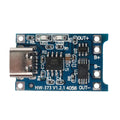
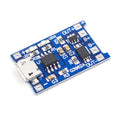
Overview
The TPL5110 module is a tiny timer that switches the power to your whole project on and off. It sits between the battery and your circuit, turns the circuit on at a fixed interval from about 100 milliseconds to 2 hours, and cuts the power again when your circuit signals that it has finished. In between, the project draws almost nothing.
That makes it a simple way to run a sensor node, data logger or other battery project for months: wake, measure, send, power off. It works with any microcontroller board, including Arduino, ESP32 and Raspberry Pi Pico, and the header comes pre-soldered.
At a Glance
Specifications
| Parameter | Value |
| Timer IC | TPL5110 nano-power system timer |
| Supply voltage (VDD) | 1.8 V to 5.5 V |
| Timer interval | About 100 ms to 2 hours, set by the trimmer or by a resistor on Delay |
| Output (DRV) | The supply voltage, switched on and off by the timer |
| Done input | A low-to-high edge switches the output off until the next interval |
| Without a Done signal | Power is switched off and on briefly at each interval, like a watchdog |
| Standby current | About 35 nA for the timer chip; on the order of 20 µA for a board of this design |
| On-board parts | Trimmer, push button for a manual start, LED |
| Jumpers | LED Enable and Trim Enable, on the back |
| Header pins | VDD, GND, Delay, DRV, Done |
Pinout Diagram
The header reads left to right: VDD, GND, Delay, DRV and Done. VDD and GND take the battery. DRV is the switched output that powers your project. Done is the input your project raises when it has finished. Delay is connected to the trimmer by default and can take a fixed resistor instead. The button starts a cycle by hand, which is handy for testing.

Wiring Guide
The battery connects to the timer, and your board is powered from the timer's DRV pin, not from the battery directly. One output pin goes to Done so the board can switch itself off. DRV passes the battery voltage straight through, so choose a battery that suits the pin you feed on your board.
Arduino Uno / Nano Wiring
| Timer Pin | Connect To | Function |
|---|---|---|
| VDD | Battery + | Power in |
| GND | Battery − and GND | Ground |
| DRV | 5V pin | Switched power |
| Done | D4 | Finished signal |
ESP32 Wiring
| Timer Pin | Connect To | Function |
|---|---|---|
| VDD | Battery + | Power in |
| GND | Battery − and GND | Ground |
| DRV | 5V / VIN pin | Switched power |
| Done | GPIO 4 | Finished signal |
Raspberry Pi
The TPL5110 is a poor match for a Raspberry Pi computer. Cutting the power without a clean shutdown can corrupt the SD card, and a Pi takes far longer to start than a microcontroller. Put the low-power part of your project on a Pico, an Arduino or an ESP32 instead.
| Board | Recommendation |
|---|---|
| Raspberry Pi 3, 4, 5, Zero | Not recommended: sudden power cuts risk SD card corruption |
| Raspberry Pi Pico | Works well: see the Pico tab |
Raspberry Pi Pico Wiring
| Timer Pin | Connect To | Function |
|---|---|---|
| VDD | Battery + | Power in |
| GND | Battery − and GND (Pin 38) | Ground |
| DRV | VSYS (Pin 39) | Switched power |
| Done | GP15 (Pin 20) | Finished signal |
Code Examples
View or download this product's example code on GitHub.
Both examples follow the same pattern: do the work once, then pulse Done until the timer cuts the power. The code never loops back to the work, because the next run starts from a fresh power-up.
Arduino and ESP32 — Work Once, Then Power Off
// TPL5110 power timer - do one job, then tell the timer to cut the power
// The board is powered from the TPL5110 DRV pin, so this sketch restarts at every wake-up.
// Wiring: Done = D4 (Arduino) or GPIO 4 (ESP32), DRV = board power input, GND = GND
const int DONE_PIN = 4;

void setup() {
  pinMode(DONE_PIN, OUTPUT);
  digitalWrite(DONE_PIN, LOW);

  Serial.begin(115200);
  Serial.println("Awake - doing the job");
  // Put your own work here: read a sensor, then send or store the result.
  delay(500);
  Serial.println("Finished - asking the timer to cut power");
  Serial.flush();
}

void loop() {
  // Pulse Done until the power disappears
  digitalWrite(DONE_PIN, HIGH);
  delay(1);
  digitalWrite(DONE_PIN, LOW);
  delay(1);
}
Raspberry Pi Pico — Work Once, Then Power Off (MicroPython)
# TPL5110 power timer with a Raspberry Pi Pico (MicroPython) - save as main.py
# The Pico is powered from the TPL5110 DRV pin, so this script restarts at every wake-up.
# Wiring: Done = GP15, DRV = VSYS (pin 39), GND = GND
from machine import Pin
import time

done = Pin(15, Pin.OUT, value=0)

print("Awake - doing the job")
# Put your own work here: read a sensor, then send or store the result.
time.sleep(0.5)
print("Finished - asking the timer to cut power")

while True:               # pulse Done until the power disappears
    done.value(1)
    time.sleep_ms(1)
    done.value(0)
    time.sleep_ms(1)