

Project Overview
ESP32 + BME280 ESP-NOW Sensor Network: Build deep-sleep ESP32-C3 BME280 sensor nodes that wake, transmit readings over ESP-NOW, then sleep again, while one always-on ESP32 gateway forwards everything to MQTT for Home Assistant.
Wi-Fi is a poor fit for battery sensors because associating to the network, getting an IP address, and opening a connection can take 1 to 3 seconds at full radio power on every wake-up. ESP-NOW skips that: a node wakes, reads its sensor, sends one packet directly to another ESP32's MAC address, and goes back to sleep in well under a second.
The remaining problem is getting those packets onto your network. This guide builds the whole system: low-cost ESP32-C3 sensor nodes running forced measurement and deep sleep, plus an ESP32 gateway that listens for ESP-NOW while staying connected to Wi-Fi, then publishes each reading (including signal strength and a sequence number) to MQTT for Home Assistant. It also explains the setting that makes or breaks these setups: the Wi-Fi channel.
- Time: ~1.5 hours
- Skill level: Intermediate
- What you will build: Any number of deep-sleeping BME280 nodes, a combined ESP-NOW receiver / MQTT publisher gateway, and Home Assistant sensors for every node.

Parts List
From ShillehTek
- ESP32 Dev Board (38-pin, CP2102, USB-C) - the gateway
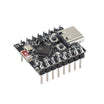
- ESP32-C3 Dev Board - one per sensor node
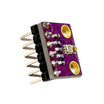
- BME280 Temperature / Humidity / Pressure Sensor - one per node
- 1×18650 Battery Holder - for battery nodes
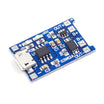
- TP4056 Charging Board - to recharge a node's cell
- 400-Point Breadboard
- Dupont Jumper Wires
External
- A 2.4 GHz Wi-Fi network, an MQTT broker (the Mosquitto add-on in Home Assistant is ideal), and 18650 cells for the battery nodes
Note: ESP-NOW and Wi-Fi share one radio, so the gateway can only listen on the channel its router uses, and every node must transmit on that same channel. If your router is set to "auto" it may hop channels after a reboot. Fix it to 1, 6, or 11 in the router settings so this network does not go quiet unexpectedly.
Step-by-Step Guide
Step 1 - The Gateway Sketch
Goal: Build an always-on ESP32 gateway that receives ESP-NOW packets and republishes them to MQTT.
What to do: Install PubSubClient, fill in Wi-Fi and broker details, and upload to the 38-pin ESP32. Open the Serial Monitor at 115200.
Code:
#include <WiFi.h>
#include <esp_now.h>
#include <PubSubClient.h>

const char* SSID = "YourNetwork";
const char* PASS = "YourPassword";
const char* MQTT_HOST = "192.168.1.10";            // your broker (Home Assistant's IP with Mosquitto)
const char* MQTT_USER = "mqtt";                    // leave "" if your broker allows anonymous
const char* MQTT_PASS = "mqttpass";

struct Reading { uint8_t node; float temp, hum, pres; uint32_t seq; };   // identical on every node
struct Item { Reading r; int rssi; };

WiFiClient net;
PubSubClient mqtt(net);
QueueHandle_t q;

void onRecv(const esp_now_recv_info_t *info, const uint8_t *data, int len) {   // runs in the Wi-Fi task
  if (len != sizeof(Reading)) return;
  Item it;
  memcpy(&it.r, data, sizeof(Reading));
  it.rssi = info->rx_ctrl->rssi;                   // signal strength of this packet
  xQueueSend(q, &it, 0);                           // hand off - never publish from inside the callback
}

void setup() {
  Serial.begin(115200);
  q = xQueueCreate(16, sizeof(Item));
  WiFi.mode(WIFI_STA);
  WiFi.setSleep(false);                            // modem sleep makes the gateway miss ESP-NOW frames
  WiFi.begin(SSID, PASS);
  while (WiFi.status() != WL_CONNECTED) delay(250);
  Serial.printf("Gateway MAC %s  -  Wi-Fi channel %d\n", WiFi.macAddress().c_str(), WiFi.channel());
  if (esp_now_init() != ESP_OK) { Serial.println("ESP-NOW init failed"); while (1); }
  esp_now_register_recv_cb(onRecv);
  mqtt.setServer(MQTT_HOST, 1883);
}

void loop() {
  if (!mqtt.connected()) {
    if (!mqtt.connect("espnow-gateway", MQTT_USER, MQTT_PASS)) { delay(2000); return; }
    Serial.println("MQTT connected");
  }
  mqtt.loop();
  Item it;
  while (xQueueReceive(q, &it, 0) == pdTRUE) {
    char topic[32], msg[112];
    snprintf(topic, sizeof topic, "espnow/node%u/state", it.r.node);
    snprintf(msg, sizeof msg, "{\"t\":%.1f,\"h\":%.0f,\"p\":%.1f,\"seq\":%lu,\"rssi\":%d}",
             it.r.temp, it.r.hum, it.r.pres, (unsigned long)it.r.seq, it.rssi);
    mqtt.publish(topic, msg, true);                // retained, so Home Assistant sees it after a restart
    Serial.printf("%s %s\n", topic, msg);
  }
}
Expected result: You should see a line like Gateway MAC 24:6F:28:11:22:33 - Wi-Fi channel 6 and then MQTT connected. Write down the MAC address and channel number because every node needs them.
Step 2 - Wire a Node
Goal: Assemble a BME280 sensor node that can run on USB or battery power.
What to do: Wire BME280 to ESP32-C3: VCC to 3V3, GND to GND, SDA to GPIO8, SCL to GPIO9 (the ESP32-C3 default I2C pins; use 21/22 on a classic ESP32).
For USB power, this is enough. For a battery node, put an 18650 in the holder and feed the board's 5V pin. Most ESP32-C3 boards use a low-dropout regulator that keeps 3.3 V until the cell is close to empty. Confirm yours with a multimeter, and recharge the cell with the TP4056 board.
Expected result: A matchbox-sized node with four I2C wires to the BME280.
Step 3 - The Node Sketch
Goal: Take one forced BME280 measurement, transmit it by ESP-NOW, then deep sleep.
What to do: Install Adafruit BME280. Set NODE_ID, paste the gateway's MAC and Wi-Fi channel, select ESP32C3 Dev Module, and upload. Give every node a different ID.
Code:
#include <WiFi.h>
#include <esp_now.h>
#include <esp_wifi.h>
#include <Wire.h>
#include <Adafruit_BME280.h>

const uint8_t NODE_ID = 1;                         // unique per node: 1, 2, 3 ...
uint8_t GATEWAY_MAC[] = {0x24, 0x6F, 0x28, 0x11, 0x22, 0x33};   // from the gateway's Serial Monitor
const uint8_t CHANNEL = 6;                         // the gateway's Wi-Fi channel
const uint32_t SLEEP_S = 60;

struct Reading { uint8_t node; float temp, hum, pres; uint32_t seq; };
RTC_DATA_ATTR uint32_t seq = 0;                    // survives deep sleep
Adafruit_BME280 bme;

void setup() {
  Reading r = { NODE_ID, NAN, NAN, NAN, ++seq };
  Wire.begin(8, 9);
  if (bme.begin(0x76)) {                           // 0x77 on some modules
    bme.setSampling(Adafruit_BME280::MODE_FORCED); // one measurement, then the sensor sleeps too
    bme.takeForcedMeasurement();
    r.temp = bme.readTemperature();
    r.hum  = bme.readHumidity();
    r.pres = bme.readPressure() / 100.0;
  }

  WiFi.mode(WIFI_STA);
  esp_wifi_set_channel(CHANNEL, WIFI_SECOND_CHAN_NONE);   // must match the gateway
  if (esp_now_init() == ESP_OK) {
    esp_now_peer_info_t peer = {};
    memcpy(peer.peer_addr, GATEWAY_MAC, 6);
    peer.channel = CHANNEL; peer.encrypt = false;
    esp_now_add_peer(&peer);
    esp_now_send(GATEWAY_MAC, (uint8_t*)&r, sizeof r);
    delay(30);                                     // let the frame and its retries leave the radio
  }
  esp_deep_sleep(SLEEP_S * 1000000ULL);            // wake again in a minute, from setup()
}

void loop() {}                                     // never reached
Expected result: Within a minute the gateway should print something like espnow/node1/state {"t":22.8,"h":46,"p":1013.2,"seq":1,"rssi":-58}, then again every minute. The node spends almost all its life asleep.
Step 4 - Into Home Assistant
Goal: Create Home Assistant MQTT sensors for each node's readings.
What to do: Add the block below (repeat it with node2, node3, and so on), restart Home Assistant, then put the sensors on a dashboard.
Code:
# configuration.yaml - one block per node
mqtt:
  sensor:
    - name: "Garage Temperature"
      state_topic: "espnow/node1/state"
      value_template: "{{ value_json.t }}"
      unit_of_measurement: "°C"
      device_class: temperature
    - name: "Garage Humidity"
      state_topic: "espnow/node1/state"
      value_template: "{{ value_json.h }}"
      unit_of_measurement: "%"
      device_class: humidity
    - name: "Garage Node Signal"
      state_topic: "espnow/node1/state"
      value_template: "{{ value_json.rssi }}"
      unit_of_measurement: "dBm"
      device_class: signal_strength
Expected result: History graphs for every room, with each node's RSSI alongside the environmental readings.
Step 5 - Read the Health Numbers
Goal: Validate link reliability and placement from your dashboard.
What to do: seq counts up by one per wake. A jump from 41 to 44 means two packets were lost. Occasional loss is fine, but consistent loss indicates a problem.
RSSI above about -80 dBm is comfortable. Below -90 dBm, move the gateway or node, or rotate the node so its antenna is not blocked by the battery. If a node goes silent after a router reboot, check the gateway's printed Wi-Fi channel. It may have moved, and the nodes need the new channel number (the next step describes how to make that automatic).
Expected result: You can diagnose node placement and packet loss from Home Assistant.
Step 6 - Grow It
Goal: Extend battery life, improve robustness, and expand sensor types.
What to do: Battery life: A node that wakes once a minute averages well under 1 mA on the ESP32 chip. The board's power LED and USB chip usually cost more than the ESP32 does, so desolder the LED on battery nodes and increase SLEEP_S to 300 for months per charge.
Auto-channel: On first boot, scan for your SSID with WiFi.scanNetworks(), store its channel in an RTC_DATA_ATTR variable, and reuse it. Rescan when readings stop being acknowledged.
More sensors: Add fields to the struct (door contact, soil probe, battery voltage from a resistor divider), but change the struct identically in the gateway since both sides decode it byte for byte.
Expected result: One gateway can support many long-lived nodes across your home.
Conclusion
With ESP32 ESP-NOW nodes and a BME280 on each, you can send sensor data in milliseconds without Wi-Fi association, IP, or broker connections on the battery device. By putting one always-on ESP32 gateway between those nodes and your network, keeping everyone on the same Wi-Fi channel, and publishing to MQTT, the readings land in Home Assistant like any other sensor.
Want the exact parts used in this build? Grab them from ShillehTek.com. If you want help customizing this project or building something for your product, check out our IoT consulting services.
Credits
All photos and images in this tutorial are credited to CiferTech on Hackster.io. The original guide by CiferTech served as the reference for this ShillehTek version. We thank them for their excellent work in the maker community.






.png?v=25000753014097803521791168436)

.png?v=68677308723310773341791168436)


