Project Overview
ESP32-C3 Portable Scale with HX711 and MAX17048: Build a rechargeable 5 kg kitchen or workbench scale using an ESP32-C3, an HX711 load cell kit, and a MAX17048 fuel gauge so the OLED shows true battery state of charge instead of a simple voltage estimate.
- Time: 1.5 to 2 hours
- Skill level: Beginner to Intermediate
- What you will build: A cordless scale that shows grams to 0.1 g, settles with a "stable" flag, tares with a button, stores its calibration in flash, and shows battery percentage, voltage and charging status.

Parts List
From ShillehTek
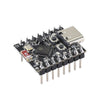
- ESP32-C3 4MB dev board (pre-soldered) - main microcontroller running the scale firmware
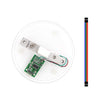
- 5 kg load cell and HX711 amplifier kit - weight sensing and amplification for the ESP32-C3
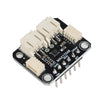
- MAX17048 single-cell lithium fuel gauge module - accurate state-of-charge reporting over I2C
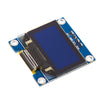
- 0.96" SSD1306 I2C OLED display - shows weight, stability, and battery status
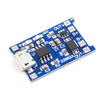
- TP4056 18650 charger board with protection - charges the cell and provides protected output
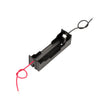
- 1 x 18650 battery holder with leads - safe, simple cell connection
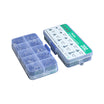
- 6 mm tactile button kit (tare button) - manual tare input
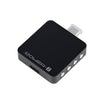
- POWER-Z KM003C USB-C power meter (optional, to watch the charge current) - monitor TP4056 charge behavior
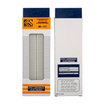
- 830-point solderless breadboard - quick prototyping
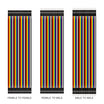
- Dupont jumper wires - simple wiring between modules
External
- One 18650 lithium-ion cell
- A base and a platter (two plates of acrylic, plywood or MDF) plus screws to fit the load cell's threaded holes
- A known reference weight for calibration, for example a 500 g calibration weight or a sealed bag you have weighed elsewhere
- USB cable for the TP4056 (micro-USB) and for programming the ESP32-C3
Note: the MAX17048 is powered by the cell it measures and does not charge it. Charging is the TP4056's job; the fuel gauge only reports voltage, state of charge and charge rate over I2C.
Step-by-Step Guide
Step 1 - Mount the load cell
Goal: Let the bar bend only under the weight you want to measure.
What to do: Screw one end of the load cell to the base on a spacer and the other end to the platter on a spacer, so the bar hangs in a Z shape and the middle (where the strain gauges sit under the white potting) touches nothing.
Most cells have an arrow on the end; point it in the direction of the load (down). Keep screws short enough that they cannot bottom out against the other plate.
Expected result: Pressing the platter flexes the bar slightly without anything rubbing.
Step 2 - Wire the scale electronics
Goal: Connect the load cell, HX711, display and tare button to the ESP32-C3.
What to do: Make these connections:
- Load cell to HX711: red to E+, black to E-, white to A-, green to A+ (if the reading goes negative under load, swap the white and green wires)
- HX711 to ESP32-C3: VCC to 3V3, GND to GND, DT to GPIO4, SCK to GPIO5
- OLED: VCC to 3V3, GND to GND, SDA to GPIO8, SCL to GPIO9
- Tare button: one leg to GPIO3, the other to GND (the sketch enables the internal pull-up)

Expected result: Everything on the scale side runs from the ESP32-C3's 3.3 V rail.
Step 3 - Wire the battery, charger and fuel gauge
Goal: Run the scale from an 18650 and measure the cell properly.
What to do: Put the cell in the holder and connect it to the TP4056's B+ and B- pads.
Connect the TP4056 OUT+ to the ESP32-C3's 5V pin and OUT- to GND; the board's 3.3 V regulator does the rest, so expect the scale to keep running until the cell is fairly low.
Then add the fuel gauge:
- MAX17048 battery input (marked B+ / B- or a battery connector, depending on the module) to across the cell, at the TP4056's B+ and B-
- MAX17048 I2C side: VIN or VCC to 3V3, GND to GND, SDA to GPIO8, SCL to GPIO9 (shared with the OLED; the gauge answers at 0x36 and the display at 0x3C)

Expected result: The ESP32-C3 powers up from the cell, and the TP4056's micro-USB port charges the cell while the scale keeps working.
Step 4 - Upload the firmware
Goal: Read the load cell and the fuel gauge and draw both on the OLED.
What to do: Install HX711 (by Bogdan Necula), Adafruit MAX1704X, Adafruit SSD1306 and Adafruit GFX from the Library Manager.
Select ESP32C3 Dev Module, set USB CDC On Boot to Enabled, and upload.
Code:
// ShillehTek ESP32-C3 portable scale: HX711 load cell + MAX17048 fuel gauge + OLED
#include <Wire.h>
#include <Preferences.h>
#include <HX711.h>
#include <Adafruit_MAX1704X.h>
#include <Adafruit_GFX.h>
#include <Adafruit_SSD1306.h>

const int SDA_PIN = 8, SCL_PIN = 9;   // OLED (0x3C) and MAX17048 (0x36) share the bus
const int HX_DOUT = 4, HX_SCK = 5;    // HX711 data and clock
const int TARE_PIN = 3;               // push button to GND
const float DEFAULT_CAL = 420.0f;     // counts per gram; replace with your own calibration
const float STABLE_G = 0.5f;          // readings within this band count as settled

HX711 scale;
Adafruit_MAX17048 gauge;
Adafruit_SSD1306 display(128, 64, &Wire, -1);
Preferences prefs;

bool haveGauge = false;
float calFactor = DEFAULT_CAL;
float recent[5];
uint8_t recentCount = 0, recentIdx = 0;
unsigned long lastRead = 0, lastBattery = 0, buttonDown = 0;
float volts = 0, percent = 0, rate = 0;
String line;

void tare() {
  scale.tare(15);
  recentCount = 0;
  Serial.println("Tared");
}

void calibrate(float knownGrams) {
  if (knownGrams <= 0) return;
  float counts = scale.get_value(20);            // raw counts minus the tare offset
  calFactor = counts / knownGrams;
  scale.set_scale(calFactor);
  prefs.putFloat("cal", calFactor);
  recentCount = 0;
  Serial.printf("Calibration factor %.2f counts/g saved\n", calFactor);
}

bool settled(float &avg) {
  if (recentCount < 5) return false;
  float lo = recent[0], hi = recent[0], sum = 0;
  for (uint8_t i = 0; i < 5; i++) {
    lo = min(lo, recent[i]);
    hi = max(hi, recent[i]);
    sum += recent[i];
  }
  avg = sum / 5;
  return (hi - lo) <= STABLE_G;
}

void handleSerial() {
  while (Serial.available()) {
    char c = Serial.read();
    if (c != '\n' && c != '\r') { line += c; continue; }
    line.trim();
    if (line == "t") tare();
    else if (line.startsWith("c ")) calibrate(line.substring(2).toFloat());
    else if (line == "?") Serial.printf("cal %.2f, battery %.2f V %.0f %% (%.1f %%/h)\n", calFactor, volts, percent, rate);
    line = "";
  }
}

void draw(float grams, bool stable) {
  display.clearDisplay();
  display.setTextColor(SSD1306_WHITE);
  display.setTextSize(1);
  display.setCursor(0, 0);
  if (haveGauge) {
    display.printf("%3.0f%%  %.2fV", percent, volts);
    display.setCursor(84, 0);
    if (rate > 0.5f) display.print("CHG");
    else if (percent < 10) display.print("LOW!");
  } else {
    display.print("no fuel gauge");
  }
  display.setTextSize(3);
  display.setCursor(0, 22);
  if (fabs(grams) < 0.05f) grams = 0;           // hide -0.0
  display.printf(fabs(grams) < 1000 ? "%.1f" : "%.0f", grams);
  display.setTextSize(1);
  display.setCursor(110, 36);
  display.print("g");
  display.setCursor(0, 56);
  display.print(stable ? "stable" : "settling...");
  display.display();
}

void setup() {
  Serial.begin(115200);
  pinMode(TARE_PIN, INPUT_PULLUP);
  Wire.begin(SDA_PIN, SCL_PIN);
  display.begin(SSD1306_SWITCHCAPVCC, 0x3C);
  haveGauge = gauge.begin(&Wire);
  if (!haveGauge) Serial.println("MAX17048 not found - check the battery and I2C wiring");
  prefs.begin("scale", false);
  calFactor = prefs.getFloat("cal", DEFAULT_CAL);
  scale.begin(HX_DOUT, HX_SCK);
  scale.set_scale(calFactor);
  delay(500);
  tare();
  Serial.println("Commands: t = tare, c <grams> = calibrate with a known weight, ? = status");
}

void loop() {
  handleSerial();

  if (digitalRead(TARE_PIN) == LOW) {             // simple debounced press
    if (buttonDown == 0) buttonDown = millis();
  } else {
    if (buttonDown && millis() - buttonDown > 30) tare();
    buttonDown = 0;
  }

  if (haveGauge && millis() - lastBattery > 2000) {
    lastBattery = millis();
    volts = gauge.cellVoltage();
    percent = gauge.cellPercent();
    rate = gauge.chargeRate();                    // % per hour, positive while charging
    if (percent > 100) percent = 100;
  }

  if (millis() - lastRead > 150 && scale.is_ready()) {
    lastRead = millis();
    float g = scale.get_units(2);
    recent[recentIdx] = g;
    recentIdx = (recentIdx + 1) % 5;
    if (recentCount < 5) recentCount++;
    float avg = g;
    bool stable = settled(avg);
    draw(stable ? avg : g, stable);
  }
}
Expected result: The scale tares itself at power-up and shows 0.0 g, with the battery percentage and voltage on the top line.
Step 5 - Calibrate with a known weight
Goal: Convert raw HX711 counts into grams for your load cell.
What to do: Open the Serial Monitor at 115200 baud with line ending set to Newline. With the platter empty, send t to tare.
Place your reference weight and send c 500 (use your weight's real value in grams). The sketch divides the raw counts by that weight, applies the new factor and saves it in flash with Preferences, so it survives power cycles. Check the result with a second object of known weight.
Expected result: The reference weight reads its true value and the "stable" flag appears once five readings agree within 0.5 g. Expect a gram or two of drift in the first minutes while the cell and HX711 warm up; tare again after that.
Step 6 - Read the battery status
Goal: Understand what the fuel gauge is telling you.
What to do: The MAX17048 runs Maxim's ModelGauge algorithm on the cell voltage, so it needs no current-sense resistor. Give it a few minutes after first connecting the cell to settle on an accurate percentage.
While charging, the charge rate turns positive and the display shows CHG; below 10 % it shows LOW!. Send ? to print the calibration factor and battery data.
If you have the KM003C, put it inline on the charging cable and watch the current step down as the TP4056 moves from constant current to constant voltage near full.
Expected result: Battery percentage that rises while charging, falls slowly in use, and agrees with the cell voltage trend.
Conclusion
You built a cordless ESP32-C3 scale using a 5 kg load cell through an HX711, calibration stored in flash, a tare button, and a MAX17048 fuel gauge reporting the 18650's charge on the OLED.
Want the exact parts used in this build? Grab them from ShillehTek.com. If you want help customizing this project or building something for your product, check out our IoT consulting services.
Credits
All photos and images in this tutorial are credited to vinay y.n on Hackster.io. The original guide by vinay y.n served as the reference for this ShillehTek version. We thank them for their excellent work in the maker community.