

Project Overview
Arduino Uno + LCD1602 Simon Memory Game: Build a Simon-style memory game where the Arduino Uno flashes LED patterns, reads four button presses, plays buzzer tones, and shows your score on an LCD1602 display.
You will practice arrays, random number generation, and input handling by building a game that gets harder every round.
- Time: 1-2 hours
- Skill level: Beginner-Intermediate
- What you will build: A complete Simon memory game with sound, score display, and ever-longer sequences.

Parts List
From ShillehTek
- Arduino Uno R3 Super Starter Kit - includes LEDs, resistors, and a breadboard
- Tactile Button Kit - four game buttons
- KY-006 Passive Buzzer - one tone per color, Simon-style
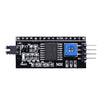
- LCD1602 Display with PCF8574 I2C backpack - two-wire score display
- Resistor Kit - use 220 ohm resistors for the LEDs
- 830-Point Breadboard - prototyping the full game circuit
- Dupont Jumper Wires - quick, clean wiring
External
- Optional: 9V battery + barrel jack for cordless play
Note: This build pairs each LED color with its own tone. The audio is a second memory channel that helps at higher levels.
Step-by-Step Guide
Step 1 - Wire the Game Board
Goal: Connect four LEDs, four buttons, a buzzer, and an I2C LCD to the Arduino Uno.
What to do: Wire LEDs on D8-D11 (each with a 220 ohm resistor to ground). Wire the matching buttons on D2-D5 to ground and use INPUT_PULLUP in code. Connect the buzzer to D12.
Connect the I2C LCD backpack to SDA (A4) and SCL (A5). Place each button physically next to its LED so the game feels natural to play.

Expected result: A complete Simon-style game console built on a breadboard.
Step 2 - The Game Logic
Goal: Understand the control flow before you implement it.
What to do: The game keeps an array of random steps. Each round: append one new random color, play the whole sequence (LED + tone per step), then read the player's button presses one at a time.
If every press matches, advance to the next round with a longer sequence. If a press does not match, play a game-over sound, display the score on the LCD, then restart.
Expected result: You can describe the entire loop clearly before writing code.
Step 3 - The Core Code
Goal: Implement sequence generation, playback, and input checking.
What to do: Install LiquidCrystal_I2C, then build around this sketch skeleton.
Code:
#include <LiquidCrystal_I2C.h>
LiquidCrystal_I2C lcd(0x27, 16, 2);

const int leds[4]    = {8, 9, 10, 11};
const int buttons[4] = {2, 3, 4, 5};
const int tones[4]   = {262, 330, 392, 523};   // C E G C
const int BUZZER = 12;

int sequence[100];
int level = 0;

void playStep(int c, int ms) {
  digitalWrite(leds[c], HIGH);
  tone(BUZZER, tones[c], ms);
  delay(ms);
  digitalWrite(leds[c], LOW);
  delay(120);
}

int waitForButton() {
  while (true)
    for (int i = 0; i < 4; i++)
      if (digitalRead(buttons[i]) == LOW) {
        playStep(i, 200);          // echo the press
        while (digitalRead(buttons[i]) == LOW);  // wait for release
        return i;
      }
}

void loop() {
  sequence[level++] = random(4);            // add a step

  for (int i = 0; i < level; i++)           // play the sequence
    playStep(sequence[i], 400);

  for (int i = 0; i < level; i++)           // read the player
    if (waitForButton() != sequence[i]) {
      tone(BUZZER, 110, 700);               // fail sound
      lcd.clear();
      lcd.print("Score: ");
      lcd.print(level - 1);
      delay(2500);
      level = 0;                            // restart
      return;
    }

  delay(600);                               // next round
}
Expected result: A playable Simon game where sequences grow until you miss a step, and the LCD shows your score.
Step 4 - Tune the Difficulty
Goal: Adjust timing and features to fit your preferred gameplay.
What to do: Speed up playback as levels climb (reduce the 400 ms per step), add a high-score line on the LCD, or implement a two-player mode where players alternate turns. To make each new game less predictable, add randomSeed(analogRead(A0)) in setup().
Expected result: Gameplay that feels better and stays replayable.
Conclusion
This Arduino Uno memory game combines arrays, random numbers, button input, buzzer tones, and an LCD1602 I2C score display into one project you can actually keep playing.
Want the exact parts used in this build? Grab them from ShillehTek.com. If you want help customizing this project or building something for your product, check out our IoT consulting services.
Credits
All photos and images in this tutorial are credited to Barqunics on Hackster.io. The original guide by Barqunics served as the reference for this ShillehTek version. We thank them for the excellent work in the maker community.









.png?v=25000753014097803521791168436)

.png?v=68677308723310773341791168436)


