IRF520 MOSFET Driver Module for Arduino, Raspberry Pi & ESP32Default Title · $3.99 · In stock
Overview
The IRF520 MOSFET Driver Module is the simplest possible power switch: one N-channel MOSFET on a breakout with screw terminals, letting a microcontroller pin switch and PWM loads far beyond what a GPIO could ever source — LED strips, DC motors, fans, pumps, solenoids, and heating elements up to 24 V DC.
Operation is low-side switching: your load’s supply connects to VIN/GND, the load itself sits on the V+/V− output pair, and the MOSFET completes the circuit on the ground side whenever SIG goes high. Because the gate is voltage-controlled, the module draws essentially nothing from your GPIO, and PWM on SIG translates directly into smooth brightness or speed control. An on-board LED shows the switch state.
The one honest caveat: the IRF520 is a classic, not a logic-level MOSFET. It switches fully at a 10 V gate drive; at 5 V logic it handles a few amps, and at 3.3 V it is best kept to roughly an amp. Within that envelope it is a wonderfully robust first power stage. This manual covers the pinout, wiring for Arduino, ESP32, Raspberry Pi, and Pico, PWM code for each, and the questions about heat, inductive loads, and logic levels.
At a Glance
Switch
IRF520N N-channel MOSFET
Load Supply
0 – 24 V DC
Load Current
~1 A @ 3.3 V · 2–4 A @ 5 V logic
Control
SIG pin — digital or PWM
Topology
Low-side switch, DC only
Indicator
On-board status LED
Specifications
Parameter
Value
MOSFET
IRF520N, N-channel, TO-220
Drain-source rating
100 V / 9.2 A (device maximum)
Practical load
≤1 A at 3.3 V logic · 2–4 A at 5 V logic (heatsink above ~1 A)
Load supply (VIN/GND)
0 – 24 V DC
Gate threshold
2 – 4 V (full enhancement at 10 V)
Control input
SIG — digital HIGH/LOW or PWM
PWM frequency
Up to ~20 kHz practical
Topology
Low-side (switches the load’s ground path)
Header
SIG · VCC (indicator LED) · GND
Terminals
VIN / GND in · V+ / V− to load
AC loads
Not supported — DC only
Pinout Diagram
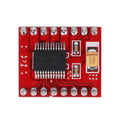
Three header pins on the left: SIG (the control/PWM input), VCC (powers the indicator LED), and GND. Two screw-terminal pairs on the right: VIN/GND take the load’s DC supply, and the load itself connects across V+/V−. V+ is joined internally to VIN; V− is the MOSFET-switched return.
Wiring Guide
Arduino Uno Wiring
Module Pin
Connection
Notes
SIG
D9
PWM-capable pin
VCC
5V
Indicator LED supply
GND
GND
Must also be common with the load supply
VIN / GND
Load supply + / − (e.g. 12 V)
Load’s own power source
V+ / V−
Load + / load −
e.g. LED strip, motor, fan
Inductive load? Add a diode. Motors, solenoids, and pumps kick back a voltage spike at turn-off that can kill the MOSFET. Fit a flyback diode (1N4007/1N5408) across the load — cathode (stripe) to V+, anode to V−. Resistive loads like LED strips and heaters do not need it.
ESP32 Wiring
Module Pin
ESP32 Pin
Notes
SIG
GPIO 25
Any PWM-capable pin
VCC
3V3
Indicator LED
GND
GND + load supply −
Common ground
VIN / GND, V+ / V−
As in the Arduino tab
Load and its supply
3.3 V logic is the IRF520’s weak spot. At a 3.3 V gate the MOSFET is only partially on: fine below ~1 A, but higher currents make it heat up fast because it is operating in its resistive region. For heavier 3.3 V-driven loads use a logic-level module (IRLZ44N, IRLB8721) — or keep this one and stay under an amp.
Raspberry Pi Wiring
Module Pin
Raspberry Pi Pin
Notes
SIG
GPIO 18 (Pin 12)
Hardware PWM pin
VCC
3.3V (Pin 1)
Indicator LED
GND
GND (Pin 6) + supply −
Common ground
VIN / GND, V+ / V−
Load supply and load
Keep load current ≤~1 A at 3.3 V drive
Feel the tab. A correctly switched MOSFET runs barely warm. If the metal tab gets hot at modest current on the Pi, that is the 3.3 V partial-enhancement effect — reduce the load or move to a logic-level part. The tab is also connected to the drain: do not let it touch other metal.
Raspberry Pi Pico Wiring
Module Pin
Pico Pin
Notes
SIG
GP15 (Pin 20)
PWM
VCC
3V3(OUT) (Pin 36)
Indicator LED
GND
GND (Pin 38) + supply −
Common ground
VIN / GND, V+ / V−
Load supply and load
≤~1 A at 3.3 V logic
Low-side quirk. The module switches the load’s negative side, so V− is NOT ground when the switch is off — it floats near VIN. Never connect V− to anything that also touches system ground (like a sensor sharing the load), or the “switch” will be permanently on.
Code Examples
Arduino — PWM Dimming an LED Strip
irf520_dim.ino
const int SIG = 9;

void setup() {
  pinMode(SIG, OUTPUT);
}

void loop() {
  // breathe a 12 V LED strip
  for (int d = 0; d <= 255; d += 3) {
    analogWrite(SIG, d);
    delay(12);
  }
  for (int d = 255; d >= 0; d -= 3) {
    analogWrite(SIG, d);
    delay(12);
  }
}
ESP32 — Fan Speed Steps
esp32_irf520.ino
const int SIG = 25;

void setup() {
  Serial.begin(115200);
  pinMode(SIG, OUTPUT);
}

void loop() {
  int steps[] = {0, 96, 160, 255};   // off, low, mid, full
  for (int i = 0; i < 4; i++) {
    analogWrite(SIG, steps[i]);
    Serial.printf("Duty: %d/255\n", steps[i]);
    delay(3000);
  }
}
Raspberry Pi — Python (gpiozero)
irf520_pwm.py
from gpiozero import PWMOutputDevice
from time import sleep

load = PWMOutputDevice(18, frequency=1000)  # GPIO 18, 1 kHz

try:
    while True:
        for pct in (0.2, 0.5, 0.8, 1.0, 0.0):
            load.value = pct
            print(f"Duty: {pct * 100:.0f}%")
            sleep(2)
except KeyboardInterrupt:
    load.off()
Raspberry Pi Pico — MicroPython
pico_irf520.py
from machine import Pin, PWM
import time

sig = PWM(Pin(15))
sig.freq(1000)

def set_duty(pct):
    sig.duty_u16(int(pct * 65535))

while True:
    # slow ramp up, fast blink, off
    for p in range(0, 101, 2):
        set_duty(p / 100)
        time.sleep(0.05)
    for _ in range(4):
        set_duty(0); time.sleep(0.2)
        set_duty(1); time.sleep(0.2)
    set_duty(0)
    time.sleep(1)
Frequently Asked Questions
My load only half-turns-on and the MOSFET gets hot. Why?
That is the logic-level story. The IRF520 needs ~10 V on its gate to enhance fully; at 3.3 V (and to a lesser degree 5 V) it is partially on, so it behaves like a resistor in series with your load — dropping voltage and burning it as heat. Reduce the load current, drive SIG from 5 V logic, or use a logic-level MOSFET module for the heavy stuff.
Can it switch AC or mains?
No. A single MOSFET conducts backwards through its body diode on the reverse half-cycle, so AC is never actually switched off — and mains voltage on this board is dangerous outright. For AC loads use a solid state relay module; this board is for DC up to 24 V.
When do I need a heatsink?
Above roughly 1 A of continuous load, bolt a small TO-220 heatsink to the tab — earlier if the enclosure is unventilated or the gate drive is 3.3 V. The quick test: if you cannot keep a finger on the tab, it wants a heatsink (or less current).
What PWM frequency should I use?
1–2 kHz suits most loads: flicker-free LED dimming and smooth motor control. Motors are quieter at higher frequencies, but the module’s gate resistor slows switching edges, so losses climb past ~20 kHz. The defaults in the code examples (1 kHz) are a sensible middle.
Why does my sensor act weird when sharing the switched load?
Low-side switching strikes again: with the MOSFET off, the load’s V− terminal floats up near supply voltage — it is not ground. Anything electrically tied to both the load’s negative side and real ground creates a sneak path around the switch. Keep the switched load fully isolated downstream of V+/V−.
Can I drive a 3.3 V or 5 V load from it?
Yes — VIN accepts anything from a couple of volts up to 24 V, so a 5 V LED strip or 12 V fan both work; the load simply sees its own supply through the switch. Just remember the module’s GND must be common with the controller’s GND for the gate signal to mean anything.
What are good upgrade parts if I outgrow it?
For 3.3 V systems and higher currents: IRLZ44N or IRLB8721 modules (true logic-level, full-on at 3.3 V). For dual-direction motor control: an H-bridge like the TB6612FNG. For AC: a solid state relay. The wiring concepts you learned here transfer directly to all of them.
Reference documents for the IRF520 MOSFET Driver Module for Arduino, Raspberry Pi & ESP32. This manual covers wiring and code; the documents below carry the full electrical specifications.