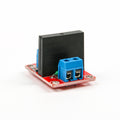
TB6612FNG Pre-Soldered Dual DC & Stepper Motor Driver Module for Arduino, Raspberry Pi & ESP32Default Title · $5.99 · In stock
Overview
The TB6612FNG is Toshiba’s dual H-bridge motor driver, and it is the modern answer to the venerable L298N. Two DC motors (or one bipolar stepper) get independent direction and PWM speed control at up to 1.2 A continuous / 3.2 A peak per channel — and because the bridges are MOSFET-based rather than the L298’s old bipolar transistors, almost no voltage is lost across the driver. A 6 V battery delivers ~6 V to your motors instead of the ~4.6 V an L298N leaves behind, with no heatsink required.
This pre-soldered breakout keeps the interface simple: a motor supply (VM, 4.5–13.5 V), logic supply (VCC, 2.7–5.5 V — happy at 3.3 V or 5 V), two input pairs (AIN1/AIN2, BIN1/BIN2) that set direction, two PWM pins for speed, and a standby pin (STBY) that must be pulled HIGH for anything to move at all — the number one “why won’t it work” pin on this board.
It is the right driver for small robots, gearmotors, pumps, and camera sliders in the micro-metal-gearmotor class. This manual covers the pinout, wiring for Arduino, ESP32, Raspberry Pi, and Pico, direction-and-speed code for each, the control truth table, and honest sizing guidance.
At a Glance
Driver
Toshiba TB6612FNG dual H-bridge
Motor Supply (VM)
4.5 – 13.5 V
Logic (VCC)
2.7 – 5.5 V
Current
1.2 A cont. / 3.2 A peak per channel
PWM
Up to 100 kHz
Standby
STBY must be HIGH
Specifications
Parameter
Value
Driver IC
Toshiba TB6612FNG, MOSFET H-bridges
Channels
2 (A and B), independently controlled
Motor voltage (VM)
4.5 – 13.5 V (15 V absolute max)
Logic voltage (VCC)
2.7 – 5.5 V
Output current
1.2 A continuous, 3.2 A peak per channel
On-resistance
~0.5 Ω total — minimal voltage loss
PWM frequency
Up to 100 kHz
Control pins
AIN1/AIN2, BIN1/BIN2, PWMA, PWMB, STBY
Functions
Forward · reverse · short brake · coast/stop
Protection
Thermal shutdown, undervoltage lockout
Stepper support
One bipolar stepper (both channels)
Heatsink
Not required within ratings
Pinout Diagram
Left column: power (VM, VCC, GND) and the motor outputs — A1/A2 (AO1/AO2) for motor A, B1/B2 (BO1/BO2) for motor B. Right column: the control side — PWMA and PWMB for speed, AIN1/AIN2 and BIN1/BIN2 for direction, and STBY, which enables the whole chip when HIGH.
Wiring Guide
Arduino Uno Wiring (Motor A)
TB6612 Pin
Connection
Notes
VM
Motor battery + (4.5–13.5 V)
Never from the Arduino 5 V pin
VCC
5V
Logic supply
GND (both)
Battery − and Arduino GND
All grounds common
PWMA
D5
PWM speed
AIN1 / AIN2
D4 / D3
Direction pair
STBY
D6 (or tie to 5V)
HIGH to enable
A1 / A2 (AO1/AO2)
Motor A leads
Swap leads to flip “forward”
The truth table. AIN1=1, AIN2=0 → forward · AIN1=0, AIN2=1 → reverse · both 1 → short brake · both 0 → coast. PWMA then scales the speed of whichever state is active. Channel B is identical with its own pins.
ESP32 Wiring
TB6612 Pin
ESP32 Pin
Notes
VM
Motor battery +
Separate motor supply
VCC
3V3
2.7–5.5 V logic — 3.3 V is native
GND
GND + battery −
Common ground
PWMA
GPIO 25
PWM-capable
AIN1 / AIN2
GPIO 26 / 27
Direction
STBY
GPIO 33
Drive HIGH in setup
Silent motors: PWM at 20 kHz or higher moves the switching whine above human hearing — the TB6612 handles it effortlessly, unlike the L298N. On ESP32, analogWriteFrequency(25, 20000) (or the LEDC API) does it in one line.
Raspberry Pi Wiring
TB6612 Pin
Raspberry Pi Pin
Notes
VM
Motor battery +
Never the Pi’s 5 V
VCC
3.3V (Pin 1)
Logic
GND
GND (Pin 6) + battery −
Common ground
PWMA
3.3V (tied HIGH)
Speed comes from PWM on the IN pins
AIN1 / AIN2
GPIO 17 (Pin 11) / GPIO 27 (Pin 13)
gpiozero PWMs these
STBY
GPIO 22 (Pin 15)
HIGH to enable
Why tie PWMA high? The TB6612 also accepts PWM on the direction inputs. Tying PWMA high and letting gpiozero’s Motor class PWM AIN1/AIN2 gives clean speed + direction from just two GPIOs per motor — the idiomatic Pi wiring.
Raspberry Pi Pico Wiring
TB6612 Pin
Pico Pin
Notes
VM
Motor battery +
4.5–13.5 V
VCC
3V3(OUT) (Pin 36)
Logic
GND
GND (Pin 38) + battery −
Common ground
PWMA
GP15 (Pin 20)
PWM speed
AIN1 / AIN2
GP14 / GP13
Direction
STBY
GP12 (Pin 16)
HIGH to enable
Size for stall, not cruise. A motor’s stall current is 5–10× its running current, and every start is a brief stall. Micro metal gearmotors and TT motors fit the 1.2 A/3.2 A budget nicely; big 775-class motors do not — they belong on a BTS7960 or similar.
Nine times out of ten: STBY. The standby pin must be HIGH or the chip ignores everything — tie it to VCC or drive it from a GPIO as every example here does. The remaining tenth: VM has no supply (motor power does not come from VCC) or grounds are not common.
Why choose this over an L298N?
Efficiency and size. The L298N’s bipolar bridges drop ~1.4–2.6 V — brutal on 6 V robots — and need a heatsink. The TB6612’s MOSFETs drop tenths of a volt, run cool, PWM to 100 kHz, and the whole board is smaller than the L298N’s heatsink. The L298N’s only wins are a higher voltage ceiling (to ~35 V) and tolerance of slightly larger motors.
What is the difference between brake and coast?
Coast (both inputs LOW) disconnects the motor and lets it spin down freely. Short brake (both inputs HIGH) shorts the motor windings through the bridge, converting momentum to heat and stopping fast. Robots use brake for crisp stops and coast for gentle ones; neither holds position against a force — that needs a stepper or servo.
Can I parallel channels A and B for more current?
It is not a supported configuration — tiny timing mismatches between the bridges cause shoot-through current between channels. If a motor needs more than 1.2 A continuous, step up to a driver rated for it (BTS7960, DRV8871, VNH5019) rather than doubling up this one.
Can it drive a stepper motor?
Yes — a bipolar stepper’s two coils map to channels A and B, and you sequence AIN/BIN states to step. It works for small steppers within the current rating, but there is no microstepping or current limiting; for serious stepper work an A4988/DRV8825 with adjustable current is the better tool.
Do I need capacitors?
The breakout carries basic decoupling, but motors are noisy loads: add a 100–470 µF electrolytic across VM/GND near the board, and for brushed motors the classic 100 nF ceramic across the motor terminals tames commutator noise that can reset microcontrollers.
Motor runs the wrong way — code bug?
Not necessarily. “Forward” is just whichever way the wiring spins: swap the motor’s two leads on A1/A2 (or invert AIN1/AIN2 in code) and forward becomes forward. On two-motor robots one motor is mirror-mounted, so expect to invert exactly one side.
Reference documents for the TB6612FNG Pre-Soldered Dual DC & Stepper Motor Driver Module for Arduino, Raspberry Pi & ESP32. This manual covers wiring and code; the documents below carry the full electrical specifications.