

Project Overview
ESP32 Gesture-Controlled Robot Car: Build a hand-tilt controller using an ESP32 and an MPU6050 to drive a 2WD robot car over ESP-NOW with proportional speed, smooth steering, and a link-loss failsafe that stops the car automatically.
Joysticks and phone apps are fine, but nothing makes people grin like a car that follows your hand. Tilt your fist forward and it drives; tilt further and it goes faster; roll your wrist and it turns; hold your hand flat and it stops.
This build uses two ESP32 boards: one on your hand reads an MPU6050 and turns pitch and roll into throttle and steering, the other sits on the chassis and drives two gear motors through an L298N. They talk over ESP-NOW, Espressif's peer-to-peer radio that needs no router, pairs by MAC address, and delivers a packet in a few milliseconds. The car stops on its own if the glove goes quiet, so a flat battery never means a runaway robot.
- Time: ~2 hours
- Skill level: Intermediate
- What you will build: A hand-worn tilt controller and a 2WD robot car with proportional speed, differential steering, a dead zone for "stop", and a 300 ms link-loss failsafe.

Parts List
From ShillehTek
- ESP32 Dev Board (38-pin, CP2102, USB-C) ×2 - one for the glove, one for the car
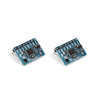
- MPU6050 Accelerometer/Gyro (pre-soldered) - measures hand tilt (pitch/roll)
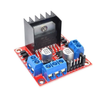
- L298N Dual Motor Driver - drives two DC motors from the battery
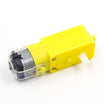
- TT Gear Motor 3-6 V ×2 - left and right drive motors
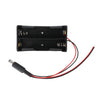
- 2×18650 Battery Holder - 7.4 V pack for the car
- 400-Point Breadboard - compact build for the glove
- Dupont Jumper Wires - wiring between ESP32, MPU6050, and driver
External
- A 2WD robot chassis with wheels and a caster, two 18650 cells for the car, and a small USB power bank for the glove
- A strip of Velcro or an old glove to mount the controller on the back of your hand
Note: Never run the motors from an ESP32 pin or its 5 V pin. The battery feeds the L298N's 12 V terminal; with the L298N's 5 V jumper fitted, its on-board regulator then powers the car's ESP32 through the 5V pin. Remove the ENA and ENB jumpers on the L298N so the ESP32 can control speed with PWM.
Step-by-Step Guide
Step 1 - Wire the Car

Goal: Put the ESP32 in charge of two motors through the L298N.
What to do: Wire the L298N power and motors: battery + to 12V, battery - to GND, OUT1/OUT2 to the left motor, OUT3/OUT4 to the right motor.
What to do: Wire the L298N control pins to the ESP32: ENA to GPIO25, IN1 to GPIO26, IN2 to GPIO27, ENB to GPIO33, IN3 to GPIO14, IN4 to GPIO13, 5V to ESP32 5V, and GND to ESP32 GND.
What to do: These pins keep the motors clear of the ESP32 boot-strapping pins (0, 2, 5, 12, 15), so the car never twitches or refuses to boot. The ESP32's 3.3 V outputs are a valid logic high for the L298N.
Expected result: One battery powers motors and logic, with a shared ground between the L298N and ESP32.
Step 2 - The Car Sketch
Goal: Receive throttle and steering packets over ESP-NOW and drive both motors with PWM.
Code:
#include <WiFi.h>
#include <esp_now.h>

const int ENA = 25, IN1 = 26, IN2 = 27;     // left motor
const int ENB = 33, IN3 = 14, IN4 = 13;     // right motor

struct Packet { int8_t throttle; int8_t steer; };   // each -100..100
volatile Packet cmd = {0, 0};
volatile unsigned long lastRx = 0;

void onRecv(const esp_now_recv_info_t *info, const uint8_t *data, int len) {
  if (len == sizeof(Packet)) { memcpy((void*)&cmd, data, sizeof(Packet)); lastRx = millis(); }
}

void drive(int en, int a, int b, int speed) {        // speed -100..100
  digitalWrite(a, speed > 0);
  digitalWrite(b, speed < 0);
  ledcWrite(en, map(abs(speed), 0, 100, 0, 255));
}

void setup() {
  Serial.begin(115200);
  pinMode(IN1, OUTPUT); pinMode(IN2, OUTPUT); pinMode(IN3, OUTPUT); pinMode(IN4, OUTPUT);
  ledcAttach(ENA, 1000, 8); ledcAttach(ENB, 1000, 8); // ESP32 core 3.x PWM: 1 kHz, 8-bit
  WiFi.mode(WIFI_STA);
  Serial.print("Car MAC: "); Serial.println(WiFi.macAddress());   // copy this into the glove sketch
  if (esp_now_init() != ESP_OK) { Serial.println("ESP-NOW init failed"); while (1); }
  esp_now_register_recv_cb(onRecv);
}

void loop() {
  int t = cmd.throttle, s = cmd.steer;
  if (millis() - lastRx > 300) { t = 0; s = 0; }     // failsafe: no packets for 300 ms = stop
  int left  = constrain(t + s, -100, 100);           // differential mixing
  int right = constrain(t - s, -100, 100);
  if (abs(left)  < 15) left  = 0;                    // TT motors just buzz below ~15 % PWM
  if (abs(right) < 15) right = 0;
  drive(ENA, IN1, IN2, left);
  drive(ENB, IN3, IN4, right);
  delay(20);
}
What to do: Upload to the car's ESP32 (ESP32 board package 3.x). Open the Serial Monitor at 115200 and copy the printed MAC address, for example 24:6F:28:AA:BB:CC.
Expected result: The MAC address prints and the motors stay still. With no glove sending commands yet, the failsafe holds everything at zero.
Step 3 - Build the Glove

Goal: Mount an MPU6050-based IMU controller on your hand.
What to do: Wire the MPU6050 to the glove ESP32: VCC to 3V3, GND to GND, SDA to GPIO21, and SCL to GPIO22.
What to do: Place the ESP32 and MPU6050 on the small breadboard. Keep the sensor flat with its X arrow pointing toward your fingertips, then strap the breadboard to the back of your hand or a glove. Power it from a small USB power bank.
Expected result: A controller that tilts exactly as your hand does.
Step 4 - The Glove Sketch
Goal: Read pitch and roll from the MPU6050 and send throttle/steering packets over ESP-NOW.
Code:
#include <WiFi.h>
#include <esp_now.h>
#include <Wire.h>
#include <math.h>

uint8_t CAR_MAC[] = {0x24, 0x6F, 0x28, 0xAA, 0xBB, 0xCC};   // the MAC the car printed
const uint8_t MPU = 0x68;

struct Packet { int8_t throttle; int8_t steer; };
Packet pkt;

int16_t readWord(uint8_t reg) {                    // one signed 16-bit MPU6050 register pair
  Wire.beginTransmission(MPU); Wire.write(reg); Wire.endTransmission(false);
  Wire.requestFrom(MPU, (uint8_t)2);
  int hi = Wire.read(), lo = Wire.read();
  return (int16_t)((hi << 8) | lo);
}

int8_t shape(float deg) {                          // tilt in degrees -> -100..100
  const float DEAD = 10, FULL = 40;                // ignore +-10 deg, full speed at 40 deg
  if (fabs(deg) < DEAD) return 0;
  float v = constrain((fabs(deg) - DEAD) / (FULL - DEAD) * 100.0, 0, 100);
  return (int8_t)(deg > 0 ? v : -v);
}

void setup() {
  Serial.begin(115200);
  Wire.begin(21, 22);
  Wire.beginTransmission(MPU); Wire.write(0x6B); Wire.write(0); Wire.endTransmission();   // wake the MPU6050
  WiFi.mode(WIFI_STA);
  if (esp_now_init() != ESP_OK) { Serial.println("ESP-NOW init failed"); while (1); }
  esp_now_peer_info_t peer = {};
  memcpy(peer.peer_addr, CAR_MAC, 6);
  peer.channel = 0; peer.encrypt = false;
  esp_now_add_peer(&peer);
}

void loop() {
  float ax = readWord(0x3B) / 16384.0, ay = readWord(0x3D) / 16384.0, az = readWord(0x3F) / 16384.0;
  float pitch = atan2(-ax, sqrt(ay * ay + az * az)) * 57.3;   // fingers down = positive
  float roll  = atan2(ay, az) * 57.3;                          // wrist roll
  pkt.throttle = shape(pitch);
  pkt.steer    = shape(roll);
  esp_now_send(CAR_MAC, (uint8_t*)&pkt, sizeof(pkt));
  Serial.printf("pitch %6.1f  roll %6.1f  ->  T %4d  S %4d\n", pitch, roll, pkt.throttle, pkt.steer);
  delay(50);                                                   // 20 packets per second
}
What to do: Paste the car's MAC into CAR_MAC (keep the 0x prefixes), upload to the glove ESP32, and open its Serial Monitor.
Expected result: With your hand flat, T and S read 0. Tip your fingers down and T climbs to 100; roll your wrist and S swings between -100 and 100. Lift the car's wheels off the table: they follow your hand.
Step 5 - Tune the Feel
Goal: Make the direction and responsiveness match your hand motion.
What to do: If tipping forward drives backward, swap the sign using shape(-pitch). If it turns the wrong way, use shape(-roll) or swap one motor's two wires.
What to do: Raise DEAD to 15 if the car creeps while your hand is "flat". Lower FULL to 30 for a more sensitive controller.
What to do: Test the 300 ms failsafe on purpose: drive the car, then unplug the glove's power bank. It should stop within about a third of a second.
Expected result: Smooth starts, gentle curves, and a car that stops as soon as the glove stops sending.
Step 6 - Take It Further
Goal: Expand the project with optional features and alternatives.
What to do: Add a button on the glove for a horn or a turbo mode and include it in the packet. Use the gyro's Z rate for spin-in-place turns. Swap the L298N for a TB6612FNG for less voltage drop and cooler running.
What to do: Send telemetry back (ESP-NOW is two-way) and show the car's battery voltage on an OLED on the glove.
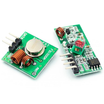
What to do: The original version of this project used Arduino Pro Minis and the 433 MHz RF link kit. The same tilt logic works over RadioHead's RH_ASK if you'd rather use 5 V Arduinos, just at a lower update rate.
Expected result: A platform you can teach new gestures and features over time.
Conclusion
Two ESP32s, an MPU6050 IMU, and ESP-NOW turn a basic 2WD chassis into a gesture-controlled robot car where your hand tilt becomes throttle and steering in milliseconds. Proportional control makes it drivable, the dead zone makes it easy to stop, and the link-loss failsafe helps keep it safe.
Want the exact parts used in this build? Grab them from ShillehTek.com. If you want help customizing this project or building something for your product, check out our IoT consulting services.
Credits: All photos and images in this tutorial are credited to Varun Walimbe on Hackster.io. The original guide by Varun Walimbe served as the reference for this ShillehTek version.





.png?v=25000753014097803521791168436)

.png?v=68677308723310773341791168436)


