

Project Overview
Arduino Uno + HC-SR04 Ultrasonic + LCD parking sensor: Build a distance guide that shows live centimeters on a 16x2 LCD and plays beeps that speed up as you get closer, switching to a solid tone at the stop distance.
You will use ultrasonic echo timing to calculate distance, then filter out occasional bad readings so the display and buzzer behavior stays stable.
- Time: ~45 minutes
- Skill level: Beginner
- What you will build: A garage parking assistant (or robot obstacle sensor) with distance display and proximity-scaled beeping.

Parts List
From ShillehTek
- Arduino Uno R3 Super Starter Kit - includes the HC-SR04 ultrasonic sensor
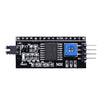
- LCD1602 Display + PCF8574 I2C backpack - displays distance over I2C
- KY-006 Passive Buzzer - the proximity beeper
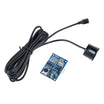
- JSN-SR04T Waterproof Ultrasonic - optional drop-in upgrade for damp/outdoor installs
- 400-Point Breadboard - for prototyping the wiring
- Dupont Jumper Wires - connects the Arduino, sensor, LCD, and buzzer
External
- None
Note: The HC-SR04 fires a 40 kHz chirp and times the echo. Sound covers ~0.034 cm per microsecond, and the pulse travels out and back, so distance = duration × 0.034 / 2.
Step-by-Step Guide
Step 1 - Wire the sensor, LCD, and buzzer
Goal: Connect the HC-SR04 for ranging and add LCD + buzzer feedback.
What to do: Wire the HC-SR04 as follows: VCC to 5V, GND to GND, TRIG to D9, and ECHO to D10. Connect the I2C LCD to A4 (SDA) and A5 (SCL). Connect the buzzer signal to D6.
Point the sensor transducers at the target you want to measure (wall, box, or car bumper area).

Expected result: The hardware is wired and ready for distance measurement.
Step 2 - Measure distance and filter bad readings
Goal: Get stable distance values and map distance to buzzer behavior.
What to do: The HC-SR04 can sometimes return 0 or an unrealistic value if the echo is missed. Reject readings outside a sane range (the code below rejects values below 2 cm or above 300 cm), then use the remaining measurements to drive the LCD and buzzer timing.
Code:
#include <LiquidCrystal_I2C.h>
LiquidCrystal_I2C lcd(0x27, 16, 2);

const int TRIG = 9, ECHO = 10, BUZZ = 6;
const int STOP_CM = 15;                  // where the solid tone begins

long readCm() {
  digitalWrite(TRIG, LOW);  delayMicroseconds(2);
  digitalWrite(TRIG, HIGH); delayMicroseconds(10);
  digitalWrite(TRIG, LOW);
  long us = pulseIn(ECHO, HIGH, 30000);  // timeout: nothing within ~5 m
  return us * 0.034 / 2;
}

void setup() {
  pinMode(TRIG, OUTPUT); pinMode(ECHO, INPUT); pinMode(BUZZ, OUTPUT);
  lcd.init(); lcd.backlight();
}

void loop() {
  long cm = readCm();
  if (cm < 2 || cm > 300) return;         // reject junk readings

  lcd.setCursor(0, 0); lcd.print("Distance: ");
  lcd.print(cm); lcd.print(" cm   ");

  if (cm <= STOP_CM) {
    tone(BUZZ, 2000);                      // STOP: solid tone
    lcd.setCursor(0, 1); lcd.print("   *** STOP ***  ");
  } else {
    noTone(BUZZ);
    int gap = map(constrain(cm, STOP_CM, 150), STOP_CM, 150, 60, 800);
    tone(BUZZ, 1500, 40);                  // beep faster as you get closer
    lcd.setCursor(0, 1); lcd.print(cm < 60 ? "  slow down...   " : "  keep coming    ");
    delay(gap);
  }
}
Expected result: Distance updates on the LCD. The buzzer beeps faster as you approach, then becomes a solid tone at 15 cm.
Step 3 - Install it as a parking guide
Goal: Use the project in a real parking scenario.
What to do: Mount the sensor at bumper height on the garage wall. Set STOP_CM to your preferred stopping distance. Power the Arduino from a USB adapter.
For a damp garage, you can swap in the JSN-SR04T waterproof sensor. The trigger/echo code stays the same, but the transducer is sealed.
Expected result: A repeatable stopping point using a clear distance readout and proximity beeps.
Step 4 - Reuse the sensor code for other projects
Goal: Treat the ranging function as a reusable building block.
What to do: The readCm() function can be reused for obstacle-avoiding robots, tank-level monitors, touchless dispensers, and people counters. Change the decision logic and outputs to fit your use case.
Expected result: A distance-sensing routine you can drop into future Arduino builds.
Conclusion
You built an Arduino Uno parking sensor using an HC-SR04 ultrasonic module, an I2C 16x2 LCD, and a buzzer to turn distance into readable centimeters and proximity beeps with a stop tone.
Want the exact parts used in this build? Grab them from ShillehTek.com. If you want help customizing this project or building something for your product, check out our IoT consulting services.
Photo credit: Lucas Fernando on Hackster.io.







.png?v=25000753014097803521791168436)

.png?v=68677308723310773341791168436)