
Project Overview
Face-Tracking Pan-Tilt Webcam — OpenCV on Your Computer Finds the Face, an Arduino Uno Swings Two Servos to Keep It Centred, and Three LEDs Show What the Tracker Sees: Face detection is far too heavy for an 8-bit microcontroller, but trivial for a laptop. So this build splits the work. A Python script reads the webcam, finds the biggest face with OpenCV, works out how far it is from the middle of the frame, and sends new pan and tilt angles over USB. The Arduino only does what it's good at: driving two servos smoothly and switching status lights — red when nobody is in view, yellow while it's moving to catch up, green when the face is locked in the centre. Walk out of frame and the head starts a slow search sweep until it finds you again. It's a great first computer-vision project and the same pattern runs camera sliders, sentry rigs and video-call auto-framers.
- Time: ~2 hours
- Skill level: Intermediate
- What you will build: A webcam on a two-servo pan-tilt head that follows the nearest face, with a Python + OpenCV tracker, an Arduino servo controller and red/yellow/green status LEDs.

Parts List
From ShillehTek
- Super Starter Kit for Arduino Uno R3 — the Uno plus the LEDs, 220 Ω resistors, breadboard and wires used here
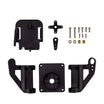
- Pan-Tilt Servo Bracket Kit for SG90 & MG90S
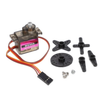
- MG90S Metal Gear Micro Servo ×2
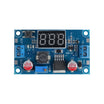
- LM2596 Adjustable Step-Down Module — the 5 V servo supply
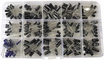
- Electrolytic Capacitor Kit — a 470 µF cap across the servo rail
- Dupont Jumper Wires
External
- A light USB webcam (under about 100 g) and a Windows, macOS or Linux computer with Python 3
- A 9–12 V DC adapter to feed the LM2596
- Zip ties or a small screw to fix the webcam to the tilt bracket
Note: don't run two servos from the Uno's 5V pin — a sudden move can pull more current than USB can supply and reset the board mid-track. Set the LM2596 to 5.0 V before connecting anything, and join its ground to the Uno's ground. All video processing happens on your own computer; nothing is uploaded anywhere.
Step-by-Step Guide
Step 1 — Wire the Servos, LEDs and Power

Goal: Two servos with their own supply, three status lights, one USB link to the computer.
What to do: Connect the DC adapter to the LM2596 input and turn its trimmer until the output reads 5.0 V on a multimeter. LM2596 OUT+ → both servos' red wires; OUT− → both servos' brown wires and Uno GND; put a 470 µF capacitor across the servo rail (stripe to ground). Pan servo signal (orange) → D8, tilt servo signal → D9. LEDs: red → D2, yellow → D3, green → D4, each long leg to the pin and short leg through a 220 Ω resistor to GND. The Uno itself is powered and controlled over its USB cable.
Expected result: A clean 5 V servo rail that shares ground with the Uno, and three LEDs on the breadboard.
Step 2 — The Arduino Sketch
#include <Servo.h>

Servo panServo, tiltServo;
const byte PAN_PIN = 8, TILT_PIN = 9;
const byte RED = 2, YELLOW = 3, GREEN = 4;   // no face / moving to it / locked on

char buf[20];
byte n = 0;
bool inMsg = false;
unsigned long lastMsg = 0;

void showState(int s) {
  digitalWrite(RED, s == 0);
  digitalWrite(YELLOW, s == 1);
  digitalWrite(GREEN, s == 2);
}

void setup() {
  Serial.begin(115200);
  pinMode(RED, OUTPUT);
  pinMode(YELLOW, OUTPUT);
  pinMode(GREEN, OUTPUT);
  panServo.attach(PAN_PIN);
  tiltServo.attach(TILT_PIN);
  panServo.write(90);                         // straight ahead
  tiltServo.write(90);                        // level
  showState(0);
}

void loop() {
  while (Serial.available()) {                // messages look like <92,85,1>
    char c = Serial.read();
    if (c == '<') {
      inMsg = true;
      n = 0;
    } else if (c == '>' && inMsg) {
      buf[n] = 0;
      inMsg = false;
      int pan, tilt, state;
      if (sscanf(buf, "%d,%d,%d", &pan, &tilt, &state) == 3) {
        panServo.write(constrain(pan, 0, 180));
        tiltServo.write(constrain(tilt, 20, 160));
        showState(state);
        lastMsg = millis();
      }
    } else if (inMsg && n < sizeof(buf) - 1) {
      buf[n++] = c;
    }
  }
  if (millis() - lastMsg > 2000) showState(0);   // the PC script stopped talking
}
What to do: Upload to the Uno (board "Arduino Uno"). The start and end markers mean a half-received message is simply ignored, so a glitch can never send a servo to a random angle.
Expected result: Both servos snap to 90° and hold there, and the red LED is on.
Step 3 — Assemble the Pan-Tilt Head
Goal: Mechanical centre that matches software centre.
What to do: With the sketch running and the servos holding 90°, build the bracket kit: fit the pan servo in the base and the tilt servo in the upper bracket, then press on the horns so the head faces straight ahead and the tilt plate is level. Fix the webcam to the tilt plate with zip ties or a screw, as close to the tilt axis as you can — a camera hanging far forward makes the small servo work much harder. Leave a loop of slack in the webcam's USB cable so it never pulls against the pan movement.
Expected result: A head that looks straight at you when both servos are at 90°.
Step 4 — The Python Tracker
# face_tracker.py  -  pip install opencv-python pyserial
import time
import cv2
import serial

PORT = "COM5"              # Windows COMx, macOS /dev/cu.usbserial-xxxx or /dev/cu.usbmodemxxxx, Linux /dev/ttyACM0
CAMERA = 0                 # 0 = first webcam; try 1 if a laptop's built-in camera opens instead
KP = 0.02                  # degrees per pixel of error, per frame
DEAD = 30                  # pixels from the centre that count as "locked on"
PAN_DIR, TILT_DIR = 1, -1  # flip a sign if the camera turns away from your face

arduino = serial.Serial(PORT, 115200, timeout=0)
time.sleep(2)              # the Uno resets when the port opens
cam = cv2.VideoCapture(CAMERA)
cam.set(cv2.CAP_PROP_FRAME_WIDTH, 640)
cam.set(cv2.CAP_PROP_FRAME_HEIGHT, 480)
detector = cv2.CascadeClassifier(cv2.data.haarcascades + "haarcascade_frontalface_default.xml")

pan, tilt = 90.0, 90.0
last_seen, sweep = time.time(), 1

while True:
    ok, frame = cam.read()
    if not ok:
        break
    h, w = frame.shape[:2]
    gray = cv2.equalizeHist(cv2.cvtColor(frame, cv2.COLOR_BGR2GRAY))
    faces = detector.detectMultiScale(gray, scaleFactor=1.2, minNeighbors=6, minSize=(60, 60))

    if len(faces):
        x, y, fw, fh = map(int, max(faces, key=lambda f: f[2] * f[3]))   # biggest (closest) face
        ex = (x + fw / 2) - w / 2                               # horizontal error in pixels
        ey = (y + fh / 2) - h / 2                               # vertical error in pixels
        if abs(ex) > DEAD:
            pan -= PAN_DIR * KP * ex
        if abs(ey) > DEAD:
            tilt -= TILT_DIR * KP * ey
        state = 2 if abs(ex) <= DEAD and abs(ey) <= DEAD else 1
        last_seen = time.time()
        colour = (0, 255, 0) if state == 2 else (0, 200, 255)
        cv2.rectangle(frame, (x, y), (x + fw, y + fh), colour, 2)
    else:
        state = 0
        if time.time() - last_seen > 3:                          # nobody for 3 s: slow search sweep
            pan += sweep * 0.8
            if pan > 150 or pan < 30:
                sweep = -sweep
            tilt += (90 - tilt) * 0.05                          # drift back to level while searching

    pan = max(0, min(180, pan))
    tilt = max(20, min(160, tilt))
    arduino.write(f"<{int(pan)},{int(tilt)},{state}>".encode())

    cv2.circle(frame, (w // 2, h // 2), DEAD, (255, 255, 255), 1)
    cv2.imshow("ShillehTek face tracker - press q to quit", frame)
    if cv2.waitKey(1) & 0xFF == ord("q"):
        break

cam.release()
cv2.destroyAllWindows()
arduino.close()
What to do: Install the two packages with pip install opencv-python pyserial. Close the Arduino Serial Monitor (only one program can own the port), set PORT to the Uno's port as shown in the Arduino IDE, plug in the webcam and run python face_tracker.py. The Haar cascade file ships inside the OpenCV package, so there is nothing else to download.
Expected result: A window showing the camera view with a box around your face. Move sideways and the head turns to follow, with the LED yellow while it catches up and green once your face sits inside the small centre circle. Step out of view: red, and after three seconds the head starts sweeping left and right until it finds you.
Step 5 — Tune the Response
Goal: Smooth, confident tracking instead of jitter or chasing.
What to do: If the head turns away from you, flip the sign of PAN_DIR (left–right) or TILT_DIR (up–down) — it depends on which way round the servos are mounted. KP sets the speed: around 0.01 is calm, 0.04 is snappy, and if the head swings past your face and back it's too high, because the camera is always a few frames behind the servos. A larger DEAD zone stops the head hunting when you're nearly centred. For detection, good front lighting matters more than anything; lower minNeighbors to catch faces sooner (at the cost of more false boxes) or raise minSize to ignore faces far away.
Expected result: The head settles on your face in well under a second and stays there while you move around the room.
Step 6 — Take It Further
Goal: More capable tracking and new jobs for the rig.
What to do: The Haar cascade only finds faces looking at the camera; OpenCV's DNN detector (cv2.FaceDetectorYN with the small YuNet model file) also handles turned heads and dim rooms. Swap face detection for colour tracking (an HSV threshold and cv2.findContours) to follow a ball or a marker. Save a clip with cv2.VideoWriter whenever a face appears for a simple person-aware camera. Or cut the USB cable: replace the Uno with an ESP32 that receives the same <pan,tilt,state> messages over Wi-Fi, so the head can sit anywhere in the room.
Expected result: A vision-guided pan-tilt platform you can point at whatever problem comes next.
Conclusion
You built a face-tracking camera by giving each part the job it's best at: OpenCV on the computer does the seeing, a short Python loop turns pixel errors into angles, and an Arduino Uno with two MG90S servos and a pan-tilt bracket does the moving — with three LEDs telling you what the tracker is thinking. Tune two numbers and it follows you around the room; swap the detector and it follows anything.
Want the exact parts used in this build? Grab them from ShillehTek.com. If you want help customizing this project, check out our IoT consulting services.
Credits
All photos and images in this tutorial are credited to Little_french_kev on Hackster.io. The original guide by Little_french_kev served as the reference for this ShillehTek version. We thank them for their excellent work in the maker community.




.png?v=25000753014097803521791168436)

.png?v=68677308723310773341791168436)