
Project Overview
TinyML Gesture Recognition on an ESP32 — Record Motion From an MPU6050, Train a Classifier in Edge Impulse, and Recognise Circles and Swipes on the Board Itself in Milliseconds: Machine learning doesn't need a GPU or the cloud. A gesture is just a short burst of acceleration, and a small neural network running on an ESP32 can learn to tell a circle from a swipe from "doing nothing" — then decide in a few milliseconds, offline, every couple of seconds. This guide walks the full TinyML loop: stream accelerometer data from an MPU6050, record and label examples in Edge Impulse, train a spectral-features + neural-network model, export it as an Arduino library and run it on the ESP32 with the result on an OLED and an LED for each gesture. Once you've done it for gestures, the same workflow recognises machine vibrations, exercise reps or a knock pattern on a door.
- Time: ~2 hours (most of it recording training data)
- Skill level: Intermediate
- What you will build: A handheld ESP32 + MPU6050 "motion wand" that classifies idle, up_down, left_right and circle gestures on-device, showing confidence bars on an OLED and lighting a matching LED.

Parts List
From ShillehTek
- ESP32 Dev Board (38-pin, CP2102, USB-C)
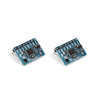
- MPU6050 Accelerometer / Gyroscope (pre-soldered)
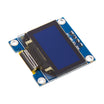
- 0.96" I2C OLED (SSD1306)
- 830-Point Breadboard
- Resistor Kit — three 220 Ω for the LEDs
- Dupont Jumper Wires
External
- Three 5 mm LEDs (red, green, blue) or one common-cathode RGB LED
- A free Edge Impulse account and a current LTS version of Node.js (for the Edge Impulse command-line tools)
- A long, flexible USB cable — you'll be waving the board around while it's plugged in
Note: the model learns how the sensor is held as well as how it moves. Hold the breadboard the same way while recording data and while using it, and keep the accelerometer range and sample rate identical in both sketches — change either and you must retrain.
Step-by-Step Guide
Step 1 — Wire the Wand
Goal: Sensor and display on one I2C bus, three LEDs for output.
What to do: MPU6050: VCC → 3V3, GND → GND, SDA → GPIO21, SCL → GPIO22. OLED: VCC → 3V3, GND → GND, SDA → GPIO21, SCL → GPIO22 — the two devices share the bus at different addresses (MPU6050 0x68, OLED 0x3C). LEDs: GPIO16 → red, GPIO17 → green, GPIO18 → blue, each long leg to the pin and short leg through a 220 Ω resistor to GND. Press the MPU6050 firmly into the breadboard so it can't wobble — loose sensors record the wobble too.
Expected result: A compact board you can hold in one hand and swing about.
Step 2 — Stream Accelerometer Data
#include <Wire.h>
#include <Adafruit_MPU6050.h>
#include <Adafruit_Sensor.h>

Adafruit_MPU6050 mpu;
const unsigned long INTERVAL_US = 1000000UL / 60;   // 60 samples per second

void setup() {
  Serial.begin(115200);
  Wire.begin(21, 22);
  if (!mpu.begin()) {
    Serial.println("MPU6050 not found - check the wiring");
    while (1) delay(10);
  }
  mpu.setAccelerometerRange(MPU6050_RANGE_8_G);   // fast gestures stay inside the range
  mpu.setFilterBandwidth(MPU6050_BAND_21_HZ);      // smooth out hand tremor and vibration
}

void loop() {
  static unsigned long next = micros();
  if ((long)(micros() - next) < 0) return;        // wait for the next 1/60 s slot
  next += INTERVAL_US;
  sensors_event_t a, g, temp;
  mpu.getEvent(&a, &g, &temp);
  Serial.print(a.acceleration.x, 3); Serial.print(',');
  Serial.print(a.acceleration.y, 3); Serial.print(',');
  Serial.println(a.acceleration.z, 3);              // one line per sample: accX,accY,accZ in m/s^2
}
What to do: Install Adafruit MPU6050 from the Library Manager (accept its dependencies, Adafruit Unified Sensor and BusIO), select "ESP32 Dev Module" and upload. Open the Serial Monitor at 115200 for a few seconds, then close it again.
Expected result: Three numbers per line, sixty lines a second. Lying flat, one axis reads about 9.8 (gravity) and the others near 0; shake the board and all three jump.
Step 3 — Connect to Edge Impulse
Goal: The ESP32 appears as a data source in your Edge Impulse project.
What to do: Create a new project at edgeimpulse.com. On your computer, install the tools with npm install -g edge-impulse-cli, then run edge-impulse-data-forwarder with the ESP32 plugged in and the Serial Monitor closed. Log in, pick your project, name the three axes accX,accY,accZ when asked, and give the device a name. The forwarder works out the sample rate on its own by counting the lines your sketch prints.
Expected result: The Devices page of your project lists the board with a green dot and a detected frequency of 60 Hz.
Step 4 — Record and Label the Gestures
Goal: Enough varied examples for the model to generalise.
What to do: Open Data acquisition, choose your device, set the sample length to 10000 ms and record one class at a time, typing the label before each recording: idle (holding the wand still or moving it naturally without a gesture), up_down, left_right and circle (repeated continuously for the whole 10 seconds). Aim for about three minutes per class. Vary the speed and size of each gesture, take short breaks, and if you can, let a second person record some — that variety is what stops the model only working for you on a good day. Let Edge Impulse split the data 80/20 into training and test sets.
Expected result: Four labels with roughly equal amounts of data, each sample showing a clearly different wave pattern in the preview.
Step 5 — Design and Train the Impulse
Goal: A model that separates the four gestures with high accuracy.
What to do: In Create impulse, set the time-series window size to 2000 ms with a window increase of 200 ms (each 10-second recording becomes dozens of overlapping training windows), add a Spectral Analysis processing block and a Classification learning block, and save. On the Spectral features page keep the defaults, save the parameters and click Generate features — the feature explorer should show four mostly separate clusters. On the Classifier page start training with the default network. Check the confusion matrix, then run Model testing on the held-back test data.
Expected result: Validation and test accuracy above about 90%. If two gestures are confused with each other, record more examples of exactly those two.
Step 6 — Deploy and Run It on the ESP32
#include <Gesture_Wand_inferencing.h>   // use the header name of YOUR Edge Impulse library
#include <Wire.h>
#include <Adafruit_MPU6050.h>
#include <Adafruit_Sensor.h>
#include <Adafruit_GFX.h>
#include <Adafruit_SSD1306.h>

Adafruit_MPU6050 mpu;
Adafruit_SSD1306 oled(128, 64, &Wire, -1);
const int LED_R = 16, LED_G = 17, LED_B = 18;
const float THRESHOLD = 0.70;                   // ignore guesses the model isn't sure about
static float window[EI_CLASSIFIER_DSP_INPUT_FRAME_SIZE];

void show(const ei_impulse_result_t &r, size_t best) {
  oled.clearDisplay();
  oled.setTextSize(2);
  oled.setCursor(0, 0);
  oled.print(r.classification[best].label);
  oled.setTextSize(1);
  for (size_t i = 0; i < EI_CLASSIFIER_LABEL_COUNT && i < 4; i++) {   // one confidence bar per class
    int y = 24 + i * 10;
    oled.setCursor(0, y);
    oled.print(r.classification[i].label);
    oled.drawRect(66, y, 60, 8, SSD1306_WHITE);
    oled.fillRect(66, y, (int)(r.classification[i].value * 60), 8, SSD1306_WHITE);
  }
  oled.display();
}

void setup() {
  Serial.begin(115200);
  pinMode(LED_R, OUTPUT);
  pinMode(LED_G, OUTPUT);
  pinMode(LED_B, OUTPUT);
  Wire.begin(21, 22);
  if (!mpu.begin()) {
    Serial.println("MPU6050 not found");
    while (1) delay(10);
  }
  mpu.setAccelerometerRange(MPU6050_RANGE_8_G);  // must match the data-collection sketch
  mpu.setFilterBandwidth(MPU6050_BAND_21_HZ);
  oled.begin(SSD1306_SWITCHCAPVCC, 0x3C);
  oled.setTextColor(SSD1306_WHITE);
  if (EI_CLASSIFIER_RAW_SAMPLES_PER_FRAME != 3) {
    Serial.println("This sketch expects a 3-axis accX, accY, accZ model");
    while (1) delay(10);
  }
}

void loop() {
  // 1. Record one window at the same rate the training data was recorded
  const unsigned long intervalUs = (unsigned long)(EI_CLASSIFIER_INTERVAL_MS * 1000);
  for (size_t i = 0; i < EI_CLASSIFIER_DSP_INPUT_FRAME_SIZE; i += 3) {
    unsigned long t0 = micros();
    sensors_event_t a, g, temp;
    mpu.getEvent(&a, &g, &temp);
    window[i]     = a.acceleration.x;
    window[i + 1] = a.acceleration.y;
    window[i + 2] = a.acceleration.z;
    long wait = (long)intervalUs - (long)(micros() - t0);
    if (wait > 0) delayMicroseconds(wait);
  }

  // 2. Run the impulse: spectral features, then the neural network
  signal_t signal;
  numpy::signal_from_buffer(window, EI_CLASSIFIER_DSP_INPUT_FRAME_SIZE, &signal);
  ei_impulse_result_t result = { 0 };
  if (run_classifier(&signal, &result, false) != EI_IMPULSE_OK) return;

  // 3. Act on the most likely gesture
  size_t best = 0;
  for (size_t i = 1; i < EI_CLASSIFIER_LABEL_COUNT; i++)
    if (result.classification[i].value > result.classification[best].value) best = i;
  const char *label = result.classification[best].label;
  bool sure = result.classification[best].value >= THRESHOLD;
  Serial.printf("%-10s %.2f  (dsp %d ms, nn %d ms)\n", label, result.classification[best].value,
                result.timing.dsp, result.timing.classification);
  digitalWrite(LED_R, sure && strcmp(label, "up_down") == 0);
  digitalWrite(LED_G, sure && strcmp(label, "left_right") == 0);
  digitalWrite(LED_B, sure && strcmp(label, "circle") == 0);
  show(result, best);
}
What to do: In Edge Impulse open Deployment, choose Arduino library, keep the default quantized (int8) model and click Build to download a .zip. In the Arduino IDE use Sketch → Include Library → Add .ZIP Library. The library is named after your project, so check File → Examples for its exact name and change the first #include to match (a project called "Gesture Wand" becomes Gesture_Wand_inferencing.h). Install Adafruit SSD1306, then upload. The first compile takes several minutes because the whole DSP and neural-network runtime is built from source.
Expected result: Every two seconds the Serial Monitor prints the winning label, its confidence and how long the maths took — typically a few milliseconds. The OLED shows the gesture name and a bar for each class; draw a circle in the air and the blue LED lights, swipe left and right for green, up and down for red.
Step 7 — Make It Better
Goal: From demo to dependable input device.
What to do: This sketch classifies back-to-back two-second windows, so a gesture that straddles two windows can be missed; Edge Impulse's continuous mode (run_classifier_continuous with a sliding window) fixes that at the cost of a little more code. Adding the three gyroscope axes as extra inputs helps separate gestures that look alike in acceleration alone. Record an unknown class of random movement so the model has somewhere to put motions it wasn't trained on, or add an anomaly-detection block. Then give gestures jobs: send them as BLE keyboard shortcuts, MQTT messages to Home Assistant, or IR codes to the TV.
Expected result: A gesture remote that recognises your moves reliably and only acts when it's sure.
Conclusion
You took an ESP32 and an MPU6050 through the complete TinyML workflow: stream raw sensor data, label it in Edge Impulse, train a spectral-features neural network, and run it on the microcontroller with results on an OLED and three LEDs — no internet connection needed once the model is on the board. The same recipe works for any signal you can sample, from motor vibration to sound.
Want the exact parts used in this build? Grab them from ShillehTek.com. If you want help customizing this project, check out our IoT consulting services.
Credits
All photos and images in this tutorial are credited to João Vitor Yukio Bordin Yamashita (Yukio) on Hackster.io (LGPL license). The original guide by João Vitor Yukio Bordin Yamashita served as the reference for this ShillehTek version. We thank them for their excellent work in the maker community.






.png?v=25000753014097803521791168436)

.png?v=68677308723310773341791168436)