

Project Overview
DIY Arduino Whack-a-Mole: Build an Arduino Nano whack-a-mole game using an LCD1602 display with an I2C backpack to show score and a countdown bar while five lit buttons drive 30 seconds of fast reaction gameplay.
A random button lights up. Hit it in time to score a point. Miss it and the game still speeds up as the reaction window shrinks. The LCD tracks score and remaining time, and a buzzer gives hit/miss feedback.
- Time: 1 to 2 hours
- Skill level: Intermediate
- What you will build: A five-button arcade game with accelerating difficulty, live score, and a visual countdown.

Parts List
From ShillehTek
- Arduino Nano V3.0 Pre-Soldered - the microcontroller running the game logic
- Tactile Button Kit - the five moles (pair each with an LED, or use illuminated arcade buttons)
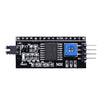
- LCD1602 Display + PCF8574 I2C backpack - score and countdown bar display
- KY-006 Passive Buzzer - hit/miss feedback tones
- Resistor Kit - 220Ω per LED
- 830-Point Breadboard - quick prototyping
- Dupont Jumper Wires - fast, reliable connections
External
- A box or 3D-printed panel if you want it slam-worthy
Note: The difficulty curve comes from shrinking the reaction window as the game runs, so the last ten seconds get frantic.
Step-by-Step Guide
Step 1 - Wire five moles, LCD, and buzzer
Goal: Build the five LED/button pairs and connect the LCD scoreboard and buzzer.
What to do: Wire LEDs on D2 to D6 (use a 220Ω resistor for each LED). Wire the matching buttons on D8 to D12 and connect them to ground, using INPUT_PULLUP in code. Wire the buzzer to D13. Connect the I2C LCD to A4 (SDA) and A5 (SCL).
Keep each LED physically beside its button so the visual pairing is obvious during play.

Expected result: A five-hole mole field with an LCD ready to display score and time.
Step 2 - Upload the game code
Goal: Make the game pop random moles, score hits, and speed up over time.
Code:
#include <LiquidCrystal_I2C.h>
LiquidCrystal_I2C lcd(0x27, 16, 2);

const int leds[5] = {2, 3, 4, 5, 6};
const int btns[5] = {8, 9, 10, 11, 12};
const int BUZZ = 13;
const unsigned long GAME_MS = 30000;

void setup() {
  for (int i = 0; i < 5; i++) {
    pinMode(leds[i], OUTPUT);
    pinMode(btns[i], INPUT_PULLUP);
  }
  lcd.init(); lcd.backlight();
  randomSeed(analogRead(A0));
}

void loop() {
  int score = 0;
  unsigned long start = millis();

  while (millis() - start < GAME_MS) {
    // reaction window shrinks from 1200ms to 500ms as time runs out
    long window = map(millis() - start, 0, GAME_MS, 1200, 500);

    int mole = random(5);
    digitalWrite(leds[mole], HIGH);
    unsigned long popped = millis();
    bool hit = false;

    while (millis() - popped < (unsigned long)window) {
      if (digitalRead(btns[mole]) == LOW) { hit = true; break; }
    }
    digitalWrite(leds[mole], LOW);

    if (hit) { score++; tone(BUZZ, 1200, 80); }
    else     { tone(BUZZ, 200, 120); }

    lcd.setCursor(0, 0);
    lcd.print("Score: "); lcd.print(score); lcd.print("  ");

    // countdown bar on line 2: one block per 1/16th of time left
    int blocks = map(GAME_MS - (millis() - start), 0, GAME_MS, 0, 16);
    lcd.setCursor(0, 1);
    for (int i = 0; i < 16; i++) lcd.print(i < blocks ? (char)255 : ' ');

    delay(random(200, 600));   // breather between moles
  }

  lcd.clear();
  lcd.print("Final score!");
  delay(4000);
  lcd.clear();
}
What to do: Compile and upload, then start playing. The shrinking reaction window is created by the map() line that changes window as time runs out.
Expected result: 30 seconds of escalating speed, score on the LCD, and a countdown bar draining over time.
Step 3 - Balance the difficulty
Goal: Tune timing so it feels fair, but challenging.
What to do: Adjust three variables: the reaction window range (for example, 1200 to 500 ms is easier; 900 to 350 ms is harder), the random breather delay between moles, and the total game length.
Add a "golden mole" with a shorter reaction window and 3 points if you want risk/reward gameplay.
Expected result: A difficulty curve that matches your players.
Step 4 - Mount it in a cabinet
Goal: Make the build sturdy enough for repeated hits.
What to do: Move the buttons to a box lid or 3D-printed panel, keep the breadboard inside, and cut a window for the LCD. Breadboard buttons are best for testing only.
Expected result: A durable party-ready arcade game.
Conclusion
You built an Arduino Nano whack-a-mole game with five lit buttons, an LCD1602 I2C scoreboard, and buzzer feedback. The gameplay feel comes from one core idea: shrinking the reaction window as the 30-second timer runs down.
Want the exact parts used in this build? Grab them from ShillehTek.com. If you want help customizing this project or building something for your product, check out our IoT consulting services.
Credits: All photos and images in this tutorial are credited to Mirko Pavleski on Hackster.io. The original guide by Mirko Pavleski served as the reference for this ShillehTek version.









.png?v=25000753014097803521791168436)

.png?v=68677308723310773341791168436)


