

Project Overview
Arduino Nano + 4x4 Keypad + LCD1602 calculator: Build a four-function calculator that reads a 4x4 membrane keypad, shows the typed expression on a 16x2 LCD, and prints the result when you press #.
This project reads keypad input, echoes it to the top line of the display, and outputs the answer on the bottom line. The sketch also manages edge cases like division by zero and what happens after a result is shown.
- Time: ~45 minutes
- Skill level: Beginner-Intermediate
- What you will build: A working four-function calculator with an expression display, clear key, decimal results, and a divide-by-zero guard.

Parts List
From ShillehTek
- Arduino Nano V3.0 Pre-Soldered - the microcontroller that reads the keypad and drives the LCD
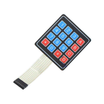
- 4x4 Membrane Matrix Keypad - user input for digits, operators, equals, and clear
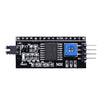
- LCD1602 Display + PCF8574 I2C backpack - I2C frees the pins the keypad needs
- 400-Point Breadboard - quick prototyping
- Dupont Jumper Wires - connections between the Nano, keypad, and LCD
External
- None
Note: Key layout for this calculator: digits are digits, A = +, B = -, C = x, D = /, # = equals, * = clear. The referenced build image shows parallel LCD wiring; with the I2C backpack, the LCD uses SDA/SCL instead of multiple data pins, which keeps the build comfortable on a Nano.
Step-by-Step Guide
Step 1 - Wire the keypad and LCD
Goal: Connect the keypad and LCD using 10 Nano pins total.
What to do: Wire keypad rows to D2, D3, D4, D5 and columns to D6, D7, D8, D9 (ribbon toward you, left to right). Wire the LCD I2C backpack: SDA to A4, SCL to A5, VCC to 5V, and GND to GND.

Expected result: Keypad and display connected, with D10-D13 and A0-A3 still free.
Step 2 - Understand the flow
Goal: Know what the code must remember while you type.
What to do: Track three things: the number being typed, the first operand once an operator is pressed, and which operator it was. Digits append to the current number. An operator saves that number and clears it for the next. Equals performs the math. Clear wipes everything.
Expected result: You can trace “1 2 A 7 #” by hand: 12, then +, then 7, then 19.
Step 3 - Upload the sketch
Goal: Program the Nano to read the keypad and print results on the LCD.
What to do: Install the required libraries, paste the sketch below, then upload it to your Arduino Nano. After uploading, type: 1 2 A 7 #.
Code:
#include <Keypad.h>
#include <LiquidCrystal_I2C.h>

LiquidCrystal_I2C lcd(0x27, 16, 2);

const byte ROWS = 4, COLS = 4;
char keys[ROWS][COLS] = {
  {'1','2','3','A'},
  {'4','5','6','B'},
  {'7','8','9','C'},
  {'*','0','#','D'}
};
byte rowPins[ROWS] = {2, 3, 4, 5};
byte colPins[COLS] = {6, 7, 8, 9};
Keypad pad(makeKeymap(keys), rowPins, colPins, ROWS, COLS);

String expr = "";        // what's shown on the top line, e.g. "12+7"
String num  = "";        // digits of the number currently being typed
double a = 0;            // first operand
char   op = 0;           // pending operator (A B C D) or 0
bool   done = false;     // a result is on screen

void reset() { expr = ""; num = ""; a = 0; op = 0; done = false; lcd.clear(); }

void redraw() {
  lcd.setCursor(0, 0); lcd.print("                ");
  lcd.setCursor(0, 0); lcd.print(expr);
}

void setup() { lcd.init(); lcd.backlight(); reset(); }

void loop() {
  char k = pad.getKey();
  if (!k) return;

  if (k == '*') { reset(); return; }                    // clear
  if (done) reset();                                    // start fresh after a result

  if (k >= '0' && k <= '9') {                           // digit
    if (num.length() < 8) { num += k; expr += k; }
  }
  else if (k == 'A' || k == 'B' || k == 'C' || k == 'D') {   // operator
    if (num.length() == 0 || op != 0) return;           // need a number, one op at a time
    a = num.toDouble(); num = ""; op = k;
    expr += (k == 'A') ? '+' : (k == 'B') ? '-' : (k == 'C') ? 'x' : '/';
  }
  else if (k == '#') {                                  // equals
    if (op == 0 || num.length() == 0) return;
    double b = num.toDouble(), r = 0;
    switch (op) {
      case 'A': r = a + b; break;
      case 'B': r = a - b; break;
      case 'C': r = a * b; break;
      case 'D': r = (b == 0) ? NAN : a / b; break;
    }
    lcd.setCursor(0, 1); lcd.print("= ");
    if (isnan(r))            lcd.print("Div by zero");
    else if (r == (long)r)   lcd.print((long)r);        // whole number: no decimals
    else                     lcd.print(r, 3);
    done = true;
    return;
  }
  redraw();
}
Expected result: Top line shows “12+7” and the bottom line shows “= 19”. Try 7 D 2 # for 3.500 and 5 D 0 # for the divide-by-zero message. Any key after a result starts a new calculation; * clears at any time.
Step 4 - Test the edge cases
Goal: Make it behave like a real calculator.
What to do: Press an operator first (ignored because no number yet). Press two operators in a row (the second is ignored). Type nine digits (capped at eight so the LCD line does not overflow). These behaviors are enforced directly in the sketch.
Expected result: Inputs that should be invalid do not produce garbage on the screen.
Step 5 - Extend it
Goal: Plan optional enhancements without changing the core build.
What to do: If you want to expand the project, you can let the result become the first operand of the next calculation by keeping a = r instead of resetting. You can also add a decimal point input, show the operator as a custom LCD character, or add a buzzer click per key. A “shift” concept can map extra functions like square root, square, and percent.
Expected result: A calculator with your feature set and a parser you understand line by line.
Conclusion
You built an Arduino Nano calculator using a 4x4 keypad for input and an LCD1602 for output, including operator handling, clean input rules, and divide-by-zero protection.
Want the exact parts used in this build? Grab them from ShillehTek.com. If you want help customizing this project or building something for your product, check out our IoT consulting services.
Credits
All photos and images in this tutorial are credited to Samridh Garg on Hackster.io. The original guide by Samridh Garg served as the reference for this ShillehTek version. We thank him for his excellent work in the maker community.






.png?v=25000753014097803521791168436)

.png?v=68677308723310773341791168436)


