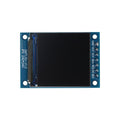
1.28" Round IPS LCD Display Module (GC9A01, 240x240) for Arduino, Raspberry Pi & ESP32Default Title · $16.99 · In stock
Overview
Round displays change how a project feels. This Waveshare 1.28″ module is a circular IPS LCD, 240 pixels across, driven by the GC9A01 controller over SPI. The IPS panel keeps colors saturated at any viewing angle, and the circular glass instantly reads as a watch face, a gauge, a dial, or an eye — the applications rectangular panels never quite pull off.
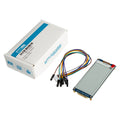
The interface is classic 4-wire SPI plus control lines: DIN (MOSI), CLK, CS, DC, RST, and a BL backlight pin, brought out on an 8-pin connector with a pre-attached cable. Unlike the CS-less square ST7789 modules, this board has a proper chip-select, so it shares an SPI bus politely. An on-board regulator accepts 3.3–5 V power, and the board measures 37.5 × 40.4 mm with four mounting standoffs.
One mental shift matters when coding for it: the framebuffer is still a 240×240 square, but only the inscribed circle is visible — the corners exist in memory and not on glass. Design dials from the center out and the panel rewards you. This manual covers the pinout, wiring and code for Arduino, ESP32, Raspberry Pi, and Pico, and the round-display questions that follow.
8-pin with cable: VCC · GND · DIN · CLK · CS · DC · RST · BL
Board size
37.5 × 40.4 mm, 4 mounting standoffs
Pinout Diagram
Eight connector pins: VCC and GND for power, DIN (SPI MOSI), CLK (SPI clock), CS (chip select), DC (data/command), RST (reset), and BL (backlight enable/dim). The diagram shows the board from the back, where the connector and driver electronics live.
Wiring Guide
Arduino Uno Wiring
Display Pin
Arduino Uno Pin
Notes
VCC
5V
On-board regulator
GND
GND
Common ground
DIN
D11 (MOSI)
SPI data
CLK
D13 (SCK)
SPI clock
CS
D10
Chip select
DC
D7
Data/command
RST
D8
Reset
BL
D9 (optional)
PWM brightness; leave open = on
Full frames are heavy for an Uno. A complete 240×240 frame is 115 KB — more than the Uno’s entire flash-to-SRAM budget can buffer. Draw shapes and text directly (as the Adafruit library does) rather than attempting full-screen animation, or use an ESP32/Pico for fluid dials.
ESP32 Wiring
Display Pin
ESP32 Pin
Notes
VCC
3V3
Power
GND
GND
Common ground
DIN
GPIO 23 (MOSI)
VSPI
CLK
GPIO 18 (SCK)
VSPI
CS
GPIO 5
Chip select
DC
GPIO 16
Data/command
RST
GPIO 17
Reset
BL
GPIO 4 (optional)
PWM brightness
The watch-face board. The ESP32’s speed, Wi-Fi (for NTP time), and 40 MHz SPI make it the natural partner for this panel — most of the smartwatch-style projects you see with this display run on exactly this pairing.
Raspberry Pi Wiring
Display Pin
Raspberry Pi Pin
Notes
VCC
3.3V (Pin 1)
Power
GND
GND (Pin 6)
Common ground
DIN
GPIO 10 / MOSI (Pin 19)
SPI0
CLK
GPIO 11 / SCLK (Pin 23)
SPI0
CS
GPIO 8 / CE0 (Pin 24)
SPI0 chip select
DC
GPIO 25 (Pin 22)
Data/command
RST
GPIO 27 (Pin 13)
Reset
BL
GPIO 18 (Pin 12)
Backlight
Enable SPI first (sudo raspi-config → Interface Options → SPI). The luma.lcd library used below renders through Pillow, so dial faces, charts, and even scaled photos are a few lines each.
Raspberry Pi Pico Wiring
Display Pin
Pico Pin
Notes
VCC
3V3(OUT) (Pin 36)
Power
GND
GND (Pin 38)
Common ground
DIN
GP11 / SPI1 TX (Pin 15)
MOSI
CLK
GP10 / SPI1 SCK (Pin 14)
Clock
CS
GP9 (Pin 12)
Chip select
DC
GP8 (Pin 11)
Data/command
RST
GP12 (Pin 16)
Reset
BL
GP13 (Pin 17)
Backlight
Driver file: copy gc9a01py.py (the pure-MicroPython GC9A01 driver) to the board. It draws shapes and text without needing a full framebuffer, which keeps the Pico’s RAM comfortable.
#include <Adafruit_GFX.h>
#include <Adafruit_GC9A01A.h>

Adafruit_GC9A01A tft(5, 16, 17);   // CS, DC, RST

void setup() {
  tft.begin();
  tft.fillScreen(GC9A01A_BLACK);
  tft.drawCircle(120, 120, 118, GC9A01A_WHITE);
}

void loop() {
  static float a = 0;
  // erase old needle, draw new one from center
  int x0 = 120 + cos(a) * 100, y0 = 120 + sin(a) * 100;
  tft.drawLine(120, 120, x0, y0, GC9A01A_BLACK);
  a += 0.05;
  int x1 = 120 + cos(a) * 100, y1 = 120 + sin(a) * 100;
  tft.drawLine(120, 120, x1, y1, GC9A01A_RED);
  delay(20);
}
Raspberry Pi — Python (luma.lcd)
round_clock.py
import time
from luma.core.interface.serial import spi
from luma.core.render import canvas
from luma.lcd.device import gc9a01

# pip3 install luma.lcd

serial = spi(port=0, device=0, gpio_DC=25, gpio_RST=27,
             bus_speed_hz=32000000)
device = gc9a01(serial, width=240, height=240, rotate=0)

while True:
    with canvas(device) as draw:
        draw.ellipse((4, 4, 236, 236), outline="cyan", width=3)
        draw.text((78, 105), time.strftime("%H:%M:%S"), fill="white")
    time.sleep(0.5)
Raspberry Pi Pico — MicroPython
pico_round.py
from machine import Pin, SPI
import gc9a01py as gc9a01   # copy gc9a01py.py driver to the board

spi = SPI(1, baudrate=40000000, sck=Pin(10), mosi=Pin(11))
tft = gc9a01.GC9A01(spi,
                    dc=Pin(8, Pin.OUT),
                    cs=Pin(9, Pin.OUT),
                    reset=Pin(12, Pin.OUT),
                    backlight=Pin(13, Pin.OUT),
                    rotation=0)

tft.fill(gc9a01.BLACK)
# concentric gauge rings
for r, color in ((118, gc9a01.CYAN), (90, gc9a01.BLUE), (60, gc9a01.MAGENTA)):
    for a in range(0, 360, 3):
        import math
        x = 120 + int(math.cos(math.radians(a)) * r)
        y = 120 + int(math.sin(math.radians(a)) * r)
        tft.pixel(x, y, color)
tft.text(gc9a01.WHITE, "PICO", 96, 112)
Frequently Asked Questions
What happens to the corners of the 240×240 image?
They are simply not displayed — the glass shows the inscribed circle only. Anything you draw within about 120 pixels of the center is fully visible; content in the square’s corners silently disappears. Design radially (rings, arcs, centered text) and the limitation becomes the aesthetic.
Is this a touchscreen?
This version is display-only. Waveshare sells a sibling module with a capacitive touch layer; if your project needs a tappable watch face, that is the one to choose — wiring for the display half is identical, with two extra I2C pins for touch.
Can it really run from 5 V and 3.3 V?
Yes — the board carries its own regulator, so VCC accepts 3.3–5 V. The logic lines are 3.3 V native; 5 V boards like the Uno generally work through the provided cable, but a level shifter is still the by-the-book choice for long-term reliability at 5 V logic.
How fast can it animate?
The GC9A01 takes SPI clocks of 40 MHz and beyond, so an ESP32 or Pico can push 20–40 fps of partial updates — plenty for sweeping needles and animated eyes. Full-frame Python redraws on the Pi land around 10–15 fps at 32 MHz, which still looks smooth for clocks and gauges.
Why is my screen mirrored or rotated?
Set the rotation argument (0–3) in whichever library you use — each step is 90°. Mirrored text usually means the display is being driven with the wrong madctl orientation for your mounting; cycling through the four rotation values finds the right one in seconds.
Can the Pico hold a full framebuffer for it?
Barely — 240×240×2 bytes is 115 KB against the Pico’s 264 KB RAM, so a full RGB565 framebuffer fits but leaves little room. The gc9a01py driver sidesteps this by drawing primitives straight to the panel; for buffered scenes, draw into smaller tiles or use RGB332.
How do I dim the backlight?
PWM the BL pin. 100% duty is full brightness; around 20% is comfortable indoors and cuts the module’s power draw substantially — useful for battery watch projects. Driving BL low turns the backlight fully off while the controller keeps running.
Reference documents for the 1.28" Round IPS LCD Display Module (GC9A01, 240x240) for Arduino, Raspberry Pi & ESP32. This manual covers wiring and code; the documents below carry the full electrical specifications.