

Project Overview
Arduino Uno + 1.3 inch ST7789 IPS TFT display: Wire a 240x240 SPI color screen and run a full Adafruit ST7789 graphics demo (text, lines, shapes, and animations) to kickstart your own Arduino UI projects.
- Time: ~45 minutes
- Skill level: Beginner
- What you will build: A six-wire display hookup running a capability demo you can strip for parts in your own dashboards, gauges, and UIs.

Parts List
From ShillehTek
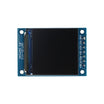
- 1.3" 240x240 IPS TFT LCD Display (ST7789, 7-Pin) - the SPI color display module used in this build
- Arduino Uno R3 (any Uno-compatible board) - runs the demo sketch and drives SPI
- Dupont Jumper Wires (6 needed) - for the SPI and control connections
- 400-Point Breadboard (optional, for a tidy mount) - helps keep wiring stable
External
- USB cable for programming - connects the Arduino to your computer
Note: Power the display from 3.3V only - connecting VCC to 5V can damage the panel. The IPS part is what sets this module apart from cheaper TN displays: colors stay true from almost any angle.
Step-by-Step Guide
Step 1 - Meet the ST7789
Goal: Know what you're working with.
What to do: This module pairs a 1.3 inch IPS panel with the ST7789 driver, a common controller used in compact instrument displays. It speaks SPI through a 6-wire hookup (this 7-pin variant has no CS pin because it is permanently selected). The Adafruit ST7789 library supports it out of the box.
Expected result: You know the display is 240x240, 3.3V, SPI, and library-supported.
Step 2 - Wire It (6 Wires)
Goal: Connect the SPI interface.
What to do: With the Arduino unplugged: GND to GND, VCC to 3.3V, SCL to D13 (SPI clock), SDA to D11 (SPI MOSI), RES to D8, DC to D9. Double-check VCC lands on 3.3V before powering up.

Expected result: Display wired and safe to power.
Step 3 - Install the Libraries
Goal: Get the graphics stack in place.
What to do: In the Arduino IDE Library Manager install Adafruit ST7735 and ST7789 plus Adafruit GFX (accept the dependency prompts). SPI ships with the IDE.
Expected result: Both libraries installed, examples visible under File to Examples.
Step 4 - Run the Demo Sketch
Goal: Bring the panel to life.
What to do: The demo initializes the display, prints "Initialized," then cycles through a print test (text in multiple colors and sizes), followed by lines, rectangles, circles, triangles, pixels, and animation passes. Here is the skeleton:
#include <Adafruit_GFX.h>    // Core graphics library
#include <Adafruit_ST7789.h> // Hardware-specific library for ST7789
#include <SPI.h>             // Arduino SPI library

#define TFT_CS   10  // this 7-pin module has no CS pin; define is unused
#define TFT_RST   8  // reset pin
#define TFT_DC    9  // data/command pin

Adafruit_ST7789 tft = Adafruit_ST7789(TFT_CS, TFT_DC, TFT_RST);

float p = 3.1415926;  // used by the graphics/math demos

void setup() {
  Serial.begin(9600);
  Serial.println(F("Hello! ST7789 TFT Test"));

  tft.init(240, 240, SPI_MODE2);  // 240x240, MODE2 for no-CS modules
  tft.setRotation(2);             // remove this line if your image is flipped
  Serial.println(F("Initialized"));

  tft.fillScreen(ST77XX_BLACK);
  tft.setCursor(30, 110);
  tft.setTextColor(ST77XX_WHITE);
  tft.setTextSize(2);
  tft.print("Hello, world!");
  delay(1000);
  // ...print test, shapes, and animation demos follow
}

void loop() {
}
Expected result: The screen boots black, greets you, then runs the full graphics tour.
Step 5 - Study the Demos, Then Build Your Own
Goal: Turn demo code into your project's UI.
What to do: Each demo section maps to one GFX call family, like drawLine, fillRect, drawCircle, fillTriangle, setTextSize, and related calls. Work through them one by one, keep the pieces you need, and you have the building blocks for gauges, sensor readouts, and even small image renders on this panel.

Expected result: You can draw anything you want, anywhere on the 240x240 canvas.
Conclusion
With six jumper wires and two libraries, you can put a bright 240x240 IPS color display on an Arduino Uno. The ST7789 and Adafruit GFX combo gives you text, shapes, and animation primitives that transfer directly to many UI-style display projects.
Want the exact parts used in this build? Grab them from ShillehTek.com. If you want help customizing this project or building something for your product, check out our IoT consulting services.
Photo credits: Electorials Electronics on Hackster.io.





.png?v=25000753014097803521791168436)

.png?v=68677308723310773341791168436)


