


Project Overview
ESP32 + SD card data logger: Build an ESP32 data logger that writes sensor readings to a microSD card as CSV, optionally adding DS3231 RTC timestamps so your logs stay readable even without internet.
Cloud logging is great until WiFi drops, your MQTT broker restarts, or you deploy somewhere with no connectivity. An ESP32 with a microSD card gives you reliable local logging that keeps writing through network hiccups.
This guide wires an SD card module to an ESP32, writes CSV data, shows how to add timestamps using a DS3231 RTC, and covers file size and speed tradeoffs for higher-rate logging.
- Time: 30 to 60 minutes
- Skill level: Beginner to Intermediate
- What you will build: An ESP32 that appends timestamped sensor data into CSV files on a microSD card.
Parts List
From ShillehTek
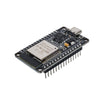
- ESP-WROOM-32 (USB-C) - main ESP32 dev board used for SPI SD logging.
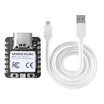
- XIAO ESP32-S3 - PSRAM-heavy alternative for buffered logging.
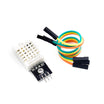
- DHT22 Sensor - example temperature and humidity data source in the code.
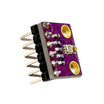
- BME280 - higher precision environmental sensor alternative.
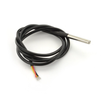
- DS18B20 Waterproof Probe - outdoor-friendly temperature sensor option.
External
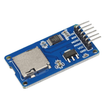
- MicroSD card module (SPI interface, 5V-tolerant preferred).
- microSD card (up to 32 GB, FAT32 format; basic Class 10 is fine).
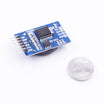
- DS3231 RTC module (optional but recommended for real timestamps).
Note: Many SD modules are not truly 3.3V-safe on all pins. Confirm whether your SD module expects 3.3V or can accept 5V on VCC, and always share GND with the ESP32.
Step-by-Step Guide
Step 1 - Decide when local logging beats cloud logging
Goal: Understand why writing to microSD is a strong default for sensor deployments.
What to do: Use local CSV logs when you need data to survive outages and be easy to retrieve later.

- Survives WiFi outages: data keeps writing regardless.
- Higher sample rate: SD logging can handle much higher rates than typical cloud endpoints.
- No cloud dependency: works where there is no internet.
- No monthly fee: large microSD cards can store extremely long time series at low sample rates.
- Data ownership: remove the card and open the CSV locally.
Expected result: You have a clear reason to log locally, either as your primary method or as a fallback when cloud connectivity fails.
Step 2 - Wire the SD card module and optional DS3231 RTC
Goal: Connect the SD card module via SPI and (optionally) connect the DS3231 via I2C for timestamps.
What to do: Wire the SD module to the ESP32 SPI pins, then wire DS3231 to ESP32 I2C pins if you want real date and time.
Wiring map:
SD Card Module    ESP32
VCC               --> 5V (some modules need 3.3V, check yours)
GND               --> GND
CS                --> GPIO5
SCK               --> GPIO18
MOSI              --> GPIO23
MISO              --> GPIO19

DS3231 RTC (optional but recommended)
VCC               --> 3.3V
GND               --> GND
SDA               --> GPIO21
SCL               --> GPIO22
Expected result: Your ESP32 can talk to the SD card over SPI. If installed, the DS3231 can provide a stable time source over I2C.
Step 3 - Upload a basic CSV logger sketch
Goal: Create a CSV file on the SD card, write a header once, and append sensor rows.
What to do: Use the SD library to initialize the card, create /log.csv if it does not exist, then append rows on a fixed interval.
Code:
#include <SPI.h>
#include <SD.h>
#include <DHT.h>

DHT dht(4, DHT22);
const int SD_CS = 5;
const char* LOG_FILE = "/log.csv";

void setup() {
  Serial.begin(115200);
  dht.begin();
  if (!SD.begin(SD_CS)) {
    Serial.println("SD failed");
    while (1);
  }
  // Write header if file doesn't exist
  if (!SD.exists(LOG_FILE)) {
    File f = SD.open(LOG_FILE, FILE_WRITE);
    f.println("millis,temp_c,humidity_pct");
    f.close();
  }
}

void loop() {
  float t = dht.readTemperature();
  float h = dht.readHumidity();
  File f = SD.open(LOG_FILE, FILE_APPEND);
  f.print(millis());
  f.print(","); f.print(t, 1);
  f.print(","); f.println(h, 1);
  f.close();
  delay(5000);
}
Expected result: The SD card contains log.csv with a header and new rows appended every 5 seconds.
Step 4 - Add real timestamps using a DS3231
Goal: Replace relative time (millis()) with human-readable timestamps.
What to do: Read the current time from the DS3231 and prepend it to each CSV row.

Code:
#include <RTClib.h>
RTC_DS3231 rtc;

void logRow(float t, float h) {
  DateTime now = rtc.now();
  char buf[24];
  sprintf(buf, "%04d-%02d-%02d %02d:%02d:%02d",
          now.year(), now.month(), now.day(),
          now.hour(), now.minute(), now.second());
  File f = SD.open(LOG_FILE, FILE_APPEND);
  f.print(buf); f.print(",");
  f.print(t, 1); f.print(",");
  f.println(h, 1);
  f.close();
}
Expected result: Each CSV row contains a real timestamp that is readable in Excel or pandas without conversion.
Step 5 - Rotate daily files on boot
Goal: Avoid extremely large CSV files that can become slow to open or process.
What to do: Generate a filename based on the current date and write logs into one file per day.
Code:
char filename[24];
DateTime now = rtc.now();
sprintf(filename, "/log_%04d%02d%02d.csv",
        now.year(), now.month(), now.day());
Expected result: Your logger writes to files like /log_20260710.csv, keeping each file smaller and easier to manage.
Step 6 - Increase throughput for high-rate logging
Goal: Improve performance when logging at 100+ samples per second.
What to do: Keep the file open and flush periodically instead of opening and closing the file every sample.
Code:
File logFile;
void setup() {
  // ...
  logFile = SD.open("/fast.csv", FILE_APPEND);
}
void loop() {
  logFile.print(micros());
  logFile.print(",");
  logFile.println(analogRead(A0));
  static int count = 0;
  if (++count % 100 == 0) logFile.flush();   // flush every 100 rows
}
Expected result: Higher sustained logging rates because SD writes are block-based and frequent flushes waste space and time.
Step 7 - Apply the logger to real deployments
Goal: Map this build to practical sensor logging scenarios.
What to do: Use the same SD CSV approach with the sensor you care about, then retrieve the card periodically for analysis.

- Weather station in a remote field - no WiFi needed.
- Vehicle GPS and accelerometer black box - second-by-second driving data.
- Beehive weight and temperature - log long term, then retrieve the card.
- Fermentation temperature curve - brewing, kombucha, sourdough starter tracking.
- Fridge or freezer defrost cycle profiling - identify a failing seal.
- Bird box camera trigger log - timestamp motion events.
Expected result: You can deploy sensors anywhere and still get complete time series data, even when connectivity is unreliable or unavailable.
Conclusion
An ESP32 with an SD card module and optional DS3231 RTC gives you a durable CSV data logger that keeps working when WiFi fails. You can remove the card and analyze the file in Excel or pandas with no cloud dependencies.
Inspiration credit: SD Card Datalogging With the DHT22 Temp Humidity Sensor on Instructables.
Want the exact parts used in this build? Grab them from ShillehTek.com. If you want help customizing this project or building something for your product, check out our IoT consulting services.


.png?v=25000753014097803521791168436)

.png?v=68677308723310773341791168436)


