

Project Overview
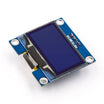
Arduino Nano + 1.3 inch SH1106 I2C OLED: In this guide, you will wire a 1.3 inch SH1106 128x64 OLED to an Arduino and use the U8glib page-drawing loop to display and cycle text screens over I2C.
OLED displays are ideal for microcontroller projects because each pixel emits its own light, contrast is excellent, and power draw scales with how many pixels you light. With I2C, the whole display runs over four wires.
- Time: 30 minutes
- Skill level: Beginner
- What you will build: An OLED cycling between text screens, a simple starting point for sensor dashboards.

Parts List
From ShillehTek
- 1.3" I2C White OLED Display (SH1106) - the 128x64 SH1106 I2C OLED used in this build (also available in blue)
- Arduino Nano V3 - or any Arduino UNO-compatible board
- 120pcs 20cm Dupont Jumper Wires - four male-to-female jumpers for I2C and power
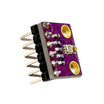
- BME280 Sensor - optional, for displaying real sensor readings after the demo
External
- USB cable for the Arduino
Note: Most 1.3 inch modules use the SH1106 controller (not the SSD1306 common on many 0.96 inch displays). If your screen shows garbage or a shifted image with SSD1306 code, use an SH1106 constructor or library.
Step-by-Step Guide
Step 1 - Wire the Display
Goal: Connect the SH1106 OLED to the Arduino I2C pins with four wires.
What to do: Use male-to-female jumpers (no breadboard required) and make these connections:
OLED GND -> Arduino GND
OLED VCC -> Arduino 5V
OLED SCL -> Arduino A5
OLED SDA -> Arduino A4

Expected result: The display is connected to the Arduino I2C bus.
Step 2 - Install U8glib and Pick the Constructor
Goal: Install the correct library and select the SH1106 driver.
What to do: In the Arduino IDE, install U8glib from Library Manager. Then use the SH1106 128x64 constructor in your sketch:
U8GLIB_SH1106_128X64 u8g(U8G_I2C_OPT_NONE);This constructor line is critical because U8glib supports many display controllers, and the correct one must match your module.
Expected result: U8glib is installed and your sketch is set to the SH1106 128x64 display.
Step 3 - Upload the Page-Cycling Demo
Goal: Display text using U8glib's picture loop and cycle between two pages.
What to do: U8glib renders in pages. You draw inside a firstPage() and nextPage() loop, and the library updates the screen. Upload this demo, which alternates two text screens every 3.5 seconds:
#include "U8glib.h"
U8GLIB_SH1106_128X64 u8g(U8G_I2C_OPT_NONE);

void draw(void) {
  u8g.setFont(u8g_font_profont12);
  u8g.setPrintPos(0, 10);
  u8g.print("This is the 1.3\"");
  u8g.setPrintPos(0, 25);
  u8g.print("White i2c OLED");
  u8g.setPrintPos(0, 40);
  u8g.print("with Arduino.");
}

void draw2(void) {
  u8g.setFont(u8g_font_profont12);
  u8g.setPrintPos(0, 10);
  u8g.print("Second screen -");
  u8g.setPrintPos(0, 25);
  u8g.print("swap in your own");
  u8g.setPrintPos(0, 40);
  u8g.setFont(u8g_font_profont10);
  u8g.print("sensor readings here.");
}

void setup(void) {
}

void loop(void) {
  u8g.firstPage();
  do {
    draw();
  } while (u8g.nextPage());
  delay(3500);

  u8g.firstPage();
  do {
    draw2();
  } while (u8g.nextPage());
  delay(3500);
}
Expected result: The OLED alternates between the two text pages.
Step 4 - Make It Yours
Goal: Turn the text demo into a simple Arduino dashboard.
What to do: Replace the u8g.print() strings with live values, such as temperature from a BME280, a distance from an HC-SR04, or a weight from an HX711. You can also change fonts (for example, u8g_font_profont10 for smaller text) to fit more information on the screen.
Expected result: Your own text or sensor readings appear on the 1.3 inch OLED.
Conclusion
You wired a 1.3 inch SH1106 OLED to an Arduino over I2C and displayed text using U8glib's page-rendering loop, including the key detail of using the SH1106 constructor. With this working, you can quickly turn almost any Arduino project into a readable on-device display.
Want the exact parts used in this build? Grab them from ShillehTek.com. If you want help customizing this project or building something for your product, check out our IoT consulting services.




.png?v=25000753014097803521791168436)

.png?v=68677308723310773341791168436)


