

Project Overview
ESP32 RFID Attendance System - RC522 Punch-In/Punch-Out Logger with NTP timestamps, a live web dashboard, and one-click CSV export (no cloud required): Most RFID tutorials stop at "the door unlocks". This one keeps the record. An ESP32 reads 13.56 MHz cards and fobs with an RC522, stamps each tap with real time from an NTP server, alternates IN and OUT for every card automatically, and serves a live web page on your network that lists who's in, who's out, and when, with a Download CSV link that opens straight in Excel or Google Sheets. There's no account to create and no cloud to pay for: the whole system is one board, one reader, and a phone browser. It's the attendance board for a makerspace, a classroom, a small team, or a gym, and the skeleton for any "who did what, when" logger.
- Time: ~1 hour
- Skill level: Intermediate
- What you will build: A Wi-Fi attendance terminal with name lookup, IN/OUT toggling, audible feedback, a self-refreshing web dashboard, and CSV export.

Parts List
From ShillehTek
- ESP32 Dev Board (38-pin, CP2102, USB-C)
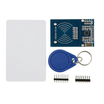
- RC522 RFID Reader Kit (13.56 MHz, SPI) - comes with a card and a fob
- 13.56 MHz S50 RFID Cards - one per person
- KY-006 Passive Buzzer - high beep in, low beep out
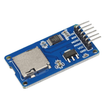
- Micro SD Card Module - optional, for logs that survive a power cut
- 400-Point Breadboard
- Dupont Jumper Wires
External
- A 2.4 GHz Wi-Fi network and any phone or laptop on it
Note: the RC522 is a 3.3 V part. Power it from the ESP32's 3V3 pin, never from 5V. The SPI lines are 3.3 V on both sides, so no level shifting is needed.
Step-by-Step Guide
Step 1 - Wire the Reader
Goal: Put the RC522 on the ESP32's default SPI bus.
What to do: RC522 to ESP32: SDA (SS) to GPIO5, SCK to GPIO18, MOSI to GPIO23, MISO to GPIO19, RST to GPIO22, 3.3V to 3V3, GND to GND; leave IRQ unconnected. Buzzer: S to GPIO27, - to GND (and + to 3V3 if your module has three pins). Keep the reader on short jumpers; SPI at the RC522's speed does not love long loose wires.
Expected result: Seven wires to the reader, plus two or three to the buzzer.
Step 2 - Libraries
Goal: Install the required libraries once and set your config values.
What to do: In the Arduino IDE Library Manager install MFRC522 (GithubCommunity). WiFi, WebServer, SPI, and the time functions ship with the ESP32 core (use core 3.x, which includes tone()). Fill in your Wi-Fi details and your POSIX timezone string in the sketch. EST5EDT,M3.2.0,M11.1.0 is US Eastern; CET-1CEST,M3.5.0,M10.5.0/3 is central Europe.
Expected result: You are ready to upload.
Step 3 - The Sketch
Goal: Load firmware that reads tags, timestamps taps, serves a dashboard, and exports CSV.
Code:
#include <WiFi.h>
#include <WebServer.h>
#include <SPI.h>
#include <MFRC522.h>
#include <time.h>

const char* SSID = "YourNetwork";
const char* PASS = "YourPassword";
const char* TZ   = "EST5EDT,M3.2.0,M11.1.0";    // POSIX timezone string for your zone

const int SS_PIN = 5, RST_PIN = 22, BUZZER = 27;
MFRC522 rfid(SS_PIN, RST_PIN);
WebServer server(80);

struct Person { const char* uid; const char* name; };
Person people[] = { {"A1 B2 C3 D4", "Alice"}, {"11 22 33 44", "Bob"} };   // paste UIDs from the Serial Monitor

struct Entry { String name; String uid; String stamp; bool in; };
Entry log_[200]; int count = 0;                   // 200 taps in RAM; see Step 6 for permanent storage
String lastUid; unsigned long lastSeen = 0;

String nameFor(const String& uid) {
  for (auto& p : people) if (uid == p.uid) return p.name;
  return "Unknown";
}

String now() {
  struct tm t; if (!getLocalTime(&t)) return "no time";
  char buf[20]; strftime(buf, sizeof buf, "%Y-%m-%d %H:%M:%S", &t); return buf;
}

bool nextIsIn(const String& uid) {                // alternate IN / OUT per card
  for (int i = count - 1; i >= 0; i--) if (log_[i].uid == uid) return !log_[i].in;
  return true;
}

const char PAGE[] PROGMEM = R"html(
<!DOCTYPE html><html><head><meta charset="utf-8"><meta name="viewport" content="width=device-width,initial-scale=1">
<title>Attendance</title><style>body{font-family:sans-serif;margin:20px}table{border-collapse:collapse;width:100%}
 td,th{border:1px solid #ccc;padding:6px;text-align:left}.in{color:#0a7}.out{color:#c33}</style></head><body>
<h2>Attendance <small id="clock"></small></h2><p><a href="/export.csv">Download CSV</a></p>
<table><thead><tr><th>Time</th><th>Name</th><th>UID</th><th>Event</th></tr></thead><tbody id="rows"></tbody></table>
<script>
async function refresh(){const r=await fetch('/api/entries');const d=await r.json();
 document.getElementById('clock').textContent=d.now;
 document.getElementById('rows').innerHTML=d.entries.map(e=>`<tr><td>${e.t}</td><td>${e.n}</td><td>${e.u}</td><td class="${e.in?'in':'out'}">${e.in?'IN':'OUT'}</td></tr>`).reverse().join('');}
refresh();setInterval(refresh,3000);
</script></body></html>)html";

void handleEntries() {
  String j = "{\"now\":\"" + now() + "\",\"entries\":[";
  for (int i = 0; i < count; i++) {
    if (i) j += ',';
    j += "{\"t\":\"" + log_[i].stamp + "\",\"n\":\"" + log_[i].name + "\",\"u\":\"" + log_[i].uid +
         "\",\"in\":" + (log_[i].in ? "true" : "false") + "}";
  }
  j += "]}";
  server.send(200, "application/json", j);
}

void handleCsv() {
  String csv = "time,name,uid,event\n";
  for (int i = 0; i < count; i++)
    csv += log_[i].stamp + "," + log_[i].name + "," + log_[i].uid + "," + (log_[i].in ? "IN" : "OUT") + "\n";
  server.sendHeader("Content-Disposition", "attachment; filename=attendance.csv");
  server.send(200, "text/csv", csv);
}

void setup() {
  Serial.begin(115200);
  pinMode(BUZZER, OUTPUT);
  SPI.begin(); rfid.PCD_Init();
  WiFi.begin(SSID, PASS);
  while (WiFi.status() != WL_CONNECTED) delay(250);
  Serial.print("Dashboard: http://"); Serial.println(WiFi.localIP());
  configTzTime(TZ, "pool.ntp.org", "time.nist.gov");
  server.on("/", []() { server.send_P(200, "text/html", PAGE); });
  server.on("/api/entries", handleEntries);
  server.on("/export.csv", handleCsv);
  server.begin();
}

void loop() {
  server.handleClient();
  if (!rfid.PICC_IsNewCardPresent() || !rfid.PICC_ReadCardSerial()) return;

  String uid;                                       // "A1 B2 C3 D4" style
  for (byte i = 0; i < rfid.uid.size; i++) {
    if (i) uid += ' ';
    if (rfid.uid.uidByte[i] < 0x10) uid += '0';
    uid += String(rfid.uid.uidByte[i], HEX);
  }
  uid.toUpperCase();
  rfid.PICC_HaltA(); rfid.PCD_StopCrypto1();

  if (uid == lastUid && millis() - lastSeen < 2000) return;    // same card still on the reader
  lastUid = uid; lastSeen = millis();

  bool in = nextIsIn(uid);
  if (count < 200) log_[count++] = { nameFor(uid), uid, now(), in };
  Serial.printf("%s  %s  %s  %s\n", now().c_str(), uid.c_str(), nameFor(uid).c_str(), in ? "IN" : "OUT");
  tone(BUZZER, in ? 1800 : 900, 120);                          // high beep = in, low beep = out
}
What to do: Upload and open the Serial Monitor at 115200. Tap each card you own on the reader once.
Expected result: The dashboard URL prints, then a line per tap: timestamp, UID, "Unknown", IN. Copy each UID into the people[] table with the person's name, upload again, and the names appear instead of "Unknown".
Step 4 - Open the Dashboard
Goal: View the log on any phone or laptop on the network.
What to do: Type the printed IP into a phone or laptop browser on the same Wi-Fi. The page shows the current time (from NTP, so it's right even after a power cut) and the table, newest first, refreshing every three seconds without reloading. Tap a card: a row appears within seconds, green IN. Tap the same card again: red OUT. Hold a card on the reader: it registers once; the two-second cooldown stops double entries.
Expected result: A live attendance board with no app installed anywhere.
Step 5 - Export to a Spreadsheet
Goal: Export the day as a CSV file you can open in Excel or Google Sheets.
What to do: Click Download CSV. The file has time, name, UID, and event columns; subtracting each person's IN from their OUT gives hours on site. Do the download before you power the board off because the entries live in RAM.
Expected result: A clean CSV of the day, ready for a timesheet.
Step 6 - Make It Permanent, Make It Yours
Goal: Extend the project from a RAM-based logger into something you can install.
What to do: For logs that survive reboots, append each row to a file, either on the micro SD module (same SPI bus, a second CS pin such as GPIO4) or in the ESP32's own flash with LittleFS, and replay it into the table at boot. To push rows to Google Sheets, add an HTTPS POST to a Google Apps Script web app in the tap handler, and keep the local page as the fallback. Add an OLED that greets the person by name, a relay that unlocks a door on IN, or an mDNS name (attendance.local) so nobody has to remember an IP. Reset the table at midnight with a time check if you want one file per day.
Expected result: A terminal you'd actually mount by the door.
Conclusion
Reading a card is the easy part; knowing when it happened, who it was, and being able to see it from any phone is what turns a reader into a system. The ESP32 brings the clock, the Wi-Fi, and the web server for the price of the RFID module itself, and because nothing leaves your network, there's nothing to subscribe to and nothing to break when a cloud API changes.
Want the exact parts used in this build? Grab them from ShillehTek.com. If you want help customizing this project or building something for your product, check out our IoT consulting services.
Credits
All photos and images in this tutorial are credited to Pradeep on Hackster.io. The original guide by Pradeep served as the reference for this ShillehTek version. We thank them for their excellent work in the maker community.







.png?v=25000753014097803521791168436)

.png?v=68677308723310773341791168436)


