

Project Overview
ESP32 + INMP441 I2S Microphone Decibel Meter: Build a real sound level meter that converts I2S microphone samples into true dB SPL, shows live and peak readings on an SSD1306 OLED, and calibrates against a reference meter.
Most “sound sensor” projects read an analog microphone and map the number to a bar, which tells you louder-or-quieter but never how loud. A real sound level meter reports decibels of sound pressure, and the parts to build one properly now cost less than a coffee. The INMP441 is a digital I2S microphone with a specified sensitivity, which means its numbers can be converted to true dB SPL with arithmetic instead of guesswork.
This guide wires the INMP441 to an ESP32, computes RMS level over 125 ms windows, converts to dB using the datasheet sensitivity, shows the result and a peak-hold on an OLED, and walks through calibration so your readings track a reference meter.
- Time: ~1 hour
- Skill level: Intermediate
- What you will build: A self-contained sound level meter reading roughly 35–115 dB SPL (unweighted) with a 3-second peak hold, a bar graph and a Serial log, calibrated to a reference.

Parts List
From ShillehTek
- ESP32 Dev Board (38-pin, CP2102, USB-C) - runs the I2S audio capture, math, and OLED output
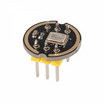
- INMP441 I2S Microphone (pre-soldered) - digital I2S microphone with known sensitivity for dB SPL conversion
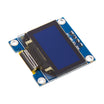
- 0.96" I2C OLED (SSD1306) - displays the live dB reading, peak-hold, and bar graph
- 400-Point Breadboard - quick prototyping for I2S and I2C wiring
- Dupont Jumper Wires - connects ESP32 to the INMP441 and OLED
External
- A reference for calibration: a sound-level-meter app on a phone (good enough to a few dB) or a real meter if you can borrow one, plus any speaker that can play steady noise
Note: The INMP441 is a 3.3 V part and must never see 5 V on VDD. Its L/R pin selects which I2S slot it answers in - tie it to GND and the sketch reads the left slot. Keep the three signal wires short; I2S clocks run at a few MHz and long jumpers add noise that shows up as a raised floor in your quietest readings.
Step-by-Step Guide
Step 1 - Wire the Microphone and Display
Goal: One I2S bus, one I2C bus.
What to do: Wire the INMP441: VDD → 3V3, GND → GND, L/R → GND, SCK → GPIO14, WS → GPIO15, SD → GPIO32. Wire the OLED: VCC → 3V3, GND → GND, SDA → GPIO21, SCL → GPIO22. Mount the microphone so its port (the tiny hole on the metal can) faces the room, not the breadboard.
Expected result: Six wires to the mic, four to the display.
Step 2 - The Arithmetic
Goal: Understand the three numbers in the sketch.
What to do: The INMP441 delivers 24-bit samples; full scale is 2^23 = 8,388,608. Over a window of samples we compute the RMS (root-mean-square, the “average loudness” that matches how pressure levels are defined), then dBFS = 20·log10(RMS ÷ full scale), a negative number that says how far below clipping the signal sits.
The datasheet pins the conversion to the real world: a 94 dB SPL tone at 1 kHz produces −26 dBFS. So dB SPL ≈ dBFS + 26 + 94 = dBFS + 120. A quiet room at −80 dBFS is therefore 40 dB SPL; a vacuum cleaner at −45 dBFS is 75 dB.
The 125 ms window is the “fast” time constant real meters use, and removing the DC offset before squaring keeps a small bias in the mic from inflating quiet readings.
Expected result: You can follow every line of the maths in Step 3.
Step 3 - Upload the Sketch
Goal: Read the INMP441 over I2S, compute dB SPL, and display it on the OLED.
What to do: Use ESP32 core 3.x (the ESP_I2S.h driver ships with it), install Adafruit SSD1306 and Adafruit GFX, upload, then open the Serial Monitor at 115200.
Code:
#include <ESP_I2S.h>                 // ESP32 Arduino core 3.x I2S driver
#include <Wire.h>
#include <Adafruit_GFX.h>
#include <Adafruit_SSD1306.h>
#include <math.h>

const int I2S_SCK = 14, I2S_WS = 15, I2S_SD = 32;   // INMP441 SCK, WS, SD (L/R to GND)
const int RATE = 16000;
const int N = 2000;                                   // 2000 samples at 16 kHz = 125 ms ("fast" meter response)
const float MIC_REF_DB    = 94.0;    // datasheet: a 94 dB SPL tone ...
const float MIC_SENS_DBFS = -26.0;   // ... reads -26 dBFS on the INMP441
float CAL = 0.0;                     // your trim from Step 4 (e.g. +2.5 or -1.0)

I2SClass i2s;
Adafruit_SSD1306 oled(128, 64, &Wire, -1);
int32_t buf[N];
float peakHold = 0; unsigned long peakAt = 0;

void setup() {
  Serial.begin(115200);
  oled.begin(SSD1306_SWITCHCAPVCC, 0x3C); oled.setTextColor(SSD1306_WHITE);
  i2s.setPins(I2S_SCK, I2S_WS, -1, I2S_SD);           // bclk, ws, dout (none), din
  if (!i2s.begin(I2S_MODE_STD, RATE, I2S_DATA_BIT_WIDTH_32BIT, I2S_SLOT_MODE_MONO, I2S_STD_SLOT_LEFT)) {
    Serial.println("I2S init failed"); while (1);
  }
}

void loop() {
  size_t got = i2s.readBytes((char*)buf, sizeof(buf));   // blocks for one 125 ms window
  int n = got / 4; if (n == 0) return;

  double mean = 0, sum = 0;
  for (int i = 0; i < n; i++) mean += (buf[i] >> 8);           // the 24-bit sample sits in the top bits
  mean /= n;                                                   // DC offset
  for (int i = 0; i < n; i++) { double x = (buf[i] >> 8) - mean; sum += x * x; }
  double rms = sqrt(sum / n);

  float dbfs = 20.0 * log10(rms / 8388608.0);                  // relative to full scale (2^23)
  float db   = dbfs - MIC_SENS_DBFS + MIC_REF_DB + CAL;        // -> dB SPL, unweighted

  if (db > peakHold || millis() - peakAt > 3000) { peakHold = db; peakAt = millis(); }   // 3 s peak hold

  oled.clearDisplay();
  oled.setTextSize(1); oled.setCursor(0, 0);  oled.print("Sound level   dB(Z)");
  oled.setTextSize(3); oled.setCursor(14, 18); oled.print(db, 1);
  oled.setTextSize(1); oled.setCursor(0, 52); oled.print("peak "); oled.print(peakHold, 1);
  int bar = constrain((int)((db - 30) * 128 / 70), 0, 128);    // 30..100 dB -> 0..128 px
  oled.fillRect(0, 62, bar, 2, SSD1306_WHITE);
  oled.display();

  Serial.printf("%.1f dB   (%.1f dBFS)\n", db, dbfs);
}
Expected result: A quiet room reads somewhere in the 35–45 dB range; speaking at arm's length pushes it to 60–70; a clap spikes past 90 and the peak-hold keeps the number for three seconds. “I2S init failed” means a pin typo; a reading stuck near 120 means SD is disconnected (the driver is reading full-scale garbage).
Step 4 - Calibrate
Goal: Move from datasheet-typical sensitivity to your actual microphone module.
What to do: Datasheet sensitivity is a typical value; individual mics sit a dB or two either side, and the module's layout adds a little more. Play steady broadband noise from a speaker (any “white noise” or “rain” track) and put your reference (phone app or real meter) right next to the INMP441, both a metre from the speaker.
Compare the two readings at a moderate level (around 65–75 dB) and set CAL to the difference (reference minus yours). Re-upload and check a second, louder level. If both match within a dB or two, you’re done; if the error grows with level, your speaker is distorting, so turn it down.
Expected result: Agreement with the reference to about ±2 dB across the range you care about. Phone apps themselves are only good to a few dB, so a borrowed real meter is worth the favour.
Step 5 - Read the Numbers
Goal: Understand what the scale means in real life.
What to do: Roughly: 30 dB a whisper, 40 a quiet library, 60 normal conversation, 70 a vacuum cleaner, 85 the level at which hearing protection is recommended for an eight-hour day, 100 a nightclub or a chainsaw at arm's length, 110 a loud concert. Every 10 dB is ten times the acoustic power.
This meter reads dB(Z), flat across frequency. The dB(A) figure on an official meter rolls off bass and treble to match human hearing, so expect yours to read a little higher on rumbly sources like traffic or a compressor.
Expected result: You can decide whether the workshop needs ear defenders with actual data.
Step 6 - Make It Yours
Goal: Extend the project beyond the on-device display.
What to do: Add an A-weighting filter (a second-order IIR cascade - Ivan Kostoski's ESP32 I2S sound-level-meter code is the reference implementation) to report dB(A). Log the level every second over MQTT and let Home Assistant graph a day of neighbourhood noise. Keep a rolling Leq (energy average over 15 minutes) for a proper exposure measurement. Light a WS2812 ring red when the shop crosses 85 dB. Or power it from an 18650 and take it to the next band practice.
Expected result: A measuring instrument, built from a two-dollar microphone.
Conclusion
The difference between a sound sensor and a sound level meter is one datasheet number: the INMP441's −26 dBFS at 94 dB SPL turns raw samples into decibels you can compare with the rest of the world. Add a 125 ms RMS, a line of calibration and an OLED, and the ESP32 reads noise the way a real instrument does.
Want the exact parts used in this build? Grab them from ShillehTek.com. If you want help customizing this project or building something for your product, check out our IoT consulting services.
Credits
All photos and images in this tutorial are credited to Luigi Morelli on Hackster.io (LGPL license). The original guide by Luigi Morelli served as the reference for this ShillehTek version. We thank them for their excellent work in the maker community.





.png?v=25000753014097803521791168436)

.png?v=68677308723310773341791168436)


