

Project Overview
ESP32-CAM + OV3660 camera computer vision: Build an ESP32-CAM JPEG server that streams frames over Wi-Fi to your PC, where a Python OpenCV script runs MobileNet-SSD object detection and QR code reading in real time.
The ESP32-CAM is great at capturing JPEG frames and serving them over HTTP, but it does not have the RAM to run a neural network. The workflow here splits the job: the ESP32-CAM captures and serves images, and your computer does the heavy processing with OpenCV.
- Time: ~1.5 hours
- Skill level: Intermediate
- What you will build: An ESP32-CAM JPEG server plus a Python/OpenCV client that draws labeled boxes around detected objects and decodes any QR code it sees, live, at several frames per second.

Parts List
From ShillehTek
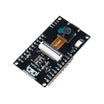
- ESP32-CAM Board with OV3660 Camera (pre-soldered) - the Wi-Fi camera module that captures and serves JPEG frames.
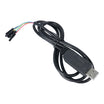
- FT232RL USB-to-TTL Cable - required to flash code because the ESP32-CAM has no USB port.
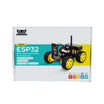
- ESP32-CAM 4WD Robot Car Kit - optional: mount the camera on a mobile platform.
- 400-Point Breadboard - optional: makes temporary wiring and power distribution easier.
- Dupont Jumper Wires - for TX/RX/GND connections and jumper wires for boot mode.
External
- A computer with Python 3 (Windows, macOS, or Linux) - runs OpenCV, MobileNet-SSD inference, and QR decoding.
- Solid 5 V 1 A power supply for the ESP32-CAM - prevents brownouts during camera + Wi-Fi current spikes.
Note: The ESP32-CAM can reset with "Brownout detector was triggered" if power is weak. Feed it 5 V from a proper 1 A source (not from the FT232RL cable's power pin) and keep the camera ribbon seated firmly in its connector.
Step-by-Step Guide
Step 1 - Flash the Camera
Goal: Upload firmware to an ESP32-CAM board that has no USB port.
What to do: Wire your FT232RL cable (set to 3.3 V logic) as follows: GND to GND, TX to U0R, RX to U0T. Power the ESP32-CAM 5V and GND from your external 5 V supply.
To enter flash mode, jumper IO0 to GND and press RST (or power-cycle). In the Arduino IDE, install the ESP32 board package, select AI Thinker ESP32-CAM, choose the correct serial port, and install the esp32cam library (by yoursunny) from Library Manager. Upload your sketch. After uploading, remove the IO0 to GND jumper and press RST.
Expected result: The Arduino IDE reports "Hard resetting", and the board is ready to boot your sketch.
Step 2 - Upload the ESP32-CAM Sketch
Goal: Serve single JPEG frames over HTTP from two endpoints.
What to do: Paste the sketch below into the Arduino IDE. Update the Wi-Fi SSID and password, then upload to the ESP32-CAM.
Code:
#include <WiFi.h>
#include <WebServer.h>
#include <esp32cam.h>                 // "esp32cam" library by yoursunny

const char* SSID = "YourNetwork";
const char* PASS = "YourPassword";
WebServer server(80);

static auto loRes = esp32cam::Resolution::find(320, 240);
static auto hiRes = esp32cam::Resolution::find(800, 600);

void serveJpg() {
  auto frame = esp32cam::capture();
  if (frame == nullptr) { server.send(503, "", ""); return; }
  server.setContentLength(frame->size());
  server.send(200, "image/jpeg");
  WiFiClient client = server.client();
  frame->writeTo(client);
}

void handleLo() { esp32cam::Camera.changeResolution(loRes); serveJpg(); }
void handleHi() { esp32cam::Camera.changeResolution(hiRes); serveJpg(); }

void setup() {
  Serial.begin(115200);
  using namespace esp32cam;
  Config cfg;
  cfg.setPins(pins::AiThinker);        // the standard ESP32-CAM pin map (OV2640 and OV3660 boards alike)
  cfg.setResolution(hiRes);
  cfg.setBufferCount(2);
  cfg.setJpeg(80);
  bool ok = Camera.begin(cfg);
  Serial.println(ok ? "camera ok" : "camera FAILED - check the ribbon");

  WiFi.begin(SSID, PASS);
  while (WiFi.status() != WL_CONNECTED) delay(250);
  Serial.print("http://"); Serial.print(WiFi.localIP()); Serial.println("/cam-hi.jpg");

  server.on("/cam-lo.jpg", handleLo);  // fast, small frames
  server.on("/cam-hi.jpg", handleHi);  // detailed frames
  server.begin();
}

void loop() { server.handleClient(); }
Open Serial Monitor at 115200, then copy the printed URL into a browser to test.
Expected result: A fresh 800x600 JPEG every time you refresh. Each HTTP request captures exactly one frame, which is ideal for a Python loop.
Step 3 - Set Up Python and the Model Files
Goal: Install OpenCV and download the MobileNet-SSD model files used by OpenCV DNN.
What to do: On your computer, install dependencies:
pip install opencv-python numpyDownload these three files into the same folder where you will run your Python script:
-
frozen_inference_graph.pb(weights) -
ssd_mobilenet_v3_large_coco_2020_01_14.pbtxt(graph/config) -
coco.names(80 COCO class labels)
These are the standard OpenCV MobileNet-SSD example files from the TensorFlow Object Detection model zoo. Searching for the .pbtxt filename will lead you to the correct set.
Expected result: The three model files are present next to your script.
Step 4 - Run the Vision Script (Object Detection + QR)
Goal: Pull JPEG frames from the ESP32-CAM endpoint, then run OpenCV object detection and QR code decoding on each frame.
What to do: Save the script below as (for example) vision.py. Replace URL with the address printed in the Serial Monitor (choose /cam-hi.jpg or /cam-lo.jpg).
Code:
import cv2, urllib.request, numpy as np

URL = "http://192.168.1.60/cam-hi.jpg"          # the address from the Serial Monitor
CLASSES = open("coco.names").read().strip().split("\n")

net = cv2.dnn_DetectionModel("frozen_inference_graph.pb",
                             "ssd_mobilenet_v3_large_coco_2020_01_14.pbtxt")
net.setInputSize(320, 320)
net.setInputScale(1.0 / 127.5)
net.setInputMean((127.5, 127.5, 127.5))
net.setInputSwapRB(True)
qr = cv2.QRCodeDetector()

while True:
    data = urllib.request.urlopen(URL, timeout=5).read()            # one JPEG per request
    img = cv2.imdecode(np.frombuffer(data, np.uint8), cv2.IMREAD_COLOR)
    if img is None:
        continue

    ids, confs, boxes = net.detect(img, confThreshold=0.5)          # objects
    if len(ids):
        for cid, conf, box in zip(ids.flatten(), confs.flatten(), boxes):
            x, y, w, h = box
            cv2.rectangle(img, (x, y), (x + w, y + h), (0, 255, 0), 2)
            cv2.putText(img, f"{CLASSES[cid - 1]} {conf:.2f}", (x, y - 8),
                        cv2.FONT_HERSHEY_SIMPLEX, 0.6, (0, 255, 0), 2)

    text, pts, _ = qr.detectAndDecode(img)                          # QR codes
    if pts is not None and text:
        pts = pts.astype(int).reshape(-1, 2)
        cv2.polylines(img, [pts], True, (255, 0, 255), 2)
        cv2.putText(img, text, (pts[0][0], pts[0][1] - 10),
                    cv2.FONT_HERSHEY_SIMPLEX, 0.6, (255, 0, 255), 2)
        print("QR:", text)

    cv2.imshow("ESP32-CAM vision", img)
    if cv2.waitKey(1) == 27:                                        # Esc quits
        break

cv2.destroyAllWindows()
Run it:
python vision.pyExpected result: A window displays the live frames with green boxes labeled with detected objects and confidence scores. When a QR code is visible, a magenta outline appears and its decoded text prints in the terminal.
Step 5 - Tune Confidence, NMS, and Frame Size
Goal: Reduce false detections and improve frame rate.
What to do: Adjust confThreshold up to 0.6 to 0.7 if you see random labels, or down to about 0.4 to catch smaller or partially hidden objects. Add nmsThreshold=0.4 to net.detect() if you want to suppress overlapping duplicate boxes.
For speed, request /cam-lo.jpg instead of /cam-hi.jpg. Also note that lighting matters significantly; the OV3660 performs better with good illumination on the subject.
Expected result: More stable detections and a faster loop (often around 5 to 10 FPS on a laptop).
Step 6 - Extend the Script Into an Application
Goal: Turn detections and QR reads into actions.
What to do: Use the detected class names and QR decoded text as triggers. For example, count consecutive frames containing a specific class (like person) and then send an HTTP request to another ESP32 controlling a relay, or send a message. You can also save a timestamped JPEG when a target object appears, or treat each decoded QR code as a command.
Expected result: A camera feed that produces events (objects and QR commands), not just pixels.
Conclusion
You built an ESP32-CAM wireless JPEG server and a Python OpenCV pipeline that performs MobileNet-SSD object detection and QR code reading on frames streamed over HTTP. This split keeps the ESP32-CAM focused on capture and Wi-Fi while your PC handles inference.
Want the exact parts used in this build? Grab them from ShillehTek.com. If you want help customizing this project or building something for your product, check out our IoT consulting services.
Credits
All photos and images in this tutorial are credited to Mirko Pavleski (mircemk) on Hackster.io. The original guide by Mirko Pavleski served as the reference for this ShillehTek version. We thank them for their excellent work in the maker community.




.png?v=25000753014097803521791168436)

.png?v=68677308723310773341791168436)


