

Project Overview
ESP32-C3 + SSD1306 OLED + MPU6050 + TTP223 desk pet: In this project, you will build an ESP32-C3 desk pet that animates expressive RoboEyes on a 0.96-inch SSD1306 OLED and reacts to touch, tilt, and shaking with moods and buzzer chirps.
A pair of expressive eyes on a small OLED is all it takes to make a gadget feel alive. This build uses an ESP32-C3, a 0.96-inch OLED, and three low-cost modules to create a desk companion with moods. The eyes come from the open-source RoboEyes library, which handles smooth blinking, glancing, and expressions. We add the senses: a TTP223 touch pad so it can be tapped and petted, an MPU6050 so it notices being tilted, picked up, or shaken, and a passive buzzer so it can chirp back. A small state machine ties it together (awake, reacting, drowsy, and asleep) so the pet behaves differently depending on how much attention it gets.
- Time: ~1 hour
- Skill level: Beginner-Intermediate
- What you will build: A USB-powered desk pet with blinking, wandering eyes that laughs and chirps when tapped, looks "downhill" when tilted, gets angry and sweaty when shaken, and naps after a few minutes alone.

Parts List
From ShillehTek
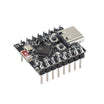
- ESP32-C3 Dev Board (pre-soldered) - main microcontroller board for running the sketch
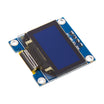
- 0.96" I2C OLED (SSD1306) - the face display for RoboEyes
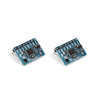
- MPU6050 Accelerometer / Gyroscope - tilt and shake sensing
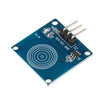
- TTP223B Capacitive Touch Sensor - touch input for tapping and petting
- KY-006 Passive Buzzer - simple audio feedback (chirps)
- 400-Point Breadboard - easy prototyping
- Dupont Jumper Wires - quick wiring between modules
External
- A USB-C cable for power and programming
- Optional: a small 3D-printed or card enclosure with a window for the screen
Note: The touch pad works through a few millimetres of plastic, so it can hide inside the case. Tape it behind the "head" and the pet reacts to a stroke on the outside. Mount the MPU6050 flat and square to the screen, or the tilt directions will not match what you see.
Step-by-Step Guide
Step 1 - Wire the Senses
Goal: Screen and motion sensor on one I2C bus, a touch input, and a buzzer output.
What to do: OLED and MPU6050 share the bus: both VCC to 3V3, GND to GND, SDA to GPIO8, SCL to GPIO9 (the ESP32-C3 default I2C pins). The OLED answers at 0x3C and the MPU6050 at 0x68.
Wire the TTP223B: VCC to 3V3, GND to GND, I/O to GPIO4. Wire the KY-006: S to GPIO5, minus to GND, middle pin to 3V3. GPIO4 and GPIO5 are deliberately not strapping pins, so the touch pad cannot stop the board from booting.
Expected result: Four small modules around the ESP32-C3, all on 3.3 V.
Step 2 - Install the Libraries
Goal: Install everything the sketch needs.
What to do: Install the ESP32 boards package, then from the Library Manager install Adafruit SSD1306 (with Adafruit GFX), Adafruit MPU6050, and FluxGarage RoboEyes. RoboEyes draws the eyes on any Adafruit SSD1306 display and handles the animation timing, so the sketch only has to decide what the eyes should do.
Expected result: The RoboEyes examples appear under File to Examples.
Step 3 - Upload the Sketch
Goal: Load the full desk pet firmware onto the ESP32-C3.
What to do: Paste the code below into the Arduino IDE.
#include <Wire.h>
#include <Adafruit_SSD1306.h>
#include <Adafruit_MPU6050.h>
#include <Adafruit_Sensor.h>

Adafruit_SSD1306 display(128, 64, &Wire, -1);
#include <FluxGarage_RoboEyes.h>                  // include after the display object
RoboEyes<Adafruit_SSD1306> roboEyes(display);
Adafruit_MPU6050 mpu;

const int SDA_PIN = 8, SCL_PIN = 9;               // ESP32-C3 I2C
const int TOUCH_PIN = 4;                          // TTP223B output: HIGH while touched
const int BUZZER_PIN = 5;                         // KY-006 signal

enum State { AWAKE, REACTING, DROWSY, ASLEEP };
State state = AWAKE;
unsigned long lastAttention = 0, reactUntil = 0, lastImu = 0, touchStart = 0;
bool wasTouched = false;
int lookDir = -1;
float lastMag = 9.8;

void beep(int freq, int ms) { tone(BUZZER_PIN, freq, ms); delay(ms); }
void chirpHappy()  { beep(1800, 60); beep(2400, 60); beep(3000, 80); }
void chirpGrumpy() { beep(420, 120); beep(300, 160); }
void chirpWake()   { beep(1200, 50); beep(2000, 70); }

void attention() { lastAttention = millis(); }
void react(unsigned long ms) { state = REACTING; reactUntil = millis() + ms; }

void calmDown() {                                 // back to the everyday face
  state = AWAKE;
  roboEyes.setMood(DEFAULT);
  roboEyes.setSweat(false);
  roboEyes.setAutoblinker(true, 3, 2);            // blink every 3 s, +/- 2 s
  roboEyes.setIdleMode(true, 3, 2);               // glance somewhere new every 3 s, +/- 2 s
  lookDir = -1;                                   // re-check the tilt on the next reading
}

void wakeUp() {
  roboEyes.open();
  calmDown();
  chirpWake();
}

void lookFromTilt(float ax, float ay) {           // tip the pet and its eyes roll downhill
  bool left = ay > 3.5, right = ay < -3.5, up = ax < -3.5, down = ax > 3.5;
  int dir = DEFAULT;
  if (up && left) dir = NW;        else if (up && right) dir = NE;
  else if (down && left) dir = SW; else if (down && right) dir = SE;
  else if (up) dir = N;            else if (down) dir = S;
  else if (left) dir = W;          else if (right) dir = E;
  if (dir == lookDir) return;
  lookDir = dir;
  roboEyes.setIdleMode(dir == DEFAULT, 3, 2);     // only wander when the pet is level
  roboEyes.setPosition(dir);
}

void setup() {
  Serial.begin(115200);
  pinMode(TOUCH_PIN, INPUT);
  Wire.begin(SDA_PIN, SCL_PIN);
  if (!display.begin(SSD1306_SWITCHCAPVCC, 0x3C)) { Serial.println("OLED not found"); while (true) delay(10); }
  if (!mpu.begin()) { Serial.println("MPU6050 not found"); while (true) delay(10); }
  mpu.setAccelerometerRange(MPU6050_RANGE_4_G);
  mpu.setFilterBandwidth(MPU6050_BAND_21_HZ);
  roboEyes.begin(128, 64, 100);                   // width, height, max frame rate
  roboEyes.setCuriosity(true);                    // the outer eye grows when it looks sideways
  calmDown();
  chirpWake();
  attention();
}

void loop() {
  unsigned long now = millis();

  // 1. Touch: a tap makes it laugh, holding your finger on it keeps it happy
  bool touched = digitalRead(TOUCH_PIN) == HIGH;
  if (touched && !wasTouched) {
    touchStart = now;
    attention();
    if (state == ASLEEP || state == DROWSY) {
      wakeUp();
    } else {
      roboEyes.setMood(HAPPY);
      roboEyes.anim_laugh();
      chirpHappy();
      react(2500);
    }
  }
  if (touched && now - touchStart > 1500 && state == REACTING) {   // being petted
    reactUntil = now + 1500;
    attention();
  }
  wasTouched = touched;

  // 2. Motion, 50 times a second: a shake annoys it, a tilt steers its gaze
  if (now - lastImu >= 20) {
    lastImu = now;
    sensors_event_t a, g, t;
    mpu.getEvent(&a, &g, &t);
    float mag = sqrt(a.acceleration.x * a.acceleration.x +
                     a.acceleration.y * a.acceleration.y +
                     a.acceleration.z * a.acceleration.z);
    if (fabs(mag - lastMag) > 1.5) attention();   // picked up or nudged
    lastMag = mag;
    if (mag > 20 && state != REACTING) {           // a real shake: roughly 2 g
      if (state == ASLEEP) roboEyes.open();
      roboEyes.setMood(ANGRY);
      roboEyes.setSweat(true);
      roboEyes.anim_confused();
      chirpGrumpy();
      react(3000);
    } else if (state != ASLEEP) {
      lookFromTilt(a.acceleration.x, a.acceleration.y);
    }
  }

  // 3. Moods over time
  unsigned long idle = millis() - lastAttention;   // fresh millis(): the chirps above take time
  if (state == REACTING && millis() > reactUntil) calmDown();
  if (state == AWAKE && idle > 60000UL) {          // ignored for a minute: getting sleepy
    state = DROWSY;
    roboEyes.setMood(TIRED);
  }
  if (state == DROWSY && idle > 180000UL) {        // three minutes alone: nap time
    state = ASLEEP;
    roboEyes.setAutoblinker(false, 3, 2);
    roboEyes.setIdleMode(false, 3, 2);
    roboEyes.close();
  }
  if (state == ASLEEP && idle < 1000) wakeUp();   // nudged awake

  roboEyes.update();                               // draw the next frame (capped at 100 fps)
}
In the Arduino IDE, select your ESP32-C3 board (for most plain C3 boards, use "ESP32C3 Dev Module", with USB CDC On Boot enabled if you want Serial Monitor output over USB-C) and upload.
Expected result: A rising chirp, then two rounded eyes that blink on their own and glance around every few seconds.
Step 4 - Meet Your Pet
Goal: Try every reaction.
What to do: Tap the touch pad: the eyes turn happy, shake with a laugh, and the buzzer chirps. Keep your finger on it and it stays happy for as long as you are petting it. Tilt the board and the eyes slide toward the low side. Level it again and they go back to wandering. Give it a proper shake: angry eyes, sweat drops, a confused wobble, and a grumble. Then leave it alone: after a minute it looks tired, after three it closes its eyes. A tap or a nudge wakes it with a little chirp.
Expected result: A pet that reacts to you and quietly entertains itself when you are busy.
Step 5 - Make It Yours
Goal: Tune the personality.
What to do: If tilting left makes it look right, swap the signs in lookFromTilt(). This depends on how the MPU6050 is mounted relative to the screen.
Make it touchier or calmer with the shake threshold (mag > 20) and the tilt threshold (3.5 m/s², about 20 degrees). Change the timings: shorter setAutoblinker intervals make it nervous, and a longer drowsy timeout makes it patient.
RoboEyes can also reshape the face with setWidth(), setHeight(), setBorderradius(), and setSpacebetween() for eye geometry. Use setCyclops(true) for a single eye, and setHFlicker() or setVFlicker() for a scared shiver.
Expected result: A pet with a character you designed.
Step 6 - Upgrades
Goal: Add more life and reduce wires.
What to do: Put it in a small case with a window for the screen, as in the original build. Make it cordless with a LiPo cell and a TP4056 charger board.
Use the C3's Wi-Fi: subscribe to an MQTT topic so it looks surprised when the doorbell rings or happy when a build passes, or serve a tiny web page with mood buttons. Add a second touch pad on its back for a different reaction, or a light sensor so it sleeps when the room goes dark.
Expected result: A desk companion that keeps you company and tells you what is happening.
Conclusion
An ESP32-C3, a 0.96-inch OLED, an MPU6050, a TTP223B touch pad, and a KY-006 buzzer, tied together by the RoboEyes library and a four-state mood machine, make a desk pet that blinks, laughs, sulks, and sleeps. It is a practical introduction to sensor-driven behavior, and once the eyes are on the screen, it is hard to stop adding personality.
Want the exact parts used in this build? Grab them from ShillehTek.com. If you want help customizing this project or building something for your product, check out our IoT consulting services.
Credits
All photos and images in this tutorial are credited to Pradeep (pradeeplogu0) on Hackster.io (LGPL license). The original guide by Pradeep served as the reference for this ShillehTek version. We thank them for their excellent work in the maker community.





.png?v=25000753014097803521791168436)

.png?v=68677308723310773341791168436)


