

Project Overview
Arduino Uno LM35 thermometer with an LCD: Build a simple digital thermometer by reading an LM35 temperature sensor on an Arduino Uno and displaying the result on a 16x2 LCD, with a button to toggle between Celsius and Fahrenheit.
The LM35 is a straightforward analog temperature sensor: no library, no protocol, just 10 millivolts per degree Celsius on a single analog pin. Read it, do one multiplication, and show the result on the display.
- Time: ~45 minutes
- Skill level: Beginner
- What you will build: A desk thermometer with live readings and a Celsius/Fahrenheit toggle for a clean introduction to analog sensors.

Parts List
From ShillehTek
- Arduino Uno R3 Super Starter Kit - includes the LM35 sensor, button, and resistors
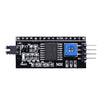
- LCD1602 Display + PCF8574 I2C backpack - two-wire readout
- Tactile Button Kit - the C/F toggle
- 400-Point Breadboard
- Dupont Jumper Wires
External
- None
Note: The LM35 outputs 0 V at 0 C and rises 10 mV per degree, so 250 mV means 25 C. That linear output is why it needs no calibration tables and no libraries.
Step-by-Step Guide
Step 1 - Wire the Sensor, LCD, and Button
Goal: Connect the LM35, I2C LCD, and toggle button to the Arduino Uno.
What to do: Place the LM35 with the flat face toward you. Wire left leg to 5V, middle leg to A3, and right leg to GND.
For the I2C LCD, connect SDA to A4, SCL to A5, and also connect 5V and GND.
Wire the button from D2 to GND and use INPUT_PULLUP in code.
Swapping the LM35 outer legs can make it heat up quickly. Double-check orientation before powering on.

Expected result: The hardware is wired and ready for the sketch.
Step 2 - Understand the Math
Goal: Convert an ADC reading into temperature.
What to do: analogRead() returns 0 to 1023 for 0 to 5 V. Convert to voltage with: raw × (5.0 / 1023).
Since the LM35 outputs 10 mV per degree C, convert voltage to Celsius with: voltage × 100.
Convert Celsius to Fahrenheit with: C × 9/5 + 32.
Expected result: You can convert any raw reading to C or F by hand.
Step 3 - Upload the Thermometer Sketch
Goal: Display live temperature on the LCD and toggle units with the button.
Code:
#include <LiquidCrystal_I2C.h>
LiquidCrystal_I2C lcd(0x27, 16, 2);

const int LM35 = A3;
const int BTN  = 2;
bool fahrenheit = false;

void setup() {
  lcd.init(); lcd.backlight();
  pinMode(BTN, INPUT_PULLUP);
}

void loop() {
  if (digitalRead(BTN) == LOW) {          // toggle units
    fahrenheit = !fahrenheit;
    delay(300);
  }

  long sum = 0;                            // average 10 samples for a steady reading
  for (int i = 0; i < 10; i++) { sum += analogRead(LM35); delay(5); }
  float voltage = (sum / 10.0) * (5.0 / 1023.0);
  float tempC = voltage * 100.0;           // 10 mV per degree C

  lcd.setCursor(0, 0);
  lcd.print("Temperature:    ");
  lcd.setCursor(0, 1);
  if (fahrenheit) { lcd.print(tempC * 9.0 / 5.0 + 32.0, 1); lcd.print(" F      "); }
  else            { lcd.print(tempC, 1);                     lcd.print(" C      "); }

  delay(500);
}
What to do: Upload the sketch. Pinch the LM35 between two fingers and watch the temperature climb. Press the button to flip between C and F.
Expected result: A live thermometer that responds within seconds.
Step 4 - Improve Accuracy
Goal: Reduce error from reference voltage and noise.
What to do: The Uno 5 V rail over USB is often closer to 4.8 to 4.9 V, which changes the voltage conversion. Measure your actual 5 V rail and use that number instead of 5.0.
Or switch to the internal 1.1 V reference using analogReference(INTERNAL), then use 1.1 / 1023 in the voltage calculation. This gives good resolution for about 0 to 110 C.
Averaging multiple samples (as done in the sketch) reduces jitter.
Expected result: Readings within about a degree of a reference thermometer.
Conclusion
This Arduino Uno LM35 thermometer shows how simple analog sensing can be: one analog pin, one linear formula, and a clear LCD readout with a Celsius/Fahrenheit toggle. The same ADC math, reference voltage choices, and averaging approach apply to many other analog sensors.
Want the exact parts used in this build? Grab them from ShillehTek.com. If you want help customizing this project or building something for your product, check out our IoT consulting services.
Credits
All photos and images in this tutorial are credited to Lucas Fernando on Hackster.io. The original guide by Lucas Fernando served as the reference for this ShillehTek version. We thank him for his excellent work in the maker community.







.png?v=25000753014097803521791168436)

.png?v=68677308723310773341791168436)


