

Project Overview
Arduino bidirectional visitor counter: Using an Arduino Uno and two IR obstacle sensor modules, you will detect direction (in vs out), show a live occupancy count on an I2C 16x2 LCD, and switch a relay to turn lights on when someone enters and off when the last person leaves.
Two infrared sensors mounted a few centimeters apart across a doorway can tell not just that someone passed, but which way they went: whichever beam breaks first gives the direction. Add an LCD and you have a live occupancy count; add a relay and the room's lights turn on when the first person enters and off when the last one leaves. It's a classic project that teaches sequence detection, the same logic behind rotary encoders and turnstiles.
- Time: ~1 hour
- Skill level: Beginner-Intermediate
- What you will build: A doorway counter with in/out/current totals on an LCD and an automatic light relay.

Parts List
From ShillehTek
- Arduino Uno R3 Super Starter Kit - Uno plus an IR obstacle sensor module (you will need two)
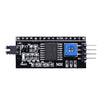
- LCD1602 Display + PCF8574 I2C backpack - I2C LCD readout for in/out/inside totals
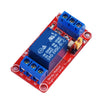
- 1-Channel 5V Relay Module - switches the lights based on occupancy
- 400-Point Breadboard - prototyping
- Dupont Jumper Wires - connections between modules
External
- A second IR obstacle sensor module (FC-51 / KY-032 style)
- Black electrical tape to narrow the sensors' field of view
Note: IR obstacle modules output LOW when something is in front of them. Mount them 10 to 15 cm apart, pointing across the doorway at chest height, and turn their sensitivity pots down so they only see a person passing close by, not the far wall.
Step-by-Step Guide
Step 1 - Wire sensors, LCD, and relay
Goal: Two eyes, a readout, a switch.
What to do: Sensor 1 (outer, the "entrance" side): VCC to 5V, GND to GND, OUT to D2. Sensor 2 (inner side): OUT to D3 (and VCC to 5V, GND to GND). LCD backpack: SDA to A4, SCL to A5. Relay: IN to D7, VCC to 5V, GND to GND.

Expected result: A doorway rig ready to count.
Step 2 - Implement the direction logic
Goal: Turn two beams into a direction.
What to do: When sensor 1 trips first, start a short timer and wait for sensor 2: if it trips within a second, someone walked in. If sensor 2 trips first and then sensor 1, someone walked out. If the second beam never trips (someone leaned in and stepped back), ignore it.
After any event, wait until both beams are clear again before counting anyone else. This prevents one slow person from being counted twice.
Expected result: A rule set that distinguishes in, out, and false alarms.
Step 3 - Upload the Arduino sketch
Goal: Run the counter, update the LCD, and control the relay based on occupancy.
Code:
#include <LiquidCrystal_I2C.h>
LiquidCrystal_I2C lcd(0x27, 16, 2);

const int S1 = 2, S2 = 3, RELAY = 7;              // S1 = outer sensor, S2 = inner sensor
const unsigned long WINDOW = 1000;                // ms allowed between the two beams
int in = 0, out = 0, inside = 0;

bool blocked(int pin) { return digitalRead(pin) == LOW; }

void show() {
  lcd.setCursor(0, 0); lcd.print("In:"); lcd.print(in); lcd.print(" Out:"); lcd.print(out); lcd.print("    ");
  lcd.setCursor(0, 1); lcd.print("Inside: "); lcd.print(inside); lcd.print("      ");
  digitalWrite(RELAY, inside > 0 ? HIGH : LOW);   // lights on while anyone is in the room
}

// wait (up to WINDOW ms) for the second sensor; returns true if it tripped
bool waitFor(int pin) {
  unsigned long t0 = millis();
  while (millis() - t0 < WINDOW) if (blocked(pin)) return true;
  return false;
}

void waitClear() { while (blocked(S1) || blocked(S2)); delay(150); }   // both beams free again

void setup() {
  pinMode(S1, INPUT); pinMode(S2, INPUT); pinMode(RELAY, OUTPUT);
  lcd.init(); lcd.backlight();
  show();
}

void loop() {
  if (blocked(S1)) {                              // outer beam first: someone entering
    if (waitFor(S2)) { in++; inside++; show(); }
    waitClear();
  }
  else if (blocked(S2)) {                         // inner beam first: someone leaving
    if (waitFor(S1) && inside > 0) { out++; inside--; show(); }
    waitClear();
  }
}
What to do: Upload, then walk a hand (or yourself) through the beams in each direction.
Expected result: Outer-then-inner adds an entry and lights the relay; inner-then-outer adds an exit. The inside count never goes below zero, and the relay turns off when the room empties.
Step 4 - Install and tune for a real doorway
Goal: Reliable counting in a real doorway.
What to do: Mount the sensors on the door frame with a small gap between them and wrap their sides in black tape to narrow the beam. If two people walking close together count as one, reduce WINDOW; if fast walkers are missed, increase it. Keep the sensors out of direct sunlight, which floods IR receivers.
Expected result: Accurate counts through a normal day of traffic.
Step 5 - Optional upgrades
Goal: From counter to system.
What to do: Store the daily totals in EEPROM, add a reset button, or move the sketch to an ESP32 and publish the occupancy over MQTT to Home Assistant (for example, turn off the heating when the office is empty). Replace the IR pair with two VL53L0X distance sensors for wider doorways.
Expected result: Occupancy data you can act on.
Conclusion
With an Arduino Uno, two IR sensors, and a simple timing window, you can count people in and out, display live occupancy on an LCD, and drive a relay so the lights follow the room state. The core pattern (first event, wait for the second, then wait for quiet) is useful anywhere order matters.
Want the exact parts used in this build? Grab them from ShillehTek.com. If you want help customizing this project or building something for your product, check out our IoT consulting services.
Credit: Photos and images are credited to Yogeshwaran on Hackster.io. The original guide by Yogeshwaran served as the reference for this ShillehTek version.






.png?v=25000753014097803521791168436)

.png?v=68677308723310773341791168436)


