

Project Overview
Arduino Uno + TB6612FNG motor driver: In this project, you will wire and program a TB6612FNG to control a 12V DC motor (or a 2-wire linear actuator) with forward, reverse, braking, and PWM speed control.
The TB6612FNG is a compact, efficient successor to the L298N. Wire it once, install one library, and get clean motor control without the heat and voltage loss common to older drivers.
- Time: ~30 minutes
- Skill level: Beginner
- What you will build: An Arduino-controlled 12V motor rig for gear motors, linear actuators, or other small DC motors, using a clear wiring diagram for the 2-wire DC case.

Parts List
From ShillehTek
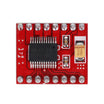
- TB6612FNG Pre-Soldered Dual DC & Stepper Motor Driver - the dual H-bridge driver that provides direction, braking, and PWM speed control.
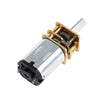
- N20 Micro Metal Gear Motor (12V, 100RPM) - a convenient 12V test motor for verifying wiring and code.
- Arduino Uno R3 - runs the control code and outputs PWM and direction signals.
- 400-Point Breadboard - makes the wiring quick and tidy.
- Dupont Jumper Wires - for Arduino-to-driver logic connections.
External
- 12V external power supply (an adjustable bench-style supply with a DC terminal connector is ideal)
- Optional: a 12V linear actuator (electrically it is a DC motor with two wires)
Note: The TB6612 drives two DC motors (or one stepper) at up to 1.2 A per channel with much better efficiency than the L298N, so you avoid a large heatsink and the typical voltage loss seen on older drivers.
Step-by-Step Guide
Step 1 - Understand what the TB6612FNG provides
Goal: Know what this driver does and what you need to control it.
What to do: The TB6612FNG is a dual H-bridge motor driver. Each motor channel uses two direction pins (AIN1/AIN2) plus a PWM pin for speed control, and both channels share a STBY (standby) enable pin. Because it uses MOSFET outputs, it runs cooler and delivers more usable motor voltage than older drivers. This guide focuses on the common 2-wire DC motor case (including linear actuators).
Expected result: You know the control pins you are about to wire: AIN1, AIN2, PWMA, and STBY (plus power and ground).
Step 2 - Wire the Arduino, TB6612FNG, motor, and 12V supply
Goal: Build a working wiring setup with shared ground and separate motor power.
What to do: Wire the control and power connections as follows: AIN1 to D5, AIN2 to D4, PWMA to D10, and STBY to D9. Connect driver VCC to Arduino 5V for logic power. Connect VM to the +12V motor supply. Make all grounds common (Arduino GND, driver GND, and power supply negative). Connect the motor wires to the MOTORA terminals. If the motor direction is opposite of what you expect later, swap the two MOTORA wires to reverse polarity.

Expected result: A fully wired rig where the Arduino powers TB6612 logic (VCC) and the external supply powers the motor (VM), with a shared ground.
Step 3 - Install the library and upload the sketch
Goal: Drive the motor using readable library commands.
What to do: In the Arduino IDE, open Library Manager and install SparkFun TB6612FNG. Upload the sketch below to run one motor through forward, reverse, braking, and a slower speed test.
Code:
#include <SparkFun_TB6612.h>

// Pins - PWMA must be a PWM-capable pin
#define AIN1 5
#define AIN2 4
#define PWMA 10
#define STBY 9

const int offsetA = 1;               // flip to -1 to reverse "forward"
Motor motor1 = Motor(AIN1, AIN2, PWMA, offsetA, STBY);

void setup() {
}

void loop() {
  motor1.drive(255, 1000);           // full speed forward, 1 s
  motor1.drive(-255, 1000);          // full speed reverse, 1 s
  motor1.brake();
  delay(1000);

  motor1.drive(128, 1000);           // half speed
  motor1.brake();
  delay(1000);
}
Expected result: The motor (or actuator) runs forward, reverses, brakes, then repeats at a lower speed.
Step 4 - Adapt the control pattern to your application
Goal: Turn the demo into a reusable motor-control building block.
What to do: Use the same wiring and library calls to fit your project needs. A linear actuator behaves like a DC motor and can be used for mechanisms such as sliders or lids. The second driver channel (BIN1/BIN2/PWMB) can run a second DC motor for a drivetrain. Replace fixed drive() values with sensor input or serial commands for interactive control. Match your motor supply voltage to your motor (5V to 12V supported for typical small DC motors).
Expected result: You have a motor control setup you can reuse and expand for real projects.
Conclusion
You built an Arduino Uno motor controller using the TB6612FNG to run a 12V DC motor (or 2-wire linear actuator) with PWM speed control, forward and reverse direction, and braking. With the wiring set up correctly and the SparkFun library installed, controlling motion becomes a simple set of readable function calls.
Reference credit: this ShillehTek version is based on the excellent original build by Bo Bomwan on Hackster.io.
Want the exact parts used in this build? Grab them from ShillehTek.com. If you want help customizing this project or building something for your product, check out our IoT consulting services.





.png?v=25000753014097803521791168436)

.png?v=68677308723310773341791168436)


