

Project Overview
Tetris on an 8x8 WS2812 Matrix on an Arduino Nano: Build a complete Tetris game on an Arduino Nano using a WS2812 8x8 LED matrix, three buttons (left, right, rotate), and a buzzer so you can play falling-block Tetris on a tiny pixel board.
This version includes all seven standard tetrominoes in their classic colours, rotation with wall kicks, flashing line clears, scoring, speed-up as you score, and game over with restart.
- Time: ~1 hour
- Skill level: Intermediate
- What you will build: A complete Tetris with 7 tetrominoes x 4 rotations stored in flash, collision detection, wall kicks, line clears with a flash, scoring, speed-up, and game over/restart.

Parts List
From ShillehTek
- Arduino Nano V3.0 Pre-Soldered - runs the Tetris sketch and reads the buttons.
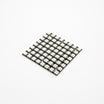
- WS2812 8x8 LED Matrix - the 64-pixel display for the game (get two for an 8x16 board, see Step 5).
- KY-006 Passive Buzzer - sound effects for locks, line clears, and game over.
- Tactile Button Kit x3 - left, right, and rotate controls.
- Resistor Kit - 330 ohm in series with the WS2812 data line.
- Electrolytic Capacitor Kit - 220 uF across the matrix 5V and GND near the matrix.
- 830-Point Breadboard - prototyping the wiring.
- Dupont Jumper Wires - connections between the Nano, matrix, buttons, and buzzer.
External
- None
Note: the sketch runs the matrix at brightness 40/255 so USB power is enough. For a boxed game at full brightness, power the matrix from a 5 V 3 A supply and share GND with the Nano. 64 pixels at full white can draw close to 4 A.
Step-by-Step Guide
Step 1 - Wire It
Goal: Connect the WS2812 matrix, three buttons, and buzzer to the Arduino Nano.
What to do: Wire the matrix DIN to Arduino D6 through a 330 ohm resistor. Connect matrix 5V to Nano 5V and matrix GND to Nano GND. Place a 220 uF capacitor across 5V and GND near the matrix.
Wire the buttons to GND and the input pins using the Nano internal pull-ups: left to D9, right to D10, rotate to D8. Wire the KY-006 buzzer: S to D2 and negative to GND.
Orient the matrix so its first pixel is at the top-left and the data runs in a snake pattern row by row.

Expected result: You have five Arduino pins in use and can install FastLED from the Arduino Library Manager.
Step 2 - How the Pieces Are Stored
Goal: Understand the compact tetromino shape table used by the sketch.
What to do: Each tetromino lives in a 4x4 box. Each of its four cells is stored as one byte: the cell index in that box, calculated as row x 4 + column. That means one rotation is four bytes, and all 7 pieces x 4 rotations fit in 112 bytes of flash.
Moving a piece is changing the box position (px, py). Rotating is selecting the next of its four stored states. The legality check unpacks the four cells and tests them against the walls, the floor, and the locked blocks.
Expected result: You can add or edit shapes by changing four numbers per rotation.
Step 3 - Upload the Sketch
Goal: Compile and upload the complete Arduino Nano Tetris sketch.
What to do: Install the FastLED library, paste the code below into the Arduino IDE, select the correct Nano board/port, and upload.
Code:
#include <FastLED.h>
#define DATA_PIN 6
#define BTN_L   9
#define BTN_R   10
#define BTN_ROT 8
#define BUZZ    2
CRGB leds[64];
CRGB field[8][8];                              // locked blocks (black = empty)

// 7 pieces x 4 rotations x 4 cells; each cell is an index into a 4x4 box: row*4 + column
const uint8_t SHAPE[7][4][4] PROGMEM = {
  {{4,5,6,7},  {2,6,10,14}, {4,5,6,7},  {2,6,10,14}},   // I
  {{1,2,5,6},  {1,2,5,6},   {1,2,5,6},  {1,2,5,6}},     // O
  {{1,4,5,6},  {1,5,6,9},   {4,5,6,9},  {1,4,5,9}},     // T
  {{1,2,4,5},  {1,5,6,10},  {1,2,4,5},  {1,5,6,10}},    // S
  {{0,1,5,6},  {2,5,6,9},   {0,1,5,6},  {2,5,6,9}},     // Z
  {{0,4,5,6},  {1,2,5,9},   {4,5,6,10}, {1,5,8,9}},     // J
  {{2,4,5,6},  {1,5,9,10},  {4,5,6,8},  {0,1,5,9}}      // L
};
const CRGB COLOR[7] = {CRGB::Cyan, CRGB::Yellow, CRGB::Purple, CRGB::Green, CRGB::Red, CRGB::Blue, CRGB::OrangeRed};

int piece, rot, px, py;
unsigned int speedMs = 500;
unsigned long lastFall = 0, score = 0;

uint16_t XY(int x, int y) { return (y & 1) ? y * 8 + (7 - x) : y * 8 + x; }   // serpentine matrix
void beep(int f, int ms) { tone(BUZZ, f, ms); }
bool occupied(int x, int y) { return field[y][x].r | field[y][x].g | field[y][x].b; }

bool fits(int x, int y, int r) {                // can the piece sit at box position (x,y) in rotation r?
  for (int i = 0; i < 4; i++) {
    uint8_t c = pgm_read_byte(&SHAPE[piece][r][i]);
    int cx = x + (c & 3), cy = y + (c >> 2);
    if (cx < 0 || cx > 7 || cy > 7) return false;          // walls and floor
    if (cy >= 0 && occupied(cx, cy)) return false;          // locked blocks (cells above the top are fine)
  }
  return true;
}

void spawn() { piece = random(7); rot = 0; px = 2; py = -2; }

void gameOver() {
  for (int i = 0; i < 3; i++) {
    fill_solid(leds, 64, CRGB::Red); FastLED.show(); beep(200, 150); delay(200);
    FastLED.clear(true); delay(200);
  }
  memset(field, 0, sizeof field); score = 0; speedMs = 500;
  while (digitalRead(BTN_L) && digitalRead(BTN_R) && digitalRead(BTN_ROT)) {}   // any button restarts
  delay(300);
}

void clearLines() {
  int n = 0;
  for (int y = 7; y >= 0; y--) {
    bool full = true;
    for (int x = 0; x < 8; x++) if (!occupied(x, y)) { full = false; break; }
    if (!full) continue;
    n++;
    for (int x = 0; x < 8; x++) leds[XY(x, y)] = CRGB::White;      // flash the row
    FastLED.show(); delay(120);
    for (int yy = y; yy > 0; yy--) for (int x = 0; x < 8; x++) field[yy][x] = field[yy - 1][x];
    for (int x = 0; x < 8; x++) field[0][x] = CRGB::Black;
    y++;                                                            // re-check the row that dropped in
  }
  if (n) {
    score += (n == 1) ? 100 : 400 * (n - 1);                        // 100, 400, 800, 1200
    beep(1200, 80);
    if (speedMs > 150) speedMs -= 10 * n;                           // faster every line
    Serial.print("score "); Serial.println(score);
  }
}

void tick() {                                   // one gravity step
  if (fits(px, py + 1, rot)) { py++; return; }
  bool over = false;                            // can't fall: lock the piece
  for (int i = 0; i < 4; i++) {
    uint8_t c = pgm_read_byte(&SHAPE[piece][rot][i]);
    int cx = px + (c & 3), cy = py + (c >> 2);
    if (cy < 0) over = true; else field[cy][cx] = COLOR[piece];
  }
  beep(300, 20);
  if (over) gameOver(); else clearLines();
  spawn();
}

void handleButtons() {
  static unsigned long lastMove = 0; static bool rotWasDown = false;
  if (millis() - lastMove >= 120) {                                 // slide: one cell per 120 ms while held
    if (!digitalRead(BTN_L) && fits(px - 1, py, rot)) { px--; lastMove = millis(); }
    if (!digitalRead(BTN_R) && fits(px + 1, py, rot)) { px++; lastMove = millis(); }
  }
  bool rotDown = !digitalRead(BTN_ROT);
  if (rotDown && !rotWasDown) {                                    // rotate once per press
    int r = (rot + 1) % 4;
    if (fits(px, py, r))          { rot = r; beep(700, 15); }
    else if (fits(px - 1, py, r)) { px--; rot = r; beep(700, 15); }   // wall kick left
    else if (fits(px + 1, py, r)) { px++; rot = r; beep(700, 15); }   // wall kick right
  }
  rotWasDown = rotDown;
}

void draw() {
  for (int y = 0; y < 8; y++) for (int x = 0; x < 8; x++) leds[XY(x, y)] = field[y][x];
  for (int i = 0; i < 4; i++) {                                     // the falling piece on top
    uint8_t c = pgm_read_byte(&SHAPE[piece][rot][i]);
    int cx = px + (c & 3), cy = py + (c >> 2);
    if (cy >= 0) leds[XY(cx, cy)] = COLOR[piece];
  }
  FastLED.show();
}

void setup() {
  Serial.begin(9600);
  FastLED.addLeds<WS2812B, DATA_PIN, GRB>(leds, 64);
  FastLED.setBrightness(40);
  pinMode(BTN_L, INPUT_PULLUP); pinMode(BTN_R, INPUT_PULLUP); pinMode(BTN_ROT, INPUT_PULLUP);
  randomSeed(analogRead(A0));
  spawn();
}

void loop() {
  handleButtons();
  if (millis() - lastFall >= speedMs) { lastFall = millis(); tick(); }
  draw();
}
Expected result: A coloured piece drops in from above the top row. Slide it with left/right and rotate with the third button. If you rotate against a wall, it can nudge sideways (wall kick). Complete a row and it flashes white, collapses, and the buzzer chirps. The fall speed increases as you clear lines. Fill the board and it flashes red, then press any button for a new game. The score prints to the Serial Monitor.
Step 4 - Read the Logic
Goal: Understand how movement, collision, rotation, and game over work.
What to do: Everything routes through fits(). Moving, rotating, and falling all check whether the piece would be legal before updating anything, so collision logic stays consistent.
Pieces spawn two rows above the top (py = -2) so they enter smoothly. Cells above the top are ignored by the check. Game over is detected when a piece locks while any cell is still above row 0.
Line clearing scans from the bottom up and re-checks a row after collapsing, so double and triple clears work.
Expected result: You know where to modify the code to add features.
Step 5 - Go Taller, Go Further
Goal: Extend the same approach to a larger playfield and extra gameplay features.
What to do: Chain a second 8x8 matrix (DOUT of the first to DIN of the second) for an 8-wide by 16-tall board. Make the field 16 rows, allocate 128 LEDs, and extend XY() so rows 8 to 15 map to the second panel (index + 64, same snake).
You can also add features like soft drop, hard drop, a next-piece preview, and a high score in EEPROM. Show the score on a TM1637 or an OLED. Swap the buttons for a joystick module for an arcade feel.
Expected result: A bigger board and a clear path to enhancements using the same core logic.
Conclusion
A 112-byte shape table, one fits() function, and a gravity timer are enough to run Tetris on an Arduino Nano with a WS2812 8x8 LED matrix. With wall kicks, line clears, scoring, and speed-up, you have a complete falling-block game in a compact and readable sketch.
Want the exact parts used in this build? Grab them from ShillehTek.com. If you want help customizing this project or building something for your product, check out our IoT consulting services.
Credits
All photos and images in this tutorial are credited to Mirko Pavleski (mircemk) on Hackster.io. The original guide by Mirko Pavleski served as the reference for this ShillehTek version. We thank them for their excellent work in the maker community.








.png?v=25000753014097803521791168436)

.png?v=68677308723310773341791168436)