

Project Overview
Arduino Nano Smart Cane with HC-SR04 ultrasonic sensor: Build a distance-warning cane attachment where the HC-SR04 scans ahead and the Arduino Nano increases buzzer beeps and vibration pulses as obstacles get closer, similar to a car parking sensor but felt in the hand.
This is a practical assistive-tech build with clear, real-world feedback output, and it is approachable as a first Arduino Nano project.
- Time: ~1.5 hours
- Skill level: Beginner-Intermediate
- What you will build: A battery-powered cane attachment with three warning zones, proportional beeping and vibration, and a mute switch for quiet mode.

Parts List
From ShillehTek
- Arduino Nano V3.0 Pre-Soldered - the main controller for reading distance and driving alerts
- Arduino Uno R3 Super Starter Kit - source of the HC-SR04, switch, and resistors
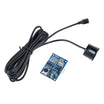
- JSN-SR04T Waterproof Ultrasonic - optional swap if you need a weather-resistant sensor
- KY-006 Passive Buzzer - audible beeps that speed up as distance decreases
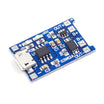
- TP4056 Li-ion Charger Board - rechargeable power option for an 18650 in the handle
- Dupont Jumper Wires - quick wiring between modules and the Nano
External
- A coin-type vibration motor, an NPN transistor (2N2222), and a 1kΩ resistor to drive the motor
- A slide switch, a 18650 cell or 9 V battery, a cane (or length of PVC pipe), zip ties, and hot glue
Note: Do not drive the vibration motor straight from a Nano pin. Motors draw more current than a pin can supply and can kick back voltage spikes. Use a transistor plus a base resistor; the sketch simply switches the transistor base.
Step-by-Step Guide
Step 1 - Wire the Electronics
Goal: Connect the ultrasonic sensor, buzzer, vibration motor driver, and mute switch.
What to do: Wire the HC-SR04 as VCC to 5V, GND to GND, TRIG to D3, and ECHO to D2. Connect the buzzer to D5.
For the vibration motor, use a transistor driver: D6 to 1kΩ to the transistor base; place the motor between 5V and the transistor collector; connect the transistor emitter to GND.
Wire the mute switch between D7 and GND. For power, use battery to VIN (7 to 12 V) or, with the TP4056 and a cell, battery positive to the 5V pin through a small boost module.

Expected result: A compact module that powers on and is ready to mount.
Step 2 - Mount It on the Cane
Goal: Aim the sensor forward and place feedback where it can be felt and heard.
What to do: Zip-tie the HC-SR04 about a third of the way up the shaft, angled slightly downward so it can detect knee-height obstacles and steps. Glue the vibration motor inside or against the handle grip. Put the Nano, battery, and switch in a small box on the shaft.
Expected result: Nothing dangles, and the vibration motor is clearly felt through the grip.
Step 3 - Upload the Sketch
Goal: Read distance, map it into warning zones, and drive buzzer plus vibration.
What to do: Upload the sketch below to your Arduino Nano, then walk the cane toward a wall.
const int TRIG = 3, ECHO = 2, BUZZ = 5, MOTOR = 6, MUTE = 7;
const int FAR_CM = 120, NEAR_CM = 60, DANGER_CM = 30;   // the three warning zones

long readCm() {
  digitalWrite(TRIG, LOW);  delayMicroseconds(2);
  digitalWrite(TRIG, HIGH); delayMicroseconds(10);
  digitalWrite(TRIG, LOW);
  long us = pulseIn(ECHO, HIGH, 30000);
  return us == 0 ? 999 : us * 0.034 / 2;
}

void setup() {
  pinMode(TRIG, OUTPUT); pinMode(ECHO, INPUT);
  pinMode(BUZZ, OUTPUT); pinMode(MOTOR, OUTPUT);
  pinMode(MUTE, INPUT_PULLUP);
  Serial.begin(9600);
}

void loop() {
  long cm = 0;
  for (int i = 0; i < 3; i++) cm += readCm();   // average three pings for stability
  cm /= 3;
  bool quiet = (digitalRead(MUTE) == LOW);       // switch closed = vibration only
  Serial.println(cm);

  if (cm > FAR_CM) {                             // clear path: silence
    digitalWrite(MOTOR, LOW);
    delay(100);
    return;
  }

  // closer = shorter gap between pulses: 600 ms at 120 cm down to ~60 ms at 30 cm
  int gap = map(constrain(cm, DANGER_CM, FAR_CM), DANGER_CM, FAR_CM, 60, 600);
  int pitch = (cm < DANGER_CM) ? 2000 : (cm < NEAR_CM) ? 1200 : 800;   // zone tone

  digitalWrite(MOTOR, HIGH);
  if (!quiet) tone(BUZZ, pitch, 40);
  delay(50);
  digitalWrite(MOTOR, LOW);
  delay(gap);
}
Expected result: Nothing happens beyond 1.2 m; slow low pulses as an obstacle appears; faster, higher pulses inside 60 cm; rapid high-pitched buzzing and continuous-feeling vibration under 30 cm. Flip the mute switch and only the vibration remains.
Step 4 - Test Like a User Would
Goal: Confirm the feedback is reliable and comfortable in real use.
What to do: Close your eyes (with a friend watching) and walk a hallway using only the feedback. Adjust the sensor angle so steps down are caught, tune FAR_CM for the walking pace, and make sure soft surfaces like curtains still register. Ultrasonic sensors sometimes miss fabric, which is a reason to keep the zones conservative.
Add a low-battery beep pattern so the cane never dies silently.
Expected result: Feedback that is informative rather than annoying.
Step 5 - Improve It
Goal: Extend the idea without changing the core concept.
What to do: Add a second sensor pointing higher for head-height obstacles (branches, signs) with a distinct vibration rhythm, add a water sensor at the tip for puddles, or swap the HC-SR04 for the waterproof JSN-SR04T so weather is not a concern. An ESP32 version could pair with a phone for GPS guidance, but the local, instant feedback is the part that matters most here.
Expected result: A cane tailored to the person who will use it.
Conclusion
In this build, an Arduino Nano reads distance from an HC-SR04 ultrasonic sensor and maps it into vibration and buzzer patterns that get more urgent as obstacles get closer. The key is the distance-to-feedback mapping (pulse rate, pitch, vibration), and tuning it for clear, usable alerts.
Want the exact parts used in this build? Grab them from ShillehTek.com. If you want help customizing this project or building something for your product, check out our IoT consulting services.
Credits: All photos and images in this tutorial are credited to Mohammad Sohail on Hackster.io. The original guide by Mohammad Sohail served as the reference for this ShillehTek version.






.png?v=25000753014097803521791168436)

.png?v=68677308723310773341791168436)


