


Project Overview
Arduino Nano + DRV8825 stepper driver: In this build, you will wire a DRV8825 to an Arduino Nano to drive a NEMA 17 stepper motor with correct current limiting and optional 1/32 microstepping for smoother motion.
The DRV8825 is a common stepper driver for 3D printers, CNC machines, and precision positioning systems. It shares the same footprint as the A4988, but supports 1/32 microstepping (vs 1/16), higher current capability (2.5 A per coil vs 2 A), and improved thermal behavior.
This guide covers wiring, setting the current limit (critical to avoid damaging the driver), selecting microstepping modes, and using acceleration control for smoother starts and stops.
- Time: 30 to 60 minutes
- Skill level: Beginner to Intermediate
- What you will build: A DRV8825-controlled NEMA 17 stepper setup that spins reliably and can ramp smoothly using AccelStepper.
Parts List
From ShillehTek
- Arduino Nano V3.0 - the example controller board used for STEP/DIR control.
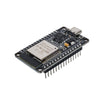
- ESP32 WROOM Dev Board - optional, for WiFi-controlled motion projects.
- Breadboard + DuPont wires - for quick prototyping and clean jumper connections.
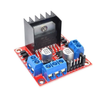
- L298N Motor Driver - alternative option for DC motors (not for steppers).
External
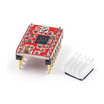
- DRV8825 stepper driver module (use one that includes a 100 uF capacitor, or add one).
- NEMA 17 bipolar stepper motor (example: 1.7 A per phase, 200 steps/rev).
- 12 V or 24 V motor power supply (rated at least 2 A).
- Small multimeter for current-limit calibration (Vref measurement).
Note: Connect a 100 uF capacitor between VMOT and GND close to the DRV8825. Without it, motor kickback can create voltage spikes that damage the driver.
Step-by-Step Guide
Step 1 - Understand why DRV8825 is used over A4988
Goal: Know what you gain (and why it matters) before wiring anything.
What to do: Compare the driver limits and capabilities so you choose the right module for your motor and supply voltage.

- Current: DRV8825 = 2.5 A/coil (with heatsink), A4988 = 2 A/coil max.
- Microstepping: DRV8825 goes to 1/32; A4988 caps at 1/16.
- Voltage: DRV8825 accepts 8.2 to 45 V; A4988 accepts 8 to 35 V.
- Thermal shutdown: DRV8825 has automatic thermal cutoff.
Expected result: You understand when DRV8825 is the better default (most 3D printer and CNC use cases) and when A4988 can still be acceptable for lower-current experiments.
Step 2 - Wire the DRV8825 to the Arduino Nano and motor supply
Goal: Connect logic, motor power, and coil outputs correctly before powering on.
What to do: Follow the mapping below and double-check polarity for VMOT and GND.
Code:
DRV8825      Arduino Nano
STEP     ->  D3
DIR      ->  D2
ENABLE   ->  D8   (LOW = enabled, HIGH = disabled)
M0, M1, M2 -> GND for full step / +5V combos for microstepping
VMOT     ->  Motor +12V (or +24V)
GND (motor) -> Motor supply GND
VDD      ->  Arduino 5V
GND (logic) -> Arduino GND
1A, 1B, 2A, 2B -> stepper motor coils
Critical: connect the 100 uF capacitor between VMOT and GND as close as possible to the module. Without it, motor kickback voltage can spike into the driver and destroy it. Many modules ship without one soldered on, so add it if needed.
Expected result: Your DRV8825 has correct logic power, motor power, common grounds, and coil wiring ready for calibration and testing.
Step 3 - Set the DRV8825 current limit using Vref
Goal: Prevent overheating and protect the driver and motor by setting the correct coil current.
What to do: Calculate a target current, compute Vref, and adjust the trim pot while measuring with a multimeter.

- Look up your motor’s rated phase current (example: 1.7 A for a common NEMA 17).
- Multiply by 0.7 for a safety margin: 1.7 × 0.7 = 1.19 A.
- Calculate Vref = current × 2 × Rsense. Rsense is 0.1Ω on most DRV8825 boards. Example: Vref = 1.19 × 2 × 0.1 = 0.238 V.
- Power the driver with motor + logic supply. Do NOT connect the motor yet.
- Put a multimeter between the VREF pad (small pad next to the trim pot) and any GND.
- Turn the trim pot until the meter reads your calculated Vref.
- Now connect the motor.
Expected result: The motor runs with good torque while staying cool to the touch during continuous motion.
Step 4 - Upload a basic sketch to make the motor spin
Goal: Confirm your wiring and driver enable/dir/step control works.
What to do: Upload the sketch below, then change direction by toggling DIR.
Code:
const int STEP_PIN = 3;
const int DIR_PIN  = 2;
const int EN_PIN   = 8;

void setup() {
  pinMode(STEP_PIN, OUTPUT);
  pinMode(DIR_PIN, OUTPUT);
  pinMode(EN_PIN, OUTPUT);
  digitalWrite(EN_PIN, LOW);   // enable driver
  digitalWrite(DIR_PIN, HIGH);
}

void loop() {
  digitalWrite(STEP_PIN, HIGH);
  delayMicroseconds(500);
  digitalWrite(STEP_PIN, LOW);
  delayMicroseconds(500);
}
Expected result: The motor spins. In full-step mode, this sketch outputs 1000 steps/sec which is about 5 revolutions/sec for a 200 steps/rev motor. Reverse by setting DIR_PIN LOW.
Step 5 - Select microstepping modes with M0, M1, and M2
Goal: Use DRV8825 microstepping to reduce vibration and smooth motion.
What to do: Set M0/M1/M2 HIGH or LOW (via wiring) to select the microstepping mode.
Code:
M2 M1 M0 :: Microstep
L  L  L  :: full step (200 steps/rev)
L  L  H  :: 1/2 step
L  H  L  :: 1/4 step
L  H  H  :: 1/8 step
H  L  L  :: 1/16 step
H  H  L  :: 1/32 step (smoothest, quietest)
At 1/32, one motor revolution takes 6400 STEP pulses instead of 200. This greatly smooths motion at slow speeds. Trade-off: lower per-microstep torque and a higher STEP pulse rate needed for the same visible speed.
Expected result: The motor runs quieter and smoother, especially at low RPM, when you switch to higher microstepping.
Step 6 - Add smooth acceleration and deceleration with AccelStepper
Goal: Avoid jerky starts by ramping speed and improving usable torque.
What to do: Use the AccelStepper library to set max speed, acceleration, and a target move.
Code:
#include <AccelStepper.h>

AccelStepper motor(1, 3, 2);   // driver mode, STEP, DIR

void setup() {
  motor.setMaxSpeed(2000);      // steps/sec
  motor.setAcceleration(500);   // steps/sec^2
  motor.moveTo(6400);           // 1 rev at 1/32
}

void loop() {
  motor.run();                  // must call often
}
Expected result: The motor accelerates smoothly toward the target instead of starting instantly at full speed.
Step 7 - Map the setup to real-world motion projects
Goal: Understand where this DRV8825 + stepper approach is commonly used.
What to do: Use the same wiring and control concepts for these typical applications.
- 3D printer axes (X, Y, Z) where DRV8825 is commonly used on maker control stacks.
- Small CNC builds such as MPCNC and similar gantry systems.
- Camera sliders and motorized dollies that need smooth microstepped motion.
- Automatic curtain openers with a gear reduction.
- Focus stacking rails for macro photography.
- Astronomy trackers where high microstepping plus gear reduction supports very slow motion rates.
Expected result: You can reuse the same DRV8825 wiring, current limiting, and step control patterns in a wide range of motion projects.
Conclusion
The DRV8825 is a strong upgrade path over the A4988: same footprint and control signals, higher current capability, more microstepping options, and better thermal protection. Once you set the current limit correctly and add the input capacitor on VMOT, it becomes a reliable driver for 3D printers, CNC machines, camera rigs, and precision positioning projects.
Want the exact parts used in this build? Grab them from ShillehTek.com. If you want help customizing this project or building something for your product, check out our IoT consulting services.
Credit: This guide was inspired by "Controll a Stepper Motor With the DRV8825" on Instructables. Images credited to the original author.





.png?v=25000753014097803521791168436)

.png?v=68677308723310773341791168436)


