

Project Overview
Arduino Keypad Piano: Build an Arduino Nano + 4x4 membrane keypad + passive piezo buzzer piano that plays 16 notes across two octaves and sustains the note while you hold a key.
You will also learn how a matrix keypad fits 16 switches into 8 pins, how tone() generates musical frequencies, and how to map keypad inputs to a frequency lookup table.
- Time: ~30 minutes
- Skill level: Beginner
- What you will build: A playable two-octave instrument with sustain, plus a Serial readout of every note's frequency.

Parts List
From ShillehTek
-
Arduino Nano V3.0 Pre-Soldered - runs the keypad scan and generates audio with
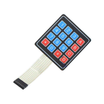
tone() - 4x4 Membrane Matrix Keypad - 16 keys using only 8 Arduino pins (matrix wiring)
- KY-006 Passive Buzzer - must be passive to play different pitches (active buzzers typically play one pitch)
- 400-Point Breadboard - quick, solderless wiring
- Dupont Jumper Wires - connect keypad rows/columns and the buzzer to the Arduino
External
- Optional: a small 8 ohm speaker with a 100 ohm series resistor for a fuller sound than the piezo
Note: Musical pitch doubles every octave and each semitone is a factor of 2^(1/12) 8 1.0595. Middle C is 262 Hz, A above it is 440 Hz, and the C an octave up is 523 Hz. The sketch frequencies come directly from that math.
Step-by-Step Guide
Step 1 - Wire the Keypad and Buzzer
Goal: Connect a 4x4 keypad (16 keys) using 8 Arduino pins, plus one pin for the buzzer.
What to do: Hold the keypad with the ribbon toward you. The first four wires are rows and the next four are columns.
Connect rows to D2, D3, D4, D5. Connect columns to D6, D7, D8, D9. Connect the buzzer signal to D11 and buzzer GND to Arduino GND.

Expected result: The keypad is wired in a way the Keypad library can scan.
Step 2 - Install the Keypad Library
Goal: Use a proven library to handle scanning the keypad matrix.
What to do: In the Arduino IDE Library Manager, install Keypad by Mark Stanley and Alexander Brevig. It drives each row in turn and reads the columns to detect a pressed key, then you read it with getKey().
Expected result: The library installs successfully, and its examples can print key characters.
Step 3 - Upload the Sketch
Goal: Map each keypad character to a note frequency and play it while the key is held.
What to do: Paste this sketch into the Arduino IDE and upload it to your Arduino Nano.
Code:
#include <Keypad.h>

const byte ROWS = 4, COLS = 4;
char keys[ROWS][COLS] = {
  {'1','2','3','A'},
  {'4','5','6','B'},
  {'7','8','9','C'},
  {'*','0','#','D'}
};
byte rowPins[ROWS] = {2, 3, 4, 5};
byte colPins[COLS] = {6, 7, 8, 9};
Keypad pad(makeKeymap(keys), rowPins, colPins, ROWS, COLS);

const int BUZZ = 11;

int noteFor(char k) {                 // C4 up to D6, reading the keypad left-to-right
  switch (k) {
    case '1': return 262;  case '2': return 294;  case '3': return 330;  case 'A': return 349;
    case '4': return 392;  case '5': return 440;  case '6': return 494;  case 'B': return 523;
    case '7': return 587;  case '8': return 659;  case '9': return 698;  case 'C': return 784;
    case '*': return 880;  case '0': return 988;  case '#': return 1047; case 'D': return 1175;
  }
  return 0;
}

void setup() {
  pinMode(BUZZ, OUTPUT);
  Serial.begin(9600);
}

void loop() {
  char k = pad.getKey();              // scans the matrix every call
  if (k) {                            // a new key went down: start its note
    int f = noteFor(k);
    tone(BUZZ, f);
    Serial.print(k); Serial.print(" -> "); Serial.print(f); Serial.println(" Hz");
  }
  if (pad.getState() == RELEASED) noTone(BUZZ);   // key came up: stop the note
}
Open the Serial Monitor at 9600 baud. Play 1-2-3-A-4-5-6-B for C-D-E-F-G-A-B-C, a full scale.
Expected result: Each key sustains its note until you release it, and the Serial Monitor prints the key and frequency.
Step 4 - Play Something
Goal: Use the keypad mapping to play a recognizable melody.
What to do: For "Twinkle Twinkle" on this layout, play 1 1 4 4 5 5 4, then A A 3 3 2 2 1 (C C G G A A G, then F F E E D D C).
You can write your favorite tune as a string of keypad characters and tape a note-name chart over the keypad.
Expected result: Recognizable music from the keypad and buzzer.
Step 5 - Level Up
Goal: Extend the project with optional features.
What to do: Try adding a potentiometer on A0 to shift octaves (multiply every frequency by 2 or 0.5), or create a record/playback mode that stores key presses and their durations in an array.
You can also drive a speaker through a small amplifier for more volume. For polyphony, you will need a different approach than tone().
Expected result: A keypad instrument with features you chose.
Conclusion
This Arduino keypad piano uses a 4x4 matrix keypad and a passive buzzer to turn button presses into sustained notes across two octaves. The same matrix scanning and lookup-table approach also applies to menus, passwords, and other user interfaces.
Want the exact parts used in this build? Grab them from ShillehTek.com. If you want help customizing this project or building something for your product, check out our IoT consulting services.
Photo credit: All photos and images in this tutorial are credited to Rishabh on Hackster.io. The original guide by Rishabh served as the reference for this ShillehTek version.






.png?v=25000753014097803521791168436)

.png?v=68677308723310773341791168436)


