

Project Overview
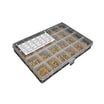
Maker component cabinet setup: Organize resistor, capacitor, and transistor kits (1900+ total parts) into a labeled drawer cabinet so you can find the right value fast and stop buying duplicates.
This guide focuses on a repeatable system: drawers labeled for quick scanning, bags inside for exact values, and a small “everyday” drawer stocked with the parts you use constantly.
- Time: 2 to 4 hours (plus optional label printing time)
- Skill level: Beginner
- What you will build: A scalable component storage cabinet layout for resistors, capacitors, transistors, and modules
Parts List
From ShillehTek
- 120-Pack DuPont Wire Kit - common “grab-and-go” wiring set to keep in an everyday drawer
- 830-Point Breadboard - useful to store with core prototyping items so new builds start faster
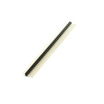
- 20-Pack 1x40 Female Header Pins - prototyping staple to sort and restock regularly
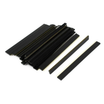
- 10-Pack 1x40 Male Pin Header - keep accessible for quick module and board connections
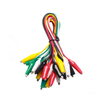
- Alligator Clip Test Leads (10pcs) - handy test leads to store with your everyday tools
External
- Multi-drawer plastic storage cabinet (24- to 60-drawer, plastic, about $20 to $50)
- Small zip-top antistatic bags for ICs and transistors
- A label printer (Brother P-touch / DYMO LetraTag) or a Sharpie plus masking tape
- 4-pocket card sleeves for IC datasheet printouts (optional)
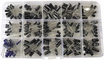
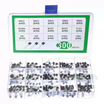
Note: The drawer counts below assume common kits like an 820-piece resistor assortment, 600-piece ceramic capacitor assortment, 200-piece electrolytic assortment, and a 300-piece transistor assortment. Adjust drawer allocation based on what you actually reach for most.
Step-by-Step Guide
Step 1 - Use frequency-of-use indexing
Goal: Make the parts you use the most the fastest to reach.
What to do: Avoid organizing only by component type (all resistors in one region, all capacitors in another). Instead, arrange drawers by how often you grab the parts. Put everyday values in the top row and long-tail parts in lower rows.
Example everyday parts: 220Ω, 1 kΩ, 10 kΩ, 100 kΩ, 100 nF, 10 µF, BC547, BC557, and common LED colors.

Expected result: You can open the most-used drawers first and find common parts quickly.
Step 2 - Lay out an 820-piece resistor kit by decades
Goal: Store 41 resistor values so you always know which drawer to open first.
What to do: Use one drawer per E12 decade (10s, 100s, 1k, 10k, 100k, 1M). Inside each drawer, keep small bags labeled with the exact value (for example “10k”). Label the drawer front with the range and optionally list the values inside.
Total: 6 drawers for 41 resistor values.
Expected result: You can jump straight to the correct decade drawer and then the exact bag.
Step 3 - Lay out capacitor kits by type and range
Goal: Keep ceramic and electrolytic capacitors easy to scan and restock.
What to do: Split drawers by capacitor type and commonly used ranges:
- Ceramic disc / MLCC small values (1pF to 100nF): 2 drawers by decade
- Ceramic disc large values (470nF to 10µF): 1 drawer
- Electrolytics, low voltage (10µF to 100µF at 16V): 1 drawer with separate bags per value
- Electrolytics, high capacitance (220µF to 1000µF): 1 drawer
- Electrolytics, high voltage (35V+): 1 drawer for less frequent use
Expected result: Capacitors are grouped the way you choose them in real builds, not buried in a mixed assortment.
Step 4 - Sort a 300-piece transistor kit by part number and family
Goal: Prevent transistor mix-ups and reduce pinout lookups.
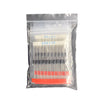
What to do: Put each tube or group into a small zip-top antistatic bag labeled with the part number (BC547, 2N2222, 2N3904, TIP120, and similar). Sort labeled bags by family (NPN small-signal, PNP small-signal, NPN power, MOSFET) across one or two drawers.
Add a small printed datasheet card with each bag (pinout, β, VCE max, IC max) so you do not have to re-search pinouts repeatedly.

Expected result: You can grab the correct transistor quickly and verify the pinout without slowing down.
Step 5 - Create an everyday drawer at eye level
Goal: Make 90% of builds start from a single drawer.
What to do: Stock one drawer with the parts you reach for constantly, such as common resistors (1 kΩ, 10 kΩ, 220Ω), 100 nF and 10 µF capacitors, a few BC547 and BC557 transistors, common LEDs, push-buttons, 1N4148 and 1N4007 diodes, and some hookup wire (for example 22 AWG). Refill this drawer from your main stash on a regular schedule.
Expected result: Most prototypes can start without digging through multiple drawers and bags.
Step 6 - Store modules and breakouts by project category
Goal: Keep larger items accessible even when they do not fit small drawers.
What to do: Use one drawer or shoebox per category such as displays, sensors, wireless, motor drivers, USB-to-serial, and power management. Do not sort by alphabet; sort so you can grab a category that matches the project you are building.
Expected result: When you start a project type (for example a weather station), the related hardware is already grouped together.
Step 7 - Apply a three-location labeling system
Goal: Make drawers readable from the front, from above, and when opened.
What to do: Use three labels:
- Front label: a quick description of what is inside (for example “Caps 10nF to 100nF”)
- Top label: useful for stackable drawers so you can scan from above
- Inside label: a small note listing exact values for the bags inside

Expected result: You can locate a part quickly, even months later, without re-learning your own system.
Step 8 - Add a tools drawer for frequent build items
Goal: Keep build tools from scattering across your workspace.
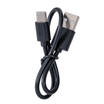
What to do: Dedicate one drawer to common build tools and accessories such as jumper wires, a mini screwdriver, USB-C and USB-A cables, multimeter probes, alligator clips, and an anti-static wristband.
Expected result: You spend less time hunting for tools during prototyping.
Step 9 - Schedule a monthly restock day
Goal: Keep the system accurate as your habits change.
What to do: Once a month, check the everyday drawer. Refill anything below about 5 pieces from your main stash. If something sat untouched for 30 days, move it back to the main bins so the everyday drawer reflects what you use right now.
Expected result: Your fastest-access drawer stays relevant and your cabinet stays organized long term.
Conclusion
After one weekend of setup, this component cabinet system makes resistor, capacitor, and transistor values easy to find, helps you finish builds faster, and reduces duplicate purchases. By indexing drawers by frequency of use and keeping an everyday drawer stocked, your bench stays ready for the next project.
This approach was inspired by "Resistor Organizer and Storage" on Instructables.
Want the exact parts used in this setup? Grab them from ShillehTek.com. If you want help customizing an organization system for your lab or building something for your product, check out our IoT consulting services.






.png?v=25000753014097803521791168436)

.png?v=68677308723310773341791168436)


