

Project Overview
"Alexa, Turn On the Desk Lamp": Voice Control for Any Relay with an ESP8266 and Espalexa: Using an ESP8266 with the Espalexa library, you can make Alexa discover your board as if it were a Philips Hue bridge and then control relays (and even dimmable outputs) by voice over your local Wi-Fi network.
Amazon Echo devices can discover Philips Hue lights on the local network without any cloud skill or account setup. Espalexa makes an ESP8266 or ESP32 pretend to be a Hue bridge, so Alexa finds your board, lists your relays as lamps, and switches them by voice: on, off, and even "set to 50 percent" for dimmable outputs. No Amazon developer account, no Lambda functions, no monthly fee: just Wi-Fi, a relay, and about 30 lines.
- Time: ~45 minutes
- Skill level: Intermediate
- What you will build: Two voice-controlled devices (a dimmable lamp and a relay) that Alexa discovers automatically, plus room groups and routines.

Parts List
From ShillehTek
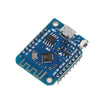
- ESP8266 D1 Mini - the original used a NodeMCU, same chip and same pins by "D" number
- ESP32 38-Pin Dev Board - Espalexa runs here too with two include lines changed
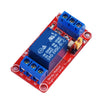
- 1-Channel 5V Relay Module - one per appliance
- Resistor Kit - 220Ω for the test LED
- 400-Point Breadboard
- Dupont Jumper Wires
External
- An Amazon Echo (any generation) on the same 2.4 GHz network
- LEDs for testing before you wire real loads
Note: Because discovery is local, the Echo and the ESP must be on the same Wi-Fi network and subnet. Guest networks and client isolation settings on some routers can block it. If Alexa cannot find the devices, check this first.
Step-by-Step Guide
Step 1 - Wire Test LEDs (Relays Come Later)
Goal: Prove the voice path before switching anything real.
What to do: LED 1 ("lamp", dimmable): D1 → 220Ω → LED → GND. LED 2 ("fan", on/off): D2 → 220Ω → LED → GND. On an ESP32 use GPIO 16 and 17.
Expected result: Two indicators standing in for two appliances.
Step 2 - Install Espalexa
Goal: The Hue-bridge emulation library.
What to do: In the Library Manager install "Espalexa" (by Aircoookie). It is the modern, maintained replacement for the older fauxmoESP, and the original tutorial switched to it for the same reason. Make sure your ESP8266 board package is installed and the D1 Mini is selected.
Expected result: Library installed, board selected.
Step 3 - Upload the Sketch and Discover Devices
Goal: Connect the ESP to Wi-Fi, expose two Alexa devices, and confirm voice control works.
Code:
#include <ESP8266WiFi.h>       // ESP32: #include <WiFi.h>
#include <Espalexa.h>

const char* SSID = "YourNetwork";
const char* PASS = "YourPassword";
const int LAMP = D1, FAN = D2;     // ESP32: 16 and 17

Espalexa alexa;

// Alexa sends a level 0-255: 0 = off, 255 = on, anything between = dimmed
void lampChanged(uint8_t level) {
  analogWrite(LAMP, level);        // PWM: "Alexa, set desk lamp to 30 percent" works
  Serial.printf("lamp -> %d\n", level);
}
void fanChanged(uint8_t level) {
  digitalWrite(FAN, level > 0);    // relay: on for anything above zero
  Serial.printf("fan -> %s\n", level ? "ON" : "OFF");
}

void setup() {
  Serial.begin(115200);
  pinMode(LAMP, OUTPUT); pinMode(FAN, OUTPUT);

  WiFi.begin(SSID, PASS);
  while (WiFi.status() != WL_CONNECTED) delay(250);
  Serial.println("\nconnected: " + WiFi.localIP().toString());

  alexa.addDevice("Desk Lamp", lampChanged);   // the names you'll say out loud
  alexa.addDevice("Desk Fan",  fanChanged);
  alexa.begin();
}

void loop() {
  alexa.loop();                    // answers Alexa's discovery and commands
  delay(1);
}
What to do: Add your Wi-Fi credentials, upload, and confirm "connected" in the Serial Monitor. Then say: "Alexa, discover devices" (or use the Alexa app: Devices → + → Add Device → Other → Discover).
Expected result: After about 20 seconds Alexa reports two new devices. "Alexa, turn on desk fan" lights LED 2. "Alexa, set desk lamp to 20 percent" dims LED 1.
Step 4 - Connect Real Appliances
Goal: Move from LEDs to real loads.
What to do: Replace LED 2 with the relay module: IN → D2, VCC → 5V, GND → GND, and put a 12 V fan or LED strip through the NO/COM contacts. If your relay board is active-LOW, invert the logic in fanChanged. For a dimmable lamp, keep the PWM output and drive a 12 V LED strip through a MOSFET. Anything mains-powered belongs behind a properly rated relay in an enclosure, installed by someone qualified.
Expected result: Real things switching from your voice commands.
Step 5 - Create Groups and Routines
Goal: Make it behave like a smart home setup.
What to do: In the Alexa app, add both devices to a group called "Office" so "Alexa, turn off the office" handles everything. Create a routine: "Alexa, movie time" dims the lamp to 10 percent and turns off the fan. Add more addDevice lines for more relays. One ESP8266 can present a dozen devices.
Expected result: Voice control of a whole room from a low-cost board.
Conclusion
By speaking the same local protocol as a Hue bridge, Espalexa gives your ESP8266 Alexa control without any cloud setup. Two callbacks and two device names can turn relays and dimmable outputs into voice-controlled devices on your local network.
Want the exact parts used in this build? Grab them from ShillehTek.com. If you want help customizing this project or building something for your product, check out our IoT consulting services.
Photo credit: Marcelo Rovai (MJRoBot) on Hackster.io.






.png?v=25000753014097803521791168436)

.png?v=68677308723310773341791168436)


