

Project Overview
ESP32 WebSocket Dashboard: Build an ESP32 live dashboard that streams KY-018 light readings plus DHT11 temperature and humidity to a browser chart twice a second using WebSockets, with a button that toggles the onboard LED.
A normal ESP32 web page shows a number when you load it; a WebSocket page shows the number changing while you watch. The board keeps a two-way connection open to every browser on the page and pushes a JSON packet every 500 ms, and the page draws a scrolling chart and updates the readouts instantly. Everything is served from the ESP32: no server, no internet, no libraries loaded from the web.
- Time: ~45 minutes
- Skill level: Intermediate
- What you will build: A self-hosted live dashboard with a canvas chart, three sensor readouts, and a browser-to-board control using ESPAsyncWebServer's built-in WebSocket support.

Parts List
From ShillehTek
- ESP32 38-Pin Dev Board (CP2102, USB-C) - runs the web server and WebSocket endpoint
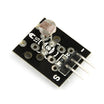
- KY-018 Photoresistor Module - provides the analog light level signal for the live chart
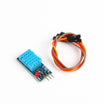
- DHT11 Temperature & Humidity Sensor - adds temperature and humidity readouts
- 400-Point Breadboard - makes it easy to prototype the wiring
- Dupont Jumper Wires - connects the sensors to the ESP32 pins
External
- None - the page is served by the ESP32 itself
Note: On the ESP32, analogRead() only works on ADC1 pins (GPIO32-39) while Wi-Fi is on because ADC2 pins are taken over by the radio. That's why the light sensor goes on GPIO34.
Step-by-Step Guide
Step 1 - Wire the Sensors
Goal: Connect the KY-018 and DHT11 to the ESP32 so the sketch can read light, temperature, and humidity.
What to do: Wire the KY-018: S to GPIO34, + to 3V3, and - to GND. Wire the DHT11: DATA to GPIO4, VCC to 3V3, and GND to GND. The onboard LED on GPIO2 is the control target.

Expected result: Hardware is wired and ready for code upload.
Step 2 - Install the Libraries
Goal: Set up the async web server and sensor libraries required by the sketch.
What to do: In the Arduino IDE Library Manager, install "ESP Async WebServer" (the ESP32Async release) and its companion "Async TCP", plus the Adafruit DHT sensor library and Adafruit Unified Sensor.
Expected result: The sketch in the next step compiles successfully.
Step 3 - Upload the Sketch (Board + Web Page)
Goal: Flash the ESP32 with firmware that serves the dashboard and streams data over WebSockets.
What to do: Paste the sketch below into the Arduino IDE.
Code:
#include <WiFi.h>
#include <AsyncTCP.h>
#include <ESPAsyncWebServer.h>
#include <DHT.h>

const char* SSID = "YourNetwork";
const char* PASS = "YourPassword";
const int LDR_PIN = 34, LED_PIN = 2;
DHT dht(4, DHT11);
AsyncWebServer server(80);
AsyncWebSocket ws("/ws");

// The whole web page lives in flash. No external files, no CDN.
const char PAGE[] PROGMEM = R"rawliteral(
<!DOCTYPE html><html><head><meta name="viewport" content="width=device-width,initial-scale=1">
<title>ESP32 Live</title>
<style>body{font-family:sans-serif;background:#111;color:#eee;text-align:center;margin:0;padding:16px}
.v{font-size:2em;margin:0 8px}canvas{width:100%;max-width:640px;background:#222;border-radius:8px}
button{font-size:1.1em;padding:10px 24px;border:0;border-radius:6px;background:#2a7;color:#fff}</style></head>
<body><h2>ESP32 Live Dashboard</h2>
<div>Light <span class="v" id="L">--</span> Temp <span class="v" id="T">--</span>C  Hum <span class="v" id="H">--</span>%</div>
<canvas id="c" width="640" height="200"></canvas>
<button onclick="ws.send('toggle')">Toggle LED</button>
<script>
const c=document.getElementById('c'),g=c.getContext('2d'),hist=[];
const ws=new WebSocket('ws://'+location.host+'/ws');
ws.onmessage=e=>{const d=JSON.parse(e.data);
  document.getElementById('L').textContent=d.light;
  document.getElementById('T').textContent=d.temp.toFixed(1);
  document.getElementById('H').textContent=d.hum.toFixed(0);
  hist.push(d.light); if(hist.length>128) hist.shift(); draw();};
function draw(){g.clearRect(0,0,640,200);g.strokeStyle='#2a7';g.lineWidth=2;g.beginPath();
  hist.forEach((v,i)=>{const x=i*5,y=195-v/4095*190; i?g.lineTo(x,y):g.moveTo(x,y);});g.stroke();}
</script></body></html>)rawliteral";

void onWsEvent(AsyncWebSocket* s, AsyncWebSocketClient* client, AwsEventType type,
               void* arg, uint8_t* data, size_t len) {
  if (type == WS_EVT_CONNECT) Serial.printf("client %u connected\n", client->id());
  if (type == WS_EVT_DATA) {                                  // a message from the browser
    String msg; for (size_t i = 0; i < len; i++) msg += (char)data[i];
    if (msg == "toggle") digitalWrite(LED_PIN, !digitalRead(LED_PIN));
  }
}

void setup() {
  Serial.begin(115200);
  pinMode(LED_PIN, OUTPUT); dht.begin();
  WiFi.begin(SSID, PASS);
  while (WiFi.status() != WL_CONNECTED) delay(250);
  Serial.println("Open http://" + WiFi.localIP().toString());
  ws.onEvent(onWsEvent);
  server.addHandler(&ws);
  server.on("/", HTTP_GET, [](AsyncWebServerRequest* r) { r->send(200, "text/html", PAGE); });
  server.begin();
}

void loop() {
  static unsigned long last = 0; static int tick = 0; static float t = 0, h = 0;
  if (millis() - last >= 500) {                               // push twice a second
    last = millis();
    if (++tick % 4 == 0) {                                    // DHT11 only every 2 s
      float nt = dht.readTemperature(), nh = dht.readHumidity();
      if (!isnan(nt)) { t = nt; h = nh; }
    }
    int light = analogRead(LDR_PIN);                          // 0..4095
    String json = "{\"light\":" + String(light) + ",\"temp\":" + String(t, 1) + ",\"hum\":" + String(h, 0) + "}";
    ws.textAll(json);                                         // to every connected browser
    ws.cleanupClients();
  }
}
What to do: Fill in your Wi-Fi details, upload, open the Serial Monitor for the IP address, and open it in a browser (phone or laptop on the same network).
Expected result: The readouts appear within a second and the light trace scrolls across the chart. Cover the KY-018 with your hand and the line dives immediately. Tap "Toggle LED" and the blue LED on the board flips. Open the page on a second device and both update in step.
Step 4 - Understand the WebSocket Flow
Goal: Understand how the browser and ESP32 communicate without refreshing.
What to do: The browser loads the page once over plain HTTP, then the script opens a WebSocket to /ws. From then on, the connection stays open: ws.textAll() on the board pushes to every client with no request, and ws.send() in the page pushes to the board. Compare that with polling (reloading a URL every second), which costs a full TCP handshake and headers per update. WebSockets carry a few bytes per message and react in milliseconds. The async server means loop() never blocks on a client either.
Expected result: You understand why the dashboard feels instant compared to refresh-based updates.
Step 5 - Make It Yours
Goal: Adapt the dashboard pattern to your own sensors and controls.
What to do: Add fields to the JSON and spans to the page for any sensor (a BME280, soil probe, or the JSN-SR04T). Send commands the other way ("fan:1", "set:24.5") and parse them in onWsEvent to drive relays or servos. Draw a second trace for temperature, or log the readings to an SD card while streaming them. For access away from home, keep the local dashboard and add MQTT for the cloud side, as in our Home Assistant guide.
Expected result: A live view of any device you build, on any phone in the house.
Conclusion
With one page stored in flash and one WebSocket connection, your ESP32 streams live KY-018 and DHT11 readings to every browser on your network while also accepting a button command to toggle the onboard LED. WebSockets are the difference between a web page about your sensor and a live instrument.
Want the exact parts used in this build? Grab them from ShillehTek.com. If you want help customizing this project or building something for your product, check out our IoT consulting services.
Photo credit: Original reference guide and images from donskytech on Hackster.io (MIT license).





.png?v=25000753014097803521791168436)

.png?v=68677308723310773341791168436)


