

Project Overview
ESP32 Telegram Bot - Switch a Pump or Any Relay From Your Phone With Chat Commands, Timers and Status Replies: Build an ESP32 + Telegram bot relay controller that switches a pump (or any relay load) from your phone using chat commands, timed runs, and status replies. The ESP32 polls Telegram every second, answers commands like /on, /on60, /off and /status, drives a relay for a water pump (or a lamp, heater, or fan), and tells you when a timed run finishes. A physical button on the board still works and reports what it did. No port forwarding, no cloud dashboard, no monthly fee.
- Time: ~45 minutes
- Skill level: Intermediate
- What you will build: A private Telegram bot with on/off/timed commands, a status query, chat-ID security, a local override button, and push notifications back to your phone.

Parts List
From ShillehTek
- ESP32 38-Pin Dev Board (CP2102, USB-C) - runs the Wi-Fi + Telegram bot code and controls the relay
- 1-Channel 5V Relay Module - switches the pump (or any other load) safely using isolated contacts
- Tactile Button Kit - local override button input
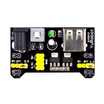
- MB102 Breadboard Power Supply - provides clean 5 V for the relay coil
- 400-Point Breadboard - quick, solderless wiring for the build
- Dupont Jumper Wires - connects the ESP32, relay module, and button
External
- A small submersible pump (5 V or 12 V) with its own supply, plus tubing, or any load you want to switch
- A Telegram account
Note: The relay contacts are isolated, so the pump gets its own supply and only its positive wire passes through COM/NO. Keep this to low-voltage DC loads unless you are comfortable with mains wiring and a proper enclosure. The bot only obeys your own chat ID; anyone else who finds it gets a polite refusal.
Step-by-Step Guide
Step 1 - Create the Bot and Find Your Chat ID
Goal: Get the two strings the sketch needs.
What to do: In Telegram, open @BotFather, send /newbot, give it a display name and a username ending in "bot", and copy the token it replies with (looks like 123456789:AAF…). Then open @userinfobot (or @myidbot and send /getid) to get your numeric chat ID.
Finally open your new bot and press Start. A bot cannot message you until you have messaged it once.
Expected result: A bot token and a chat ID.
Step 2 - Wire the Relay and Button
Goal: Put the ESP32 in control of the pump.
What to do: Relay module: IN → GPIO22, VCC → 5V (from the ESP32's VIN/5V pin or the MB102), GND → GND. Pump: supply + → relay COM, relay NO → pump +, pump − → supply −. Button: GPIO23 to GND (internal pull-up).
Most of these relay modules are active-LOW. The sketch has a RELAY_ON constant to flip if yours clicks the wrong way.
Expected result: Relay off at boot and pump silent.
Step 3 - The Sketch
Code:
#include <WiFi.h>
#include <WiFiClientSecure.h>
#include <UniversalTelegramBot.h>      // "UniversalTelegramBot" by Brian Lough (+ ArduinoJson)
#include <ArduinoJson.h>

const char* SSID = "YourNetwork";
const char* PASS = "YourPassword";
#define BOT_TOKEN "123456789:AAF-your-token-from-BotFather"
#define CHAT_ID   "123456789"           // your numeric chat id: only this chat is obeyed

const int RELAY = 22, BTN = 23;
const int RELAY_ON = LOW;               // most 1-channel modules are active-LOW; use HIGH if yours isn't

WiFiClientSecure client;
UniversalTelegramBot bot(BOT_TOKEN, client);
bool pumpOn = false;
unsigned long offAt = 0;                // millis() when a timed run should stop (0 = no timer)

void setPump(bool on, unsigned long ms = 0) {
  pumpOn = on;
  digitalWrite(RELAY, on ? RELAY_ON : !RELAY_ON);
  offAt = (on && ms) ? millis() + ms : 0;
}

void handleMessages(int n) {
  for (int i = 0; i < n; i++) {
    String chat = bot.messages[i].chat_id, text = bot.messages[i].text;
    if (chat != CHAT_ID) { bot.sendMessage(chat, "Sorry, this bot is private.", ""); continue; }
    if      (text == "/on")     { setPump(true);        bot.sendMessage(chat, "Pump ON", ""); }
    else if (text == "/on10")   { setPump(true, 10000); bot.sendMessage(chat, "Pump ON for 10 s", ""); }
    else if (text == "/on60")   { setPump(true, 60000); bot.sendMessage(chat, "Pump ON for 60 s", ""); }
    else if (text == "/off")    { setPump(false);       bot.sendMessage(chat, "Pump OFF", ""); }
    else if (text == "/status") {
      bot.sendMessage(chat, String("Pump is ") + (pumpOn ? "ON" : "OFF") + (offAt ? " (timed)" : ""), "");
    } else {
      bot.sendMessage(chat, "Commands:\n/on - run\n/on10 - run 10 s\n/on60 - run 60 s\n/off - stop\n/status", "");
    }
  }
}

void setup() {
  Serial.begin(115200);
  pinMode(RELAY, OUTPUT); setPump(false);
  pinMode(BTN, INPUT_PULLUP);
  WiFi.begin(SSID, PASS);
  while (WiFi.status() != WL_CONNECTED) delay(250);
  client.setCACert(TELEGRAM_CERTIFICATE_ROOT);    // ships with the library (or client.setInsecure())
  configTime(0, 0, "pool.ntp.org");                // TLS needs the real time
  bot.sendMessage(CHAT_ID, "Pump controller online at " + WiFi.localIP().toString(), "");
}

void loop() {
  static unsigned long lastPoll = 0; static bool btnWas = true;

  if (millis() - lastPoll >= 1000) {                                 // ask Telegram for new messages
    lastPoll = millis();
    int n = bot.getUpdates(bot.last_message_received + 1);
    while (n) { handleMessages(n); n = bot.getUpdates(bot.last_message_received + 1); }
  }

  if (offAt && millis() >= offAt) {                                  // timed run finished
    setPump(false);
    bot.sendMessage(CHAT_ID, "Timer done, pump OFF", "");
  }

  bool btn = digitalRead(BTN);                                       // local override button
  if (!btn && btnWas) {
    setPump(!pumpOn);
    bot.sendMessage(CHAT_ID, pumpOn ? "Button: pump ON" : "Button: pump OFF", "");
    delay(50);
  }
  btnWas = btn;
}
What to do: Install "UniversalTelegramBot" and ArduinoJson from the Library Manager, paste in Wi-Fi details, token and chat ID, then upload.
Expected result: Your phone buzzes: "Pump controller online at 192.168.x.x". Send /on10 and the relay clicks, "Pump ON for 10 s" comes back, and ten seconds later "Timer done, pump OFF". Press the button and the bot reports "Button: pump ON". Send anything else and you get the command list.
Step 4 - How It Works (and Why It's Safe)
Goal: Understand polling and the security model.
What to do: The ESP32 makes an outbound HTTPS request to Telegram once a second asking "anything new since message N?". That is why it works behind any home router with no open ports. Replies are just more outbound requests.
Because every message carries the sender's chat ID, the sketch compares it to yours and ignores everyone else. The bot token is the only secret, so keep it out of screenshots. The library's certificate keeps the connection verified. If Telegram rotates certificates years from now, setInsecure() is the quick fix.
Expected result: A remote control you would trust with a pump.
Step 5 - Make It a Garden System
Goal: Go beyond one relay.
What to do: Add a capacitive soil sensor and a /soil command, or have the bot message you when the soil dries out and ask "water for 60 s? /on60". Add a second relay for a light with /lamp. Send a daily report at 8 am. Add a flow sensor and report litres delivered after each run. Use Telegram's inline keyboards (sendMessageWithInlineKeyboard) for tappable ON/OFF buttons instead of typed commands.
Expected result: A garden that texts you.
Conclusion
A bot token, a chat ID, and a polling loop turn Telegram into a free, secure remote control for anything an ESP32 can switch through a relay. This same pattern can also carry sensors and alerts back to your phone.
Want the exact parts used in this build? Grab them from ShillehTek.com. If you want help customizing this project or building something for your product, check out our IoT consulting services.
Image credit and reference: carlosvolt on Hackster.io (LGPL license).







.png?v=25000753014097803521791168436)

.png?v=68677308723310773341791168436)