

Project Overview
ESP32 quadruped spider robot: Build an ESP32-based walking spider robot using eight micro servos, then control it over Bluetooth Serial from your phone for smooth creep-gait walking, turning, standing, and waving.
Wheels are easy; legs are a lesson. A four-legged robot has to keep three feet on the ground while it moves the fourth, shift its weight, and do it all with servos that each need their own neutral point. This build uses a 3D-printed spider frame, eight micro servos and a single ESP32 that drives them directly and listens for commands over Bluetooth, so a phone becomes the remote.
The sketch is written to be understood: every leg is a hip and a knee, every move is a smooth interpolation, and a calibration mode lets you fix a crooked leg with a number instead of a screwdriver.
- Time: ~3 hours including assembly
- Skill level: Intermediate
- What you will build: A battery-powered, Bluetooth-controlled quadruped that walks forward and back, turns in place, waves and stands, with per-servo direction and trim settings.

Parts List
From ShillehTek
- ESP32 Dev Board (38-pin, CP2102, USB-C) - required for classic Bluetooth Serial (SPP)
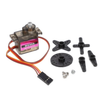
- MG90S Metal Gear Micro Servo x8 - hip and knee joints for four legs
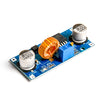
- XL4015 5 A Step-Down Module - dedicated servo power rail
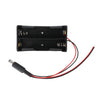
- 2x18650 Battery Holder - portable battery pack for the build
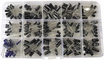
- Electrolytic Capacitor Kit - add a large capacitor across the servo rail
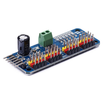
- PCA9685 16-Channel Servo Driver - optional upgrade (see Step 6)
- Dupont Jumper Wires - servo signal and power wiring
External
- The 3D-printed spider frame (body, four hips, four legs) from the original project, M2 screws, and two 18650 cells
- An Android phone with a Bluetooth serial terminal app (classic Bluetooth SPP is not available to iPhone apps; use the USB Serial Monitor or the BLE idea in Step 6)
Note: eight servos moving at once pull several amps in short bursts. Feed them from the XL4015 set to 5.5 V, never from the ESP32's 5V or 3V3 pins, put a 470 to 1000 uF capacitor across the servo rail, and join the servo ground to the ESP32 ground. Brown-outs that reset the ESP32 mid-step are almost always a power problem.
Step-by-Step Guide
Step 1 - Power and wiring
Goal: Eight signals, one strong supply.
What to do: Battery holder to XL4015 input; adjust the XL4015 pot until its output reads 5.5 V before connecting anything. XL4015 output to servo red wires (all eight in parallel) and to ESP32 5V; XL4015 negative to servo brown wires and ESP32 GND; capacitor across the rail, positive to 5.5 V.
Servo signal (orange) wires, with legs numbered 0 front-left, 1 front-right, 2 back-left, 3 back-right: hips on GPIO13, 16, 18, 25; knees on GPIO27, 17, 19, 26. These pins avoid the ESP32 strapping pins (0, 2, 5, 12, 15), so a servo can never stop the board from booting.

Expected result: A clean 5.5 V rail and eight signal wires, each labelled with its leg.
Step 2 - Upload the sketch
Goal: Get Bluetooth control and smooth servo motion running on the ESP32.
What to do: Install ESP32Servo from the Arduino Library Manager, select "ESP32 Dev Module" and upload before the legs are attached.
Code:
#include <BluetoothSerial.h>      // classic Bluetooth SPP - original ESP32 only (not S3 / C3)
#include <ESP32Servo.h>

BluetoothSerial bt;
// legs: 0 front-left, 1 front-right, 2 back-left, 3 back-right
const int HIP_PIN[4]  = {13, 16, 18, 25};
const int KNEE_PIN[4] = {27, 17, 19, 26};
int hipDir[4]  = {1, -1, 1, -1};          // flip a sign if that hip steps backward on 'F'
int kneeDir[4] = {1, -1, 1, -1};          // flip a sign if that foot pushes down instead of lifting
int hipTrim[4]  = {0, 0, 0, 0};           // per-servo trims in degrees (Step 3)
int kneeTrim[4] = {0, 0, 0, 0};
const int SWING = 25, LIFT = 35, STAND = 0;

Servo hip[4], knee[4];
int hipPos[4], kneePos[4];                // offsets from neutral, in degrees

void writeLeg(int i) {
  hip[i].write(90 + hipDir[i] * hipPos[i] + hipTrim[i]);
  knee[i].write(90 + kneeDir[i] * kneePos[i] + kneeTrim[i]);
}

void glide(const int h[4], const int k[4], int ms) {   // move all 8 servos together, smoothly
  int h0[4], k0[4];
  memcpy(h0, hipPos, sizeof h0); memcpy(k0, kneePos, sizeof k0);
  for (int s = 1; s <= 20; s++) {
    for (int i = 0; i < 4; i++) {
      hipPos[i]  = h0[i] + (h[i] - h0[i]) * s / 20;
      kneePos[i] = k0[i] + (k[i] - k0[i]) * s / 20;
      writeLeg(i);
    }
    delay(ms / 20);
  }
}

void stepLeg(int i, int hipTarget) {      // lift one foot, swing its hip, put it down
  int h[4], k[4];
  memcpy(h, hipPos, sizeof h); memcpy(k, kneePos, sizeof k);
  k[i] = LIFT;      glide(h, k, 120);
  h[i] = hipTarget; glide(h, k, 120);
  k[i] = STAND;     glide(h, k, 120);
}

void stand() { int h[4] = {0, 0, 0, 0}, k[4] = {STAND, STAND, STAND, STAND}; glide(h, k, 300); }

void walk(int dir) {                      // creep gait: one leg at a time, three always down
  const int order[4] = {0, 3, 1, 2};      // FL, BR, FR, BL
  for (int n = 0; n < 4; n++) stepLeg(order[n], dir * SWING);
  int h[4] = {0, 0, 0, 0}, k[4];
  memcpy(k, kneePos, sizeof k);
  glide(h, k, 400);                       // all hips sweep back together: the body moves
}

void turn(int dir) {                      // same raw direction on every hip = rotation
  for (int i = 0; i < 4; i++) stepLeg(i, dir * hipDir[i] * SWING);
  int h[4] = {0, 0, 0, 0}, k[4];
  memcpy(k, kneePos, sizeof k);
  glide(h, k, 400);
}

void wave() {
  int h[4], k[4];
  memcpy(h, hipPos, sizeof h); memcpy(k, kneePos, sizeof k);
  k[0] = 70; glide(h, k, 300);            // raise the front-left leg high
  for (int n = 0; n < 3; n++) { h[0] = 30; glide(h, k, 250); h[0] = -30; glide(h, k, 250); }
  stand();
}

void setup() {
  Serial.begin(115200);
  for (int i = 0; i < 4; i++) {
    hip[i].setPeriodHertz(50);  hip[i].attach(HIP_PIN[i], 500, 2400);
    knee[i].setPeriodHertz(50); knee[i].attach(KNEE_PIN[i], 500, 2400);
    hipPos[i] = 0; kneePos[i] = STAND; writeLeg(i);
  }
  bt.begin("ShillehTek-Spider");
}

void loop() {
  static char mode = 'S';
  char c = 0;
  if (bt.available()) c = toupper(bt.read());
  else if (Serial.available()) c = toupper(Serial.read());   // same commands over USB
  if (c && strchr("FBLRWCS", c)) mode = c;

  switch (mode) {
    case 'F': walk(1);  break;            // repeats until another command arrives
    case 'B': walk(-1); break;
    case 'L': turn(1);  break;
    case 'R': turn(-1); break;
    case 'W': wave(); mode = 0; break;
    case 'S': stand(); mode = 0; break;
    case 'C': for (int i = 0; i < 4; i++) { hip[i].write(90); knee[i].write(90); } mode = 0; break;
    default: delay(20);
  }
}
Expected result: All eight servos snap to their neutral position and hold it.
Step 3 - Calibrate, then assemble
Goal: Every servo starts at true centre.
What to do: Send C from the Serial Monitor so every servo goes to exactly 90 degrees. Fit the horns and legs so each hip points straight out diagonally from its corner and each knee holds its leg horizontal.
Splines only allow steps of about 15 degrees, so a leg will rarely land perfectly. Adjust hipTrim and kneeTrim a few degrees at a time, re-upload and send S until the robot stands level with its body parallel to the table.
Expected result: A spider that stands square on four equally loaded feet.
Step 4 - Connect your phone
Goal: A remote in your pocket.
What to do: Pair the phone with "ShillehTek-Spider" in Bluetooth settings, open a Bluetooth serial terminal app (Serial Bluetooth Terminal on Android works well) and connect. If your app supports macro buttons, map F, B, L, R, S and W. Commands also work from the Arduino Serial Monitor over USB, which is handy while tuning.
Expected result: Tap F and the robot starts creeping forward; S stops it in a standing pose.
Step 5 - Fix the directions
Goal: Legs that agree on which way is forward.
What to do: Watch one cycle of F. Each lifted leg should swing toward the head before it lands. A leg that swings backward has its hip servo mounted the other way round, so flip that leg's sign in hipDir.
A foot that digs into the table instead of lifting needs its sign flipped in kneeDir. If the robot walks but slides more than it steps, lower SWING to 20. If feet drag, raise LIFT. Because the creep gait always keeps three feet down, the robot never needs active balancing, just consistent geometry.
Expected result: Straight walking, clean turns in both directions and a convincing wave.
Step 6 - Upgrades
Goal: From walker to robot.
What to do: Add an HC-SR04 on the front and make walk() stop and turn when something is within 15 cm. Move the servos to a PCA9685 board to free all the ESP32's pins and get rock-steady PWM while the radio is busy.
Replace Bluetooth serial with a small web page served by the ESP32 (works with iPhones too), or with BLE UART. Speed things up by overlapping phases (lift the next leg while the body is still shifting) and you're on the way to a trot gait.
Expected result: A walking platform you can keep teaching new tricks.
Conclusion
This project uses an ESP32 and eight micro servos to build a Bluetooth-controlled quadruped spider robot with a smooth creep gait. Centre the servos before assembly, trim the rest in software, and give the servo rail a supply that can handle current bursts so the ESP32 does not brown out mid-step.
Once your spider walks straight, new behaviours like obstacle avoidance, dances, or a faster gait are just additional functions built from glide() and stepLeg().
Want the exact parts used in this build? Grab them from ShillehTek.com. If you want help customizing this project or building something for your product, check out our IoT consulting services.
Credits
All photos and images in this tutorial are credited to Maker 101 (mertarduino) on Hackster.io. The original guide by Maker 101 served as the reference for this ShillehTek version. We thank them for their excellent work in the maker community.




.png?v=25000753014097803521791168436)

.png?v=68677308723310773341791168436)


