

Project Overview
ESP32 + HLK-LD2450 mmWave Radar: Build a self-hosted web radar screen that tracks up to three people in a room in real time using an ESP32 and the HLK-LD2450 mmWave sensor. Unlike a PIR sensor that only tells you motion, the LD2450 reports where people are (X/Y coordinates in centimeters) for up to three targets at once, even when they are standing still, over a plain serial port at 256000 baud. This guide reads those frames on an ESP32, serves a web page from the board that draws a top-down radar view with a dot for each person, and exposes the raw numbers you can use for zones, counters, and smart lighting.
- Time: ~1 hour
- Skill level: Intermediate
- What you will build: A self-hosted radar display (no cloud, no app) showing position, distance, and speed of up to three tracked people, plus a presence LED, using a reusable LD2450 frame parser.

Parts List
From ShillehTek
- ESP32 38-Pin Dev Board (CP2102, USB-C) - runs the serial frame parser and serves the live web radar page.
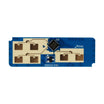
- HLK-LD2450 24 GHz mmWave Tracking Radar (pre-soldered) - provides up to three tracked targets with X/Y coordinates and speed over UART.
- 400-Point Breadboard - quick way to prototype the wiring.
- Dupont Jumper Wires - connects the ESP32 and LD2450 power and UART lines.
External
- None - the radar page is served directly by the ESP32.
Note: The LD2450 runs on 5 V but its TX/RX pins are 3.3 V logic, so it connects to the ESP32 directly. It talks at 256000 baud (much faster than the usual 9600) and the ESP32 hardware UART can handle that without dropping bytes. For best tracking, mount it upright at about 1.5 to 2 m with the antenna face toward the room, away from fans, curtains, and other frequent moving objects.
Step-by-Step Guide
Step 1 - Wire the Radar
Goal: Connect four wires to the ESP32 Serial2 UART.
What to do: Connect LD2450 5V to ESP32 VIN (5 V), GND to GND, TX to GPIO16 (RX2), and RX to GPIO17 (TX2). The ESP32 board LED on GPIO2 is used as the presence indicator in the sketch.

Expected result: The radar module LED blinks. It starts streaming as soon as it has power.
Step 2 - Understand the Data Frame
Goal: Know what bytes the ESP32 needs to parse from the LD2450 UART stream.
What to do: Every report is a 30-byte frame: header AA FF 03 00, then three 8-byte target slots (X, Y, speed and distance resolution, each a 16-bit little-endian value), then tail 55 CC. Coordinates are in millimeters and speed in cm/s, using a sign-magnitude format: the top bit set means positive, cleared means negative. An unused slot is all zeros. Frames arrive many times a second, so the parser must find the header, check the tail, and skip anything torn.
Expected result: You can read a frame by hand: 0E 03 for X is 0x030E = 782 with the sign bit clear, so -782 mm.
Step 3 - Upload the Sketch (Parser + Web Radar)
Goal: Parse LD2450 frames on the ESP32 and draw live targets on a self-hosted web page.
Code:
#include <WiFi.h>
#include <WebServer.h>

const char* SSID = "YourNetwork";
const char* PASS = "YourPassword";
WebServer server(80);

struct Target { bool ok; int x, y, speed; } t[3];
uint8_t buf[30];

// LD2450 sign-magnitude 16-bit value: top bit set = positive, cleared = negative
int16_t sval(uint8_t lo, uint8_t hi) {
  int16_t v = ((hi & 0x7F) << 8) | lo;
  return (hi & 0x80) ? v : -v;
}

void readRadar() {
  while (Serial2.available() >= 30) {
    if (Serial2.read() != 0xAA) continue;            // hunt for the header
    if (Serial2.peek() != 0xFF) continue;
    buf[0] = 0xAA; Serial2.readBytes(buf + 1, 29);
    if (buf[1] != 0xFF || buf[2] != 0x03 || buf[3] != 0x00 || buf[28] != 0x55 || buf[29] != 0xCC) continue;
    for (int i = 0; i < 3; i++) {
      uint8_t* p = buf + 4 + i * 8;                   // 8 bytes per target
      t[i].x = sval(p[0], p[1]);                      // mm, left/right of the sensor
      t[i].y = sval(p[2], p[3]);                      // mm, distance out from the sensor
      t[i].speed = sval(p[4], p[5]);                  // cm/s, negative = approaching
      t[i].ok = !(p[0] == 0 && p[1] == 0 && p[2] == 0 && p[3] == 0 && p[6] == 0 && p[7] == 0);
    }
  }
}

const char PAGE[] PROGMEM = R"rawliteral(
<!DOCTYPE html><html><head><meta name="viewport" content="width=device-width,initial-scale=1">
<title>LD2450 Radar</title>
<style>body{margin:0;background:#111;color:#eee;font-family:sans-serif;text-align:center}
canvas{max-width:100%;background:#000}#i{font-size:14px;white-space:pre;padding:8px}</style></head>
<body><h3>LD2450 tracking radar</h3><canvas id="c" width="600" height="420"></canvas><div id="i"></div>
<script>
const c=document.getElementById('c'),g=c.getContext('2d'),S=0.06;   // 0.06 px per mm: 6 m = 360 px
function grid(){g.fillStyle='#000';g.fillRect(0,0,600,420);g.strokeStyle='#143';g.lineWidth=1;
  for(let r=1;r<=6;r++){g.beginPath();g.arc(300,410,r*1000*S,Math.PI,2*Math.PI);g.stroke();}
  g.beginPath();g.moveTo(300,410);g.lineTo(300,50);g.stroke();
  g.fillStyle='#8f8';g.font='12px sans-serif';for(let r=1;r<=6;r++)g.fillText(r+' m',305,410-r*1000*S);}
async function tick(){
  try{const d=await(await fetch('/t')).json();grid();let s='';
    d.forEach((t,i)=>{if(!t.ok)return;const px=300+t.x*S,py=410-t.y*S;
      g.fillStyle=['#f55','#5f5','#59f'][i];g.beginPath();g.arc(px,py,8,0,7);g.fill();g.fillText('T'+(i+1),px+10,py);
      s+='T'+(i+1)+': x='+(t.x/1000).toFixed(2)+' m  y='+(t.y/1000).toFixed(2)+' m  dist='+(Math.hypot(t.x,t.y)/1000).toFixed(2)+' m  speed='+t.v+' cm/s\n';});
    document.getElementById('i').textContent=s||'no targets';
  }catch(e){}
  setTimeout(tick,150);}
grid();tick();
</script></body></html>)rawliteral";

void setup() {
  Serial.begin(115200);
  Serial2.setRxBufferSize(1024);
  Serial2.begin(256000, SERIAL_8N1, 16, 17);         // RX2 = GPIO16, TX2 = GPIO17
  pinMode(2, OUTPUT);
  WiFi.begin(SSID, PASS);
  while (WiFi.status() != WL_CONNECTED) delay(250);
  Serial.println("Open http://" + WiFi.localIP().toString());
  server.on("/", []() { server.send(200, "text/html", PAGE); });
  server.on("/t", []() {                             // targets as JSON
    String j = "[";
    for (int i = 0; i < 3; i++) {
      j += "{\"ok\":" + String(t[i].ok ? "true" : "false") + ",\"x\":" + t[i].x + ",\"y\":" + t[i].y + ",\"v\":" + t[i].speed + "}";
      if (i < 2) j += ",";
    }
    j += "]";
    server.send(200, "application/json", j);
  });
  server.begin();
}

void loop() {
  readRadar();
  server.handleClient();
  digitalWrite(2, t[0].ok || t[1].ok || t[2].ok);    // presence LED
}
What to do: Fill in your Wi-Fi details, upload the sketch, open the Serial Monitor to find the IP address, then open that IP on a phone or laptop.
Expected result: A dark radar screen with range rings at 1 to 6 m. Walk into the room and a red dot appears and follows you. A second person gets a green dot, and a third gets a blue dot. Under the radar, the numbers update: x, y, straight-line distance, and speed (negative while you walk toward the sensor). Stand still and the dot stays because radar sees small motion like breathing. If left and right look mirrored for your mounting, negate t[i].x.
Step 4 - Turn Coordinates Into Zones
Goal: Use position data for presence logic that a PIR sensor cannot do.
What to do: Because you have positions, presence becomes geometry. Define a rectangle in millimeters (example: the sofa: x from -1500 to 0, y from 2000 to 3200) and test each target against it: inSofa = t.ok && t.x > -1500 && t.x < 0 && t.y > 2000 && t.y < 3200. You can count how many targets are in the room, tell the desk lamp from the doorway, and ignore a corridor behind a glass wall. Add a short hold-off (keep a zone occupied for a few seconds after the last hit) so a lost track does not flicker your lights.
Expected result: Presence that knows the difference between “at the desk” and “walking past”.
Step 5 - Use It in a Real System
Goal: Apply the same targets to automation and logging beyond the demo page.
What to do: Publish zone states over MQTT to Home Assistant (see our ESP32 MQTT guide) and automate lights per zone. Log a heat-map of where people spend time by bucketing coordinates into a grid. Use speed to detect running (kids in the hallway) or a fall (fast approach then a stationary target near the floor plane). Mount the sensor behind a thin plastic or wood panel (24 GHz passes through) for a hidden install.
Expected result: Room-aware automation from a sensor that costs less than a smart bulb.
Conclusion
With a 30-byte frame parser, a sign-magnitude decoder, and a simple canvas page, your ESP32 can display live, multi-target people tracking from the HLK-LD2450 mmWave radar on any phone or laptop. The LD2450 turns presence detection from a yes/no into a map, and zones, counting, and other automations start with the same target data you parsed here.
Want the exact parts used in this build? Grab them from ShillehTek.com. If you want help customizing this project or building something for your product, check out our IoT consulting services.
Photo and wiring diagram credit: Craftiarenko on Hackster.io.





.png?v=25000753014097803521791168436)

.png?v=68677308723310773341791168436)


