

Project Overview
ESP32 FreeRTOS Tasks - Run Several Jobs at Once on Both Cores: This ESP32 FreeRTOS tasks project uses a DHT11 sensor and an SSD1306 I2C OLED to show how to run multiple loops at once, pass readings through a queue, and keep Wi-Fi responsive by pinning work to cores.
Under every ESP32 Arduino sketch, a real-time operating system is already running; loop() is just one task. Once you learn to create your own tasks you can blink an LED, poll a sensor, redraw a display, and serve a web page all at the same time, each in its own tidy loop, and pin the heavy work to the second core so the Wi-Fi never stutters. This guide starts with two independent blinkers, then builds a producer/consumer pair that passes sensor readings through a queue to a display task.
- Time: ~45 minutes
- Skill level: Intermediate
-
What you will build: Multi-tasking firmware with
xTaskCreatePinnedToCore,vTaskDelay, a queue, and a clear understanding of priorities and cores.

Parts List
From ShillehTek
- ESP32 38-Pin Dev Board (CP2102, USB-C) - dual-core, the star of this guide
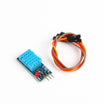
- DHT11 Temperature & Humidity Sensor - the producer task's data source
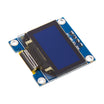
- SSD1306 0.96" I2C OLED - the consumer task's output
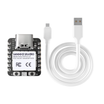
- XIAO ESP32-C6 - single-core, but the same task code runs on it (see the note)
- 400-Point Breadboard - quick prototyping
- Dupont Jumper Wires - wiring the peripherals
External
- Two LEDs with 220 resistors
Note: The classic ESP32 and the S3 have two cores; the Arduino framework and Wi-Fi/Bluetooth stacks run on core 0 and your sketch on core 1. Single-core chips like the C3 and C6 still run FreeRTOS; tasks simply take turns on the one core, so everything here works, just without true parallelism.
Step-by-Step Guide
Step 1 - Wire LEDs, Sensor, and Display
Goal: Connect something for each task to do.
What to do: LED A: GPIO 16 → 220Ω → LED → GND. LED B: GPIO 17 → 220Ω → LED → GND. DHT11 DATA → GPIO 4 (VCC 3V3, GND). OLED SDA → 21, SCL → 22.
Expected result: Four peripherals, four future tasks.
Step 2 - Two Blinkers, Two Cores
Goal: Create your first FreeRTOS tasks.
What to do: A task is just a function with an endless loop that calls vTaskDelay() instead of delay(). vTaskDelay hands the CPU to other tasks while it waits. Create two tasks and pin one to each core:
Code:
void blinkA(void*) {                        // runs forever on core 0
  pinMode(16, OUTPUT);
  for (;;) { digitalWrite(16, !digitalRead(16)); vTaskDelay(pdMS_TO_TICKS(500)); }
}
void blinkB(void*) {                        // runs forever on core 1
  pinMode(17, OUTPUT);
  for (;;) { digitalWrite(17, !digitalRead(17)); vTaskDelay(pdMS_TO_TICKS(130)); }
}

void setup() {
  Serial.begin(115200);
  //                 function, name,   stack, arg,  priority, handle, core
  xTaskCreatePinnedToCore(blinkA, "blinkA", 2048, NULL, 1, NULL, 0);
  xTaskCreatePinnedToCore(blinkB, "blinkB", 2048, NULL, 1, NULL, 1);
}
void loop() { vTaskDelay(pdMS_TO_TICKS(1000)); }   // loop() is itself a task; let it rest
Expected result: Two LEDs blinking at unrelated rates with no timing math in your code.
Step 3 - Producer, Queue, Consumer
Goal: Move data between tasks safely.
What to do: Tasks must not scribble on the same variables at the same time. A queue is the clean way to pass data: the sensor task pushes a struct in, the display task pulls it out and blocks (sleeps) until something arrives.
Code:
#include <DHT.h>
#include <Wire.h>
#include <Adafruit_GFX.h>
#include <Adafruit_SSD1306.h>

DHT dht(4, DHT11);
Adafruit_SSD1306 oled(128, 64, &Wire, -1);
typedef struct { float t, h; unsigned long ms; } Reading;
QueueHandle_t q;

void sensorTask(void*) {                    // producer
  dht.begin();
  for (;;) {
    Reading r = { dht.readTemperature(), dht.readHumidity(), millis() };
    xQueueSend(q, &r, 0);                   // drop the reading if the queue is full
    vTaskDelay(pdMS_TO_TICKS(2000));
  }
}

void displayTask(void*) {                   // consumer
  oled.begin(SSD1306_SWITCHCAPVCC, 0x3C);
  oled.setTextColor(SSD1306_WHITE);
  Reading r;
  for (;;) {
    if (xQueueReceive(q, &r, portMAX_DELAY)) {   // sleeps until a reading arrives
      oled.clearDisplay();
      oled.setTextSize(2); oled.setCursor(0, 0);  oled.printf("%.1f C", r.t);
      oled.setCursor(0, 24);                      oled.printf("%.0f %%", r.h);
      oled.setTextSize(1); oled.setCursor(0, 52); oled.printf("core %d  t=%lus", xPortGetCoreID(), r.ms / 1000);
      oled.display();
    }
  }
}

void setup() {
  Serial.begin(115200);
  q = xQueueCreate(5, sizeof(Reading));
  xTaskCreatePinnedToCore(sensorTask,  "sensor",  4096, NULL, 1, NULL, 1);
  xTaskCreatePinnedToCore(displayTask, "display", 4096, NULL, 2, NULL, 0);   // higher priority
  // the two blink tasks from Step 2 can be created here as well
}
void loop() { vTaskDelay(pdMS_TO_TICKS(1000)); }
Expected result: The OLED updates every two seconds and shows which core drew it; add the blink tasks back and nothing interferes with anything.
Step 4 - Priorities, Stacks, and the Watchdog
Goal: Learn the rules that keep tasks healthy.
What to do: Higher priority number wins when two tasks are ready, so give the display or a safety task priority 2 and background work priority 1. Every task loop must block somewhere (vTaskDelay, a queue receive, a semaphore); a task that spins forever without yielding starves the others and trips the task watchdog, which resets the chip. If a task crashes with a stack-overflow message, raise its stack size (Wi-Fi-heavy tasks often need 8192).
Expected result: Firmware that stays responsive and never watchdog-resets.
Step 5 - Where This Goes
Goal: Apply the pattern to real projects.
What to do: Give the web server its own task so a slow client can't freeze your sensor loop. Put button handling in a high-priority task that posts events to a queue. Use a mutex (xSemaphoreCreateMutex) around shared resources like the I2C bus or an SD card. Each project becomes a set of small, obvious loops instead of one giant one.
Expected result: Cleaner code that does more at once.
Conclusion
FreeRTOS turns "how do I do three things at once?" into "write three loops." Tasks, vTaskDelay, and queues are the 90% you'll use daily, and the ESP32's second core makes them genuinely parallel. Once you've built the producer/consumer pair, monolithic loop() code starts to look like the hard way.
Want the exact parts used in this build? Grab them from ShillehTek.com. If you want help customizing this project or building something for your product, check out our IoT consulting services.
Credits
All photos and images in this tutorial are credited to Nickson Kiprotich on Hackster.io. The original guide by Nickson Kiprotich served as the reference for this ShillehTek version. We thank him for his excellent work in the maker community.





.png?v=25000753014097803521791168436)

.png?v=68677308723310773341791168436)


