

Project Overview
E-Paper Partial Refresh with ESP32: Build an ESP32 + 2.9 inch SPI e-paper (e-ink) display project that uses partial refresh to update only a small region in about 0.3 seconds, without the flashing full refresh.
On many e-ink panels, a full refresh takes about 2 seconds and includes the characteristic black-white flash. Partial updates redraw only the window you define, which is why e-paper clocks, counters, and small dashboards can feel responsive instead of sluggish.
- Time: ~45 minutes
- Skill level: Intermediate
- What you will build: An ESP32 + 2.9 inch e-ink setup running the GxEPD2 library, with a live-updating value refreshed in a partial window.

Parts List
From ShillehTek
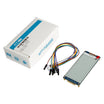
- 2.9 inch E-Paper E-Ink Display Module (296x128, SPI) - the e-paper panel used for partial refresh updates.
- ESP32 Dev Board (CP2102, USB-C, 38-Pin) - provides WiFi-capable MCU + SPI (any ESP32 works, but confirm SPI pins).
- Dupont Jumper Wires - for the 8-wire SPI hookup.
- 400-Point Breadboard - makes temporary wiring and testing easier.
External
- USB cable for programming - matches your ESP32 board (often USB-C).
Note: E-ink keeps its image with power removed. If you combine partial updates with ESP32 deep sleep, you can build always-readable displays that run on a battery for months.
Step-by-Step Guide
Step 1 - Understand partial vs full refresh
Goal: Know when to use each refresh mode.
What to do: A full e-ink refresh rewrites the entire panel with a black-white flash and is about 2 seconds on a 2.9 inch module. A partial update rewrites only a window you define, in about 0.3 seconds, without the flash.
Full refreshes still matter. Run one occasionally to clear ghosting, but anything that changes often (a clock digit, a sensor value, a counter) should live inside a partial window.
Expected result: You know what should be drawn with full refresh (static layout) and what should be updated with partial refresh (changing values).
Step 2 - Wire the display (SPI, 8 wires)
Goal: Connect the e-paper module to the ESP32 SPI pins.
What to do: For a standard ESP32 dev board, wire: BUSY to GPIO4, RST to GPIO16, DC to GPIO17, CS to GPIO5, CLK to GPIO18, DIN to GPIO23, GND to GND, VCC to 3.3V.
Different ESP32 variants route SPI differently. The GxEPD2 example sketches list pin maps for LOLIN32, TTGO, and the Waveshare driver board, so verify your pin map before powering up.

Expected result: The display is wired for 3.3V logic and is ready to initialize.
Step 3 - Install the libraries
Goal: Install GxEPD2 and the font helper library.
What to do: In the Arduino IDE Library Manager, install GxEPD2 and U8g2_for_Adafruit_GFX. Then select the correct driver class for your panel. For a 2.9 inch V2 module, use GxEPD2_290_T94_V2.
Expected result: Libraries are installed, and you know which display class matches your specific panel.
Step 4 - Do one full refresh, then partial updates
Goal: Draw a static layout once, then update only the changing region.
What to do: Use a full refresh in setup() to draw the static screen. In loop(), define a partial window over the changing area and redraw only that window.
Code:
#define ENABLE_GxEPD2_GFX 0

#include <GxEPD2_BW.h>
#include <U8g2_for_Adafruit_GFX.h>

// Waveshare 2.9" V2 panel (GDEM029T94) - change the class for other panels
GxEPD2_BW<GxEPD2_290_T94_V2, GxEPD2_290_T94_V2::HEIGHT>
  display(GxEPD2_290_T94_V2(/*CS*/ 5, /*DC*/ 17, /*RST*/ 16, /*BUSY*/ 4));

U8G2_FOR_ADAFRUIT_GFX u8g2Fonts;

void setup() {
  display.init();
  display.setRotation(1);
  u8g2Fonts.begin(display);
  u8g2Fonts.setForegroundColor(GxEPD_BLACK);
  u8g2Fonts.setBackgroundColor(GxEPD_WHITE);

  // full refresh: draw the static layout once
  display.setFullWindow();
  display.firstPage();
  do {
    display.fillScreen(GxEPD_WHITE);
    u8g2Fonts.setFont(u8g2_font_helvB14_tf);
    u8g2Fonts.setCursor(10, 30);
    u8g2Fonts.print("Uptime (ms):");
  } while (display.nextPage());
}

void loop() {
  // partial update: redraw ONLY the value box (~0.3 s, no flash)
  display.setPartialWindow(10, 50, 200, 40);
  display.firstPage();
  do {
    display.fillScreen(GxEPD_WHITE);
    u8g2Fonts.setFont(u8g2_font_logisoso28_tf);
    u8g2Fonts.setCursor(10, 85);
    u8g2Fonts.print(int(millis()));
  } while (display.nextPage());

  delay(1000);
}
Expected result: The label draws once with a flash, then the number updates every second with quick, flash-free partial refreshes.
Step 5 - Apply the technique to real data
Goal: Use partial refresh for any frequently changing value.
What to do: Replace millis() with the value you want to display, such as a temperature reading, a WiFi-fetched counter, a countdown, or a status indicator.
Run a full refresh every few dozen partial updates to reduce ghosting. For battery builds, add deep sleep between updates since the image persists with power removed.
Expected result: A crisp e-paper display that stays readable like paper, but updates like a live display for the values you choose.
Conclusion
You built an ESP32 + 2.9 inch e-paper display using GxEPD2 partial refresh, allowing flash-free updates in about 0.3 seconds by redrawing only a defined window. This pattern is the key to making e-ink clocks, counters, and dashboards feel responsive while still staying ultra low power.
Want the exact parts used in this build? Grab them from ShillehTek.com. If you want help customizing this project or building something for your product, check out our IoT consulting services.
Credits
All photos and images in this tutorial are credited to galoebn on Hackster.io. The original guide by galoebn served as the reference for this ShillehTek version. We thank them for their excellent work in the maker community.





.png?v=25000753014097803521791168436)

.png?v=68677308723310773341791168436)


