

Project Overview
ESP32 + DHT11 + MQTT + Home Assistant room sensor: This project turns an ESP32 and a DHT11 temperature and humidity sensor into a Home Assistant MQTT entity that shows up on your dashboard, with two-way control so Home Assistant can switch an output on the board.
MQTT is the language of home automation: tiny publish messages on named topics, routed by a broker, picked up by anything that subscribes. Once you have this working, every ESP32 in your house can join the same system by publishing to its own topics.
- Time: ~1 hour
- Skill level: Intermediate
- What you will build: An MQTT sensor node with two-way communication, a Mosquitto broker inside Home Assistant, and dashboard cards with automations.

Parts List
From ShillehTek
- ESP32 38-Pin Dev Board (CP2102, USB-C) - the WiFi board that publishes and subscribes to MQTT topics
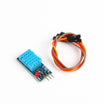
- DHT11 Temperature & Humidity Sensor - reads room temperature and humidity (the original used a DHT22; change one constant)
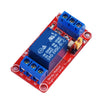
- 1-Channel 5V Relay Module - optional output you can control from Home Assistant in Step 5
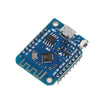
- ESP8266 D1 Mini - the same sketch runs here with ESP8266WiFi.h
- 400-Point Breadboard - makes sensor and relay wiring easy
- Dupont Jumper Wires - for connecting the ESP32 to the DHT11 and relay
External
- A Home Assistant install (Raspberry Pi, old laptop, or a VM) on the same network
Note: Topics are just paths, like home/livingroom/temperature. Pick a scheme (home/room/measurement) and stick to it so Home Assistant and other tools can find the data by name.
Step-by-Step Guide
Step 1 - Wire the Sensor
Goal: Connect the DHT11 with one data pin.
What to do: Wire DHT11 VCC to 3V3, GND to GND, and DATA to GPIO 4. The three-pin module has its pull-up resistor on board.

Expected result: The sensor node is wired.
Step 2 - Install the Mosquitto Broker in Home Assistant
Goal: Run an MQTT broker that routes messages.
What to do: In Home Assistant go to Settings → Add-ons → Add-on Store, install Mosquitto broker, and start it.
Create a Home Assistant user for your devices: Settings → People → Users, then create a user (for example mqttuser) with a password.
Add the MQTT integration: Settings → Devices & Services → Add Integration → MQTT, and point it at the broker (it usually auto-detects). Note Home Assistant's IP address.
Expected result: A broker listening on port 1883 with a username and password.
Step 3 - Upload the Sketch
Goal: Publish temperature and humidity topics, and subscribe to a command topic for output control.
What to do: Install the PubSubClient and DHT libraries, fill in your WiFi credentials and broker IP, then upload the sketch.
Code:
#include <WiFi.h>
#include <PubSubClient.h>
#include <DHT.h>

const char* SSID     = "YourNetwork";
const char* PASS     = "YourPassword";
const char* MQTT_IP  = "192.168.1.50";        // Home Assistant's IP
const char* MQTT_USER = "mqttuser";
const char* MQTT_PW   = "mqttpassword";

const char* T_TEMP = "home/livingroom/temperature";
const char* T_HUM  = "home/livingroom/humidity";
const char* T_CMD  = "home/livingroom/relay/set";   // Home Assistant -> ESP32
const char* T_STATE = "home/livingroom/relay";      // ESP32 -> Home Assistant

const int RELAY = 2;                                // onboard LED for now, relay IN later
DHT dht(4, DHT11);
WiFiClient net;
PubSubClient mqtt(net);

void onMessage(char* topic, byte* payload, unsigned int len) {
  String msg; for (unsigned int i = 0; i < len; i++) msg += (char)payload[i];
  bool on = (msg == "ON");
  digitalWrite(RELAY, on);
  mqtt.publish(T_STATE, on ? "ON" : "OFF", true);   // retained: HA sees the state after restarts
}

void connectMqtt() {
  while (!mqtt.connected()) {
    if (mqtt.connect("esp32-livingroom", MQTT_USER, MQTT_PW)) {
      mqtt.subscribe(T_CMD);
      Serial.println("MQTT connected");
    } else { Serial.print("MQTT failed rc="); Serial.println(mqtt.state()); delay(2000); }
  }
}

void setup() {
  Serial.begin(115200);
  pinMode(RELAY, OUTPUT);
  dht.begin();
  WiFi.begin(SSID, PASS);
  while (WiFi.status() != WL_CONNECTED) delay(250);
  mqtt.setServer(MQTT_IP, 1883);
  mqtt.setCallback(onMessage);
}

unsigned long lastPub = 0;
void loop() {
  if (!mqtt.connected()) connectMqtt();
  mqtt.loop();                                      // keeps the connection alive, runs callbacks

  if (millis() - lastPub > 10000) {                 // publish every 10 s
    lastPub = millis();
    float t = dht.readTemperature(), h = dht.readHumidity();
    if (!isnan(t)) { mqtt.publish(T_TEMP, String(t, 1).c_str()); }
    if (!isnan(h)) { mqtt.publish(T_HUM,  String(h, 0).c_str()); }
    Serial.printf("published %.1f C, %.0f %%\n", t, h);
  }
}
Expected result: You see MQTT connected in the Serial Monitor and a published line every ten seconds. In Home Assistant, go to Settings → Devices & Services → MQTT → Configure → Listen to a topic and use home/# to confirm messages are arriving.
Step 4 - Turn Topics into Entities
Goal: Convert MQTT topics into Home Assistant sensors and a switch.
What to do: Add the following to Home Assistant's configuration.yaml and restart:
mqtt:
  sensor:
    - name: "Living Room Temperature"
      state_topic: "home/livingroom/temperature"
      unit_of_measurement: "°C"
      device_class: temperature
    - name: "Living Room Humidity"
      state_topic: "home/livingroom/humidity"
      unit_of_measurement: "%"
      device_class: humidity
  switch:
    - name: "Living Room Relay"
      command_topic: "home/livingroom/relay/set"
      state_topic: "home/livingroom/relay"
      payload_on: "ON"
      payload_off: "OFF"
Then add Gauge cards for the two sensors and an Entity card for the switch to your Overview dashboard.
Expected result: Live gauges, a history graph that fills in over the day, and a toggle that lights the ESP32's LED from your phone.
Step 5 - Automate and Add the Relay
Goal: Use the command topic to control a real output and build an automation.
What to do: Move the signal from GPIO 2 to the relay module's IN pin. Wire relay VCC to 5V VIN and GND to GND. Most boards are active-LOW, so swap the logic if it behaves backwards.
Create an automation, for example: when Living Room Temperature is above 28 °C for 5 minutes, turn on Living Room Relay. You can control a fan, a dehumidifier, or a window actuator.
Add a notification automation for humidity above 70% to catch a damp basement.
Expected result: A closed loop running entirely on your own network.
Conclusion
With publish, subscribe, and a broker, an ESP32 becomes a first-class Home Assistant device. You now have temperature and humidity history, dashboard cards, and automations without writing a UI.
Copy the sketch, change the topic names, and the next node takes minutes to add.
Want the exact parts used in this build? Grab them from ShillehTek.com. If you want help customizing this project or building something for your product, check out our IoT consulting services.
Credits
All photos and images in this tutorial are credited to Mechatronics LAB (Sarful) on Hackster.io. The original guide by Mechatronics LAB served as the reference for this ShillehTek version. We thank them for their excellent work in the maker community.





.png?v=25000753014097803521791168436)

.png?v=68677308723310773341791168436)


