

Project Overview
ESP32 AutoConnect Wi-Fi Setup Portal: This ESP32 (and ESP8266) project uses the AutoConnect library to add a captive portal so users can enter Wi-Fi credentials from a phone instead of hard-coding ssid and password in every sketch.
On first boot, the board becomes its own hotspot. You connect, a setup page appears, you pick a network and enter the password, and the board saves the credentials to flash so it can reconnect automatically later.
- Time: ~30 minutes
- Skill level: Intermediate
- What you will build: A board that provisions itself through a phone, stores credentials in flash, reconnects automatically, and still lets you change networks later.

Parts List
From ShillehTek
- ESP32 38-Pin Dev Board (CP2102, USB-C) - the main board used for the captive portal and web server.
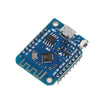
- ESP8266 D1 Mini - the identical sketch works here with the ESP8266 includes/server class.
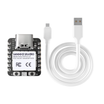
- XIAO ESP32-C6 - a compact alternative for a small, product-style build.
- 400-Point Breadboard - optional for prototyping (no wiring required for this tutorial).
- Dupont Jumper Wires - optional for prototyping (no wiring required for this tutorial).
External
- A phone or laptop to do the setup with
- A USB cable for your board
Note: This guide uses the AutoConnect library by Hieromon Ikasamo (the author of the original tutorial). The popular WiFiManager library does the same job with a nearly identical API. Pick whichever you like; the concept is the same: hotspot - captive page - saved credentials.
Step-by-Step Guide
Step 1 - Install the Library
Goal: Install AutoConnect and its dependency.
What to do: In the Arduino IDE Library Manager, search for AutoConnect (by Hieromon Ikasamo) and install it. When prompted, also install PageBuilder.
Expected result: Both libraries are installed and available to include.
Step 2 - Understand the Flow
Goal: Know what the board will do at boot.
What to do: On boot, the board tries any saved credentials. If none work, it starts a hotspot (for example, ESP32-Setup). When your phone joins that hotspot, a captive portal page appears automatically (similar to hotel Wi-Fi login pages). You choose your home network from a scan list, enter the password, and the board saves it to flash and connects. From then on, it connects on its own.
Expected result: A clear mental model of hotspot - portal - saved credentials - normal operation.
Step 3 - Upload the Sketch
Goal: Add the AutoConnect portal to your ESP32 web server sketch.
What to do: Paste the sketch below, then upload it to your board. If you are using an ESP8266, follow the comment notes for the correct includes and server class.
Code:
#include <WiFi.h>            // ESP8266: #include <ESP8266WiFi.h> and <ESP8266WebServer.h>
#include <WebServer.h>
#include <AutoConnect.h>

WebServer server(80);         // ESP8266: ESP8266WebServer server(80);
AutoConnect portal(server);
AutoConnectConfig config;

void rootPage() {             // your normal web page / app lives here
  String s = "<h1>Hello from the ESP32</h1>";
  s += "<p>Connected to " + WiFi.SSID() + " as " + WiFi.localIP().toString() + "</p>";
  s += "<p><a href='/_ac'>Wi-Fi settings</a></p>";   // built-in portal menu
  server.send(200, "text/html", s);
}

void setup() {
  Serial.begin(115200);
  config.apid = "ESP32-Setup";        // name of the setup hotspot
  config.psk  = "setup1234";          // hotspot password (8+ chars), or "" for open
  config.autoReconnect = true;        // reconnect to the saved network after outages
  config.retainPortal  = true;        // keep the portal reachable at /_ac while connected
  portal.config(config);

  server.on("/", rootPage);
  if (portal.begin()) {
    Serial.println("Online: " + WiFi.localIP().toString());
  }
}

void loop() {
  portal.handleClient();              // serves both your pages and the portal
}
Expected result: On first boot, the Serial Monitor shows the board waiting in portal mode. On your phone, join the Wi-Fi network ESP32-Setup with password setup1234.
Step 4 - Connect Through the Captive Portal
Goal: Provision the board without changing code.
What to do: After joining ESP32-Setup, a setup page should open automatically. If it does not, visit 172.217.28.1. Tap Configure new AP, pick your home network, enter its password, and save.
Expected result: The board connects to your Wi-Fi, and the Serial Monitor prints Online with its new IP address.
Step 5 - Prove It Remembers
Goal: Confirm credentials persist across power cycles.
What to do: Unplug the board and plug it back in. It should join your network directly, without starting the portal. Open the board's IP in a browser to see your root page, and use the Wi-Fi settings link (to /_ac) to manage networks from the built-in menu.
Expected result: Credentials survive power cycles, and you can add/forget/reset networks from a browser.
Step 6 - Drop It into Your Own Projects
Goal: Stop hard-coding Wi-Fi credentials in new builds.
What to do: In an existing project (web-server LED, MQTT sensor node, internet clock), delete its WiFi.begin(ssid, pass) lines and paste in the portal setup from this guide. Everything after portal.begin() returns true runs as before. If you want a simple factory-reset mechanism before handing a device to someone else, add a long-press button that calls WiFi.disconnect(true, true) to wipe stored credentials.
Expected result: Projects that can be moved, given away, or deployed without reflashing for Wi-Fi changes.
Conclusion
This ESP32 AutoConnect captive portal replaces the usual hard-coded Wi-Fi credentials with a phone-based onboarding flow that saves credentials in flash and reconnects automatically. Once it is in your project template, every ESP32 or ESP8266 build can be provisioned and updated without editing the sketch.
Want the exact parts used in this build? Grab them from ShillehTek.com. If you want help customizing this project or building something for your product, check out our IoT consulting services.
Credits
All photos and images in this tutorial are credited to Hieromon Ikasamo on Hackster.io. The original guide by Hieromon Ikasamo (author of the AutoConnect library) served as the reference for this ShillehTek version. We thank him for his excellent work in the maker community.





.png?v=25000753014097803521791168436)

.png?v=68677308723310773341791168436)


