

Project Overview
Arduino Dual-Axis Solar Tracker with Four LDRs and a Pan-Tilt Servo Mount: Build an Arduino Uno solar tracker using four LDR (photoresistor) sensors and a pan-tilt servo mount so a panel automatically turns toward the brightest light source.
Solar panels make the most power when they face the sun squarely, and the sun moves. This tracker uses four light sensors separated by a cardboard cross: whichever quadrant is brightest, the servos nudge the panel toward it until all four agree. It is a closed-loop control system you can build in an afternoon, and the same logic drives light-following robots and camera trackers.
- Time: ~1.5 hours
- Skill level: Intermediate
- What you will build: A pan-tilt platform that follows a flashlight around the room and the sun across the sky, with a dead band that keeps it from twitching.

Parts List
From ShillehTek
- Arduino Uno R3 Super Starter Kit - includes photoresistors (LDRs), an SG90 servo, and resistors
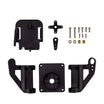
- Pan-Tilt Servo Bracket Kit - the two-axis mount
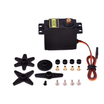
- MG995 Metal Gear Servo - for a heavier real panel instead of a demo cell
- Resistor Kit - four 10kΩ resistors for the LDR dividers
- 830-Point Breadboard - for prototyping the LDR dividers and servo connections
- Dupont Jumper Wires - for quick wiring on the breadboard
External
- Four LDRs total (the kit has some; any 5 to 10 kΩ photoresistor works)
- Cardboard for the shading cross, plus a small solar cell or panel to mount
- A 5 V supply able to deliver 1 to 2 A for the servos
Note: The shading cross is the sensor. Two pieces of cardboard glued in an X between the four LDRs cast a shadow on the side facing away from the light. That difference in brightness is the error signal the servos chase to zero.
Step-by-Step Guide
Step 1 - Assemble the Pan-Tilt Mount
Goal: Two axes of motion.
What to do: Build the bracket kit with one servo for pan (base) and one for tilt (upper). Center both servos at 90° before screwing the horns on so you have full travel each way. Mount a small board on top to carry the LDR cross and the solar cell.
Expected result: A platform that can point anywhere in a hemisphere.
Step 2 - Wire the Four LDR Dividers
Goal: Brightness as a voltage per quadrant.
What to do: Each LDR goes from 5V to an analog pin, with a 10kΩ resistor from that pin to GND. Brighter light means a higher reading. Top-left goes to A0, top-right to A1, bottom-left to A2, bottom-right to A3. Servos: pan signal to D9, tilt signal to D10, both powered from the 5 V supply with a common ground.

Expected result: Four readings that change as you shade each corner.
Step 3 - Upload the Sketch
Goal: Convert LDR imbalance into pan and tilt movement.
What to do: Upload the sketch below, then sweep a flashlight around the tracker.
Code:
#include <Servo.h>

Servo pan, tilt;
const int LDR_TL = A0, LDR_TR = A1, LDR_BL = A2, LDR_BR = A3;
const int TOL = 40;                  // dead band: ignore differences smaller than this
int panPos = 90, tiltPos = 90;

void setup() {
  pan.attach(9); tilt.attach(10);
  pan.write(panPos); tilt.write(tiltPos);
  Serial.begin(9600);
}

void loop() {
  int tl = analogRead(LDR_TL), tr = analogRead(LDR_TR);
  int bl = analogRead(LDR_BL), br = analogRead(LDR_BR);

  int top  = (tl + tr) / 2,  bottom = (bl + br) / 2;   // average each edge
  int left = (tl + bl) / 2,  right  = (tr + br) / 2;

  // move one degree toward the brighter side, but only outside the dead band
  if (abs(top - bottom) > TOL) tiltPos += (top  > bottom) ? 1 : -1;
  if (abs(left - right) > TOL) panPos  += (left > right)  ? -1 : 1;

  tiltPos = constrain(tiltPos, 20, 160);
  panPos  = constrain(panPos, 10, 170);
  tilt.write(tiltPos);
  pan.write(panPos);

  Serial.print("pan "); Serial.print(panPos);
  Serial.print("  tilt "); Serial.println(tiltPos);
  delay(30);                           // ~33 steps/second: smooth, not jittery
}
Expected result: The platform turns to face the light and settles once it is centered. If it runs away from the light instead, flip the sign on the offending axis (the direction depends on how your servos are mounted).
Step 4 - Tune the Dead Band and Speed
Goal: Smooth tracking without hunting.
What to do: If it oscillates around the target, raise TOL. If it is sluggish, lower the delay or step two degrees at a time when the error is large (proportional control). Outdoors, the sun moves slowly; a 30-second update interval is plenty and saves servo wear and power.
Expected result: A tracker that locks on and stays still until the light actually moves.
Step 5 - Mount a Real Panel
Goal: Measure the gain.
What to do: Fit a small solar cell on the platform and read its voltage on A4 through a divider. Log fixed-panel output for a day, then tracked output the next; expect roughly 20 to 35% more energy from tracking. Add a park position at night (tilt to horizontal, wait for morning brightness) so the tracker is not chasing streetlights.
Expected result: Real data proving the tracker earns its keep.
Conclusion
The Arduino solar tracker is a feedback loop you can see: sensors measure an error, actuators reduce it, repeat. With four LDRs, two servos, and a dead band, you have built the same control structure that keeps satellite dishes aimed and telescopes on target, just at breadboard scale.
Want the exact parts used in this build? Grab them from ShillehTek.com. If you want help customizing this project or building something for your product, check out our IoT consulting services.
Credit: Photos and images are credited to Samridh Garg on Hackster.io. The original guide served as the reference for this ShillehTek version.






.png?v=25000753014097803521791168436)

.png?v=68677308723310773341791168436)


