

Project Overview
DIY Smart Bathroom Scale: Build a D1 Mini (ESP8266) smart scale using four 50 kg half-bridge load cells and an HX711, then display your weight on an SSD1306 OLED and publish stable readings over MQTT.
A single bar load cell makes a kitchen scale; a person needs four. The 50 kg half-bridge cells inside many bathroom scales are cheap and tough, but they have three wires and no instructions. The key is wiring four of them into one Wheatstone bridge that an HX711 can read.
This guide wires the bridge, calibrates it against a known weight, shows the result on an OLED, and publishes a reading over MQTT only once you have stood still for three seconds, so a Home Assistant graph of your weight builds itself.
- Time: ~1.5 hours
- Skill level: Intermediate
- What you will build: A 200 kg-capacity Wi-Fi scale with tare, calibration, an OLED readout, and stable-reading MQTT publishing.

Parts List
From ShillehTek
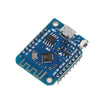
- ESP8266 D1 Mini - Wi-Fi microcontroller that reads the HX711 and publishes MQTT.
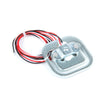
- 50 kg Half-Bridge Load Cell ×4 - the four sensors that form a full bridge under the platform.
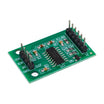
- HX711 Load Cell Amplifier (pre-soldered) - converts the bridge signal into readable digital values.
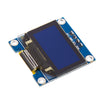
- 0.96" I2C OLED (SSD1306) - shows weight and status on-device.
- Tactile Button Kit - used as the tare button.
- 400-Point Breadboard - quick prototyping for the wiring.
- Dupont Jumper Wires - connections between modules and the D1 Mini.
External
- Two square boards (plywood or acrylic, ~30×30 cm), the cells' plastic mounting feet, screws, and a known weight for calibration
- Optional: an MQTT broker (Mosquitto / Home Assistant) on your network
Note: A half-bridge cell only produces a signal when its centre can flex. Mount each one on its plastic foot (or a washer spacer) so the middle of the metal strip floats above the base, put the top board on the four raised centres, and never clamp the whole strip flat. A clamped cell reads zero forever.
Step-by-Step Guide
Step 1 - Identify the Wires
Goal: Know which wire is the centre tap.
What to do: Each cell has red, white, and black leads. Measure between them with a multimeter: the two outer wires (white and black) read about 2 kΩ between them, and the red centre reads about 1 kΩ to each.
If your cells use different colours, the wire that reads half the resistance to both others is the centre.
Expected result: Four cells, each with a known centre wire.
Step 2 - Wire Four Half-Bridges Into One Bridge
Goal: Combine four 3-wire half-bridges into a single full Wheatstone bridge the HX711 can read.
What to do: Number the cells clockwise around the base: 1 front-left, 2 front-right, 3 back-right, 4 back-left, all mounted the same way up.
Join the outer wires in a ring:
- black of 1 → white of 2
- black of 2 → white of 3
- black of 3 → white of 4
- black of 4 → white of 1
Now connect the four red centre wires to the HX711:
- red 1 → E+
- red 3 → E−
- red 2 → A−
- red 4 → A+
Opposite corners excite the bridge; the other two corners are the signal.
Expected result: A full Wheatstone bridge that responds to weight anywhere on the platform.
Step 3 - Wire the HX711, OLED, and Button
Goal: Connect all modules to the D1 Mini (ESP8266).
What to do: Wire the modules like this:
- HX711: VCC → 3V3, GND → G, DT → D5, SCK → D6
- OLED: SDA → D2, SCL → D1, VCC → 3V3, GND → G
- Tare button: D7 to G
Install these libraries:
- HX711 Arduino Library (Bogdan Necula)
- Adafruit GFX + Adafruit SSD1306
- PubSubClient
Expected result: Hardware is wired and ready to calibrate.
Step 4 - The Sketch
Code:
#include <HX711.h>
#include <Wire.h>
#include <Adafruit_GFX.h>
#include <Adafruit_SSD1306.h>
#include <ESP8266WiFi.h>
#include <PubSubClient.h>

const char* SSID = "YourNetwork";
const char* PASS = "YourPassword";
const char* MQTT_HOST = "192.168.1.10";        // your broker (leave as-is if you have none)
const int DT = 14, SCK_PIN = 12, TARE_BTN = 13; // D5, D6, D7
float CAL = 1.0;                               // 1.0 for calibration; then your factor (Step 5)

HX711 scale;
Adafruit_SSD1306 oled(128, 64, &Wire, -1);
WiFiClient net; PubSubClient mqtt(net);

void show(float kg, const char* note) {
  oled.clearDisplay();
  oled.setTextSize(3); oled.setCursor(0, 8);  oled.print(kg, 1); oled.print("kg");
  oled.setTextSize(1); oled.setCursor(0, 52); oled.print(note);
  oled.display();
}

void setup() {
  Serial.begin(115200);
  pinMode(TARE_BTN, INPUT_PULLUP);
  oled.begin(SSD1306_SWITCHCAPVCC, 0x3C); oled.setTextColor(SSD1306_WHITE);
  scale.begin(DT, SCK_PIN);
  scale.set_scale(CAL);
  delay(500); scale.tare();                    // empty platform = zero
  WiFi.begin(SSID, PASS);
  while (WiFi.status() != WL_CONNECTED) delay(250);
  mqtt.setServer(MQTT_HOST, 1883);
}

void loop() {
  static float last = 0; static unsigned long stableSince = 0; static bool sent = false;
  if (!mqtt.connected()) mqtt.connect("smart-scale");
  mqtt.loop();

  if (digitalRead(TARE_BTN) == LOW) { scale.tare(); show(0, "tared"); delay(500); }

  float kg = scale.get_units(5);               // average of 5 readings, in kg once calibrated
  Serial.println(kg, 3);                       // raw units while CAL = 1.0
  bool stable = fabs(kg - last) < 0.2; last = kg;
  if (!stable) { stableSince = millis(); sent = false; }

  if (kg > 5 && stable && millis() - stableSince > 3000 && !sent) {   // stood still for 3 s
    char msg[16]; dtostrf(kg, 0, 1, msg);
    mqtt.publish("home/bathroom/scale/weight", msg, true);          // retained
    sent = true; show(kg, "sent");
  } else {
    show(kg, kg > 5 ? (sent ? "sent" : "hold still...") : "step on");
  }
  delay(200);
}
What to do: Upload with CAL = 1.0 and open the Serial Monitor.
Expected result: Raw numbers near zero with the platform empty, and they jump when you press on it. If pressing makes the number go negative, swap the A+ and A− wires (or use a negative CAL). The bridge is fine, just reversed.
Step 5 - Calibrate
Goal: Convert raw units into kilograms.
What to do: With CAL = 1.0, tare, then put a known weight in the middle of the platform (for example a 20 kg bag, or yourself after reading a trusted scale). Note the raw value R.
Your factor is:
CAL = R ÷ known_kg (example: 431,000 ÷ 20 = 21,550)
Enter the new CAL, re-upload, and check with a second weight. Then test the corners. A good bridge reads within about 1% wherever you stand; a big corner error means one cell is clamped flat or one ring joint is wrong.
Expected result: Readings in kg to one decimal, stable to about ±0.1 kg.
Step 6 - Make It Yours
Goal: Integrate the scale into your setup and adapt the pattern to other projects.
What to do: Add the MQTT sensor to Home Assistant with state_topic: home/bathroom/scale/weight and you get a weight history graph. You can also put the D1 Mini into deep sleep and wake it with the button for better battery life.
Using the same four-cell bridge approach, you can measure load for other platforms such as a beehive, a pet bed, a gas-bottle level, or a rain-gauge style collector.
Expected result: A scale that logs itself, and a four-cell load-cell bridge you can reuse for other builds.
Conclusion
By ringing the outer wires, alternating the centre connections, and calibrating once, four bathroom-scale half-bridge load cells become a 200 kg platform that an HX711 and D1 Mini can read. With the OLED display and MQTT publishing after 3 seconds of stability, your weight becomes reliable data that Home Assistant can track over time.
Want the exact parts used in this build? Grab them from ShillehTek.com. If you want help customizing this project or building something for your product, check out our IoT consulting services.
Credits: All photos and images in this tutorial are credited to WGLabz (weargenius) on Hackster.io (Apache-2.0 license). The original guide by WGLabz served as the reference for this ShillehTek version.





.png?v=25000753014097803521791168436)

.png?v=68677308723310773341791168436)


