

Project Overview
Arduino Nano + WS2812 8x8 LED Matrix Reaction Timer: Two players race to hit their button after the matrix flips to GO at a random moment. The first press wins the round, and the first to five wins the match.
This build uses the 8x8 WS2812 matrix as both the start light and a simple scoreboard. Along the way, you practice millis() timing, debouncing with INPUT_PULLUP, and a non-blocking game state flow.
- Time: 1 to 2 hours
- Skill level: Intermediate
- What you will build: A head-to-head reflex game with light cues, sound, and millisecond-accurate scoring.

Parts List
From ShillehTek
- Arduino Nano V3.0 Pre-Soldered - the microcontroller running the game loop
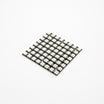
- 8x8 WS2812 RGB LED Matrix - ready/GO light plus score display
- Tactile Button Kit - start button and two player buttons
- KY-006 Passive Buzzer - round sounds and an early-press penalty sound
- 400-Point Breadboard - quick prototyping
- Dupont Jumper Wires - wiring between Nano, matrix, buttons, and buzzer
External
- Arcade-style buttons (optional) - for a more durable, slam-proof build
Note: The random wait before GO is the whole game (1 to 5 unpredictable seconds). Predictable timing gets memorized; randomness keeps it honest. Punishing early presses keeps it fair.
Step-by-Step Guide
Step 1 - Wire the arena
Goal: Connect the LED matrix, three buttons, and the buzzer to the Arduino Nano.
What to do: Wire the matrix DIN to D6, plus 5V and GND to your breadboard power rails. Wire the start button to D7, Player 1 to D8, and Player 2 to D9. Use INPUT_PULLUP for each button and connect the other side of each button to GND.
Wire the buzzer signal to D10. Place the two player buttons on opposite ends of the breadboard so each player has space to react quickly.
Expected result: A simple two-player setup ready for code upload.
Step 2 - Upload the core game loop
Goal: Create the random wait, show the GO signal, and detect who presses first.
What to do: Install the Adafruit NeoPixel library in the Arduino IDE, then upload the following sketch.
Code:
#include <Adafruit_NeoPixel.h>
Adafruit_NeoPixel matrix(64, 6, NEO_GRB + NEO_KHZ800);

const int START = 7, P1 = 8, P2 = 9, BUZZ = 10;
int score1 = 0, score2 = 0;

void fill(uint32_t c) { matrix.fill(c); matrix.show(); }

void setup() {
  matrix.begin();
  matrix.setBrightness(40);
  pinMode(START, INPUT_PULLUP);
  pinMode(P1, INPUT_PULLUP);
  pinMode(P2, INPUT_PULLUP);
  randomSeed(analogRead(A0));
  fill(matrix.Color(0, 0, 30));            // idle blue
}

void loop() {
  if (digitalRead(START) == HIGH) return;  // wait for start press

  fill(matrix.Color(30, 30, 0));           // yellow: get ready
  unsigned long wait = random(1000, 5000);
  unsigned long t0 = millis();

  while (millis() - t0 < wait) {           // false-start watch
    if (digitalRead(P1) == LOW || digitalRead(P2) == LOW) {
      tone(BUZZ, 110, 600);                // raspberry for jumping the gun
      fill(matrix.Color(30, 0, 30));
      delay(1200);
      return;
    }
  }

  fill(matrix.Color(0, 40, 0));            // GREEN: GO!
  tone(BUZZ, 1500, 120);
  unsigned long go = millis();

  while (true) {
    if (digitalRead(P1) == LOW) { score1++; break; }
    if (digitalRead(P2) == LOW) { score2++; break; }
  }
  unsigned long reaction = millis() - go;  // winner's time in ms

  // winner's color flash + show scores as lit rows
  fill(score1 > score2 ? matrix.Color(40, 0, 0) : matrix.Color(0, 0, 40));
  delay(1500);
  fill(matrix.Color(0, 0, 30));
}
Expected result: Yellow means wait, green means press. If a player presses early, the buzzer sounds and the matrix shows a penalty color.
Step 3 - Expand it to score-to-five
Goal: Turn individual rounds into a match.
What to do: Display one matrix row per point in each player's color (rows 0 to 4 for Player 1 from the top, rows 7 to 3 for Player 2 from the bottom). When either player reaches five, trigger a full-matrix victory rainbow.
The reaction variable is already measured in milliseconds. Print it to Serial if you want to compare wins by exact reaction time.
Expected result: A best-of-five style match with visible scoring on the 8x8 matrix.
Step 4 - Add tournament-style upgrades (optional)
Goal: Make the game more competitive without changing the core structure.
What to do: Shrink the random window for sudden-death rounds, add a fake-out (yellow flickers before true green), or log every reaction time over Serial to crown an average-speed champion.
Expected result: A more replayable reaction game using the same state-machine approach.
Conclusion
You built a two-player reaction timer using an Arduino Nano, an 8x8 WS2812 LED matrix, buttons, and a buzzer. The game combines random timing, millisecond measurement, first-press detection, and early-press handling in a project people actually want to play.
Want the exact parts used in this build? Grab them from ShillehTek.com. If you want help customizing this project or building something for your product, check out our IoT consulting services.
Credits
All photos and images in this tutorial are credited to Mirko Pavleski on Hackster.io. The original guide by Mirko Pavleski served as the reference for this ShillehTek version. We thank him for the excellent work in the maker community.







.png?v=25000753014097803521791168436)

.png?v=68677308723310773341791168436)


