

Project Overview
Touchless Hand Sanitizer Dispenser with Arduino, HC-SR04, and a Servo: Build an Arduino touchless hand sanitizer dispenser using an HC-SR04 ultrasonic distance sensor to detect a hand and a servo to press the pump automatically. This project shows how to convert a sensor reading into a single physical action, then wait until the hand leaves so it does not re-trigger continuously.
- Time: ~1 hour (including the mechanical bit)
- Skill level: Beginner
- What you will build: An automatic dispenser that triggers under 10 cm, pumps exactly once per hand, and works with any off-the-shelf pump bottle.

Parts List
From ShillehTek
- Arduino Nano V3.0 Pre-Soldered - compact Arduino board for reading the sensor and driving the servo
- Arduino Uno R3 Super Starter Kit - includes the HC-SR04 ultrasonic sensor and an SG90 servo
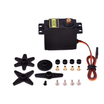
- MG995 Metal Gear Servo - higher torque option for stiff pump heads an SG90 cannot fully press
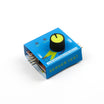
- Servo Tester - helps find your REST and PRESS angles before coding
- 400-Point Breadboard - quick prototyping for the sensor and signal wiring
- Dupont Jumper Wires - easy connections between the board, sensor, and servo signal
External
- A pump-style sanitizer or soap bottle
- Cardboard, wood, or 3D-printed bracket to hold the servo above the pump head, plus a stiff wire or popsicle-stick arm
- A 5 V USB power supply (a phone charger is fine)
Note: An MG995 pressing a pump can pull over an amp for a moment. Power the servo from the 5 V supply directly, not through the Nano's 5V pin, and share the ground. A brown-out mid-press is the classic cause of "it worked once, then reset."
Step-by-Step Guide
Step 1 - Wire the Sensor and Servo
Goal: Connect the sensor (eyes) and the servo (muscle) to the Arduino.
What to do: Wire the HC-SR04 as follows: VCC to 5V, GND to GND, TRIG to D10, and ECHO to D11.
What to do: Wire the servo as follows: signal to D9, red to the 5 V supply, and brown/black to GND. Make sure the servo ground and Arduino ground are common.
What to do: Mount the sensor facing down at the spot where hands will appear, about 15 to 20 cm above the tray.
Expected result: A sensor pointing at the hand zone and a servo ready to move.
Step 2 - Build the Pump Arm
Goal: Convert servo rotation into a clean pump press.
What to do: Fix the servo to a bracket so its horn sits just above the pump head. Attach a rigid arm (popsicle stick, coat-hanger wire, or a printed lever) that sweeps down onto the pump when the servo rotates about 90 degrees.
What to do: Use the servo tester to find two angles: REST (arm clear of the pump) and PRESS (pump fully down).
Expected result: Turning the tester knob presses and releases the pump cleanly.
Step 3 - Upload the Sketch
Goal: Read distance with the HC-SR04 and press the pump once with the servo when a hand is detected.
Code:
#include <Servo.h>

const int TRIG = 10, ECHO = 11, SERVO_PIN = 9;
const int TRIGGER_CM = 10;          // a hand closer than this dispenses
const int REST = 0, PRESS = 90;     // angles found with the servo tester
Servo arm;

long readCm() {
  digitalWrite(TRIG, LOW);  delayMicroseconds(2);
  digitalWrite(TRIG, HIGH); delayMicroseconds(10);
  digitalWrite(TRIG, LOW);
  long us = pulseIn(ECHO, HIGH, 25000);    // time out if nothing is in range
  return (us == 0) ? 999 : us * 0.034 / 2; // 999 = nothing there
}

void setup() {
  pinMode(TRIG, OUTPUT); pinMode(ECHO, INPUT);
  arm.attach(SERVO_PIN);
  arm.write(REST);
  Serial.begin(9600);
}

void loop() {
  long cm = readCm();
  Serial.println(cm);

  if (cm > 2 && cm < TRIGGER_CM) {         // hand detected
    arm.write(PRESS);  delay(600);           // push the pump
    arm.write(REST);   delay(400);           // let it spring back

    while (readCm() < TRIGGER_CM) delay(100);  // wait until the hand leaves
    delay(500);                                // so one wave = exactly one pump
  }
  delay(100);
}
What to do: Set REST and PRESS to your measured angles, upload, and wave a hand under the sensor.
Expected result: One clean pump per hand. Holding your hand there does not cause repeated pumping.
Step 4 - Tune the Dose
Goal: Dispense the right amount consistently.
What to do: If you get too little sanitizer, increase the PRESS angle or the 600 ms hold time. If you get too much, do a partial press.
What to do: Optionally add a second, shorter press for a double-dose mode, or read a potentiometer to set the dose from a knob on the front.
Expected result: A dispenser that gives the same dose as a commercial unit.
Step 5 - Box It Up
Goal: Turn the prototype into a durable front-door device.
What to do: Enclose the electronics, leave the sensor's two "eyes" exposed, and run it from a USB charger.
What to do: Optionally add a counter on a small display to track uses, or add a low-level warning using a second HC-SR04 aimed at the liquid. It is the same sensor code, but answering a different question.
Expected result: A finished appliance built from parts you understand completely.
Conclusion
In this build, the Arduino reads distance from the HC-SR04 and drives a servo to press the sanitizer pump once, then waits for the hand to leave before it can trigger again. That "act once, then wait" pattern is what keeps a touchless dispenser from repeatedly pumping while a hand is still in front of the sensor.
Want the exact parts used in this build? Grab them from ShillehTek.com. If you want help customizing this project or building something for your product, check out our IoT consulting services.
Credits: All photos and images in this tutorial are credited to Mission Critical on Hackster.io. The original guide by Mission Critical served as the reference for this ShillehTek version (shared under CC BY-SA).






.png?v=25000753014097803521791168436)

.png?v=68677308723310773341791168436)