Overview
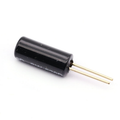
The SW-420 module is the simplest way to give a project a sense of touch-by-shake: it detects taps, knocks, bumps, and machine vibration and reports them as a clean digital signal on one pin. Inside the blue cylinder is a spring-and-pin vibration switch that is conductive at rest; the moment the module is jolted, the contact chatters open and closed. An onboard LM393 comparator turns that chatter into crisp digital pulses, with a blue trimmer potentiometer setting how hard a shake counts as "vibration."
Because the output is plain 3.3V/5V logic, the SW-420 works with every board in the drawer — Arduino, ESP32, Raspberry Pi, and Pico — with no libraries, no protocols, and no analog math. Power it from 3.3V or 5V, watch the DO pin, and react. Two onboard LEDs make setup easy: one shows power, the other mirrors the output so you can tune the sensitivity pot with your eyes before writing a single line of code.
It is a detector, not a measuring instrument — it tells you that something shook, not precisely how hard. That is exactly right for anti-tamper alarms, package and door knock sensors, washing-machine end-of-cycle detectors, earthquake toys, bike and vehicle movement alarms, and machine health monitors that flag unusual rattling. When you need actual vibration magnitude and frequency, step up to an accelerometer like the ADXL345 or MPU6050.
At a Glance
Specifications
| Parameter | Value |
| Sensing Element | SW-420 normally-closed spring vibration switch |
| Operating Voltage | 3.3V - 5V DC |
| Operating Current | ~15 mA |
| Comparator | LM393 dual differential comparator |
| Output | Digital logic on DO; pulses when vibration exceeds threshold |
| Sensitivity Adjustment | Onboard trimmer potentiometer (comparator threshold) |
| Direction Sensitivity | Non-directional — responds to shakes on any axis |
| Indicator LEDs | 2 (power + DO status) |
| Response | Bursts of pulses during vibration — count or debounce in code |
| Board Dimensions | ~32 x 14 mm |
Pinout Diagram
Three pins run the whole show: VCC accepts 3.3V or 5V (match your board's logic level), GND is ground, and DO is the digital output from the LM393 comparator. The blue potentiometer sets the vibration threshold — turning it changes how big a jolt is needed before DO fires and the output LED blinks. The SW-420 tube itself is the blue cylinder soldered to the board; it senses shakes in any direction, so the module's mounting orientation does not matter.

Wiring Guide
Arduino Wiring
Power from 5V and read DO on any digital pin. Pin 2 is used here because it supports external interrupts, which the example sketch uses to catch even the shortest pulses.
| SW-420 Pin | Arduino Pin |
|---|---|
| VCC | 5V |
| GND | GND |
| DO | Digital Pin 2 (interrupt-capable) |
ESP32 Wiring
Power the module from 3V3 so DO swings at 3.3V — safe for ESP32 inputs with zero extra components.
| SW-420 Pin | ESP32 Pin | Details |
|---|---|---|
| VCC | 3V3 | Do NOT use VIN/5V |
| GND | GND | |
| DO | GPIO 25 | Any free GPIO works |
Raspberry Pi Wiring
Same rule as the ESP32: power from the 3.3V pin so the output is GPIO-safe.
| SW-420 Pin | Raspberry Pi Pin | Details |
|---|---|---|
| VCC | Pin 1 (3.3V) | Do NOT use 5V pins |
| GND | Pin 6 (GND) | |
| DO | Pin 11 (GPIO 17) |
Raspberry Pi Pico Wiring
Power from 3V3(OUT) and read DO on any GPIO — GP15 here to match the code example.
| SW-420 Pin | Pico Pin | Details |
|---|---|---|
| VCC | 3V3(OUT) (physical pin 36) | Do NOT use VBUS (5V) |
| GND | GND (physical pin 38) | |
| DO | GP15 (physical pin 20) |
Code Examples
Vibration shows up as short bursts of pulses on DO, so all four examples use interrupts to count pulses and then report activity once per second — a simple, robust pattern that doubles as a rough intensity estimate (more pulses = harder shaking). Note: some board revisions idle HIGH instead of LOW; the pulse-counting approach works either way, since any vibration produces edges.
Arduino
// SW-420 Vibration Sensor - Arduino Example (interrupt pulse counting)
// DO -> Pin 2, VCC -> 5V, GND -> GND

const int sensorPin = 2;               // interrupt-capable pin
volatile unsigned int pulseCount = 0;

void onVibration() {
  pulseCount++;                        // keep the ISR tiny
}

void setup() {
  Serial.begin(9600);
  pinMode(sensorPin, INPUT);
  // CHANGE catches every edge, so idle-HIGH boards work too
  attachInterrupt(digitalPinToInterrupt(sensorPin), onVibration, CHANGE);
  Serial.println("Monitoring vibration...");
}

void loop() {
  // Report once per second
  noInterrupts();
  unsigned int count = pulseCount;
  pulseCount = 0;
  interrupts();

  if (count == 0) {
    Serial.println("Still");
  } else if (count < 20) {
    Serial.print("Light vibration  (");
    Serial.print(count);
    Serial.println(" pulses)");
  } else {
    Serial.print("STRONG vibration (");
    Serial.print(count);
    Serial.println(" pulses)");
  }

  delay(1000);
}
ESP32 (MicroPython)
# SW-420 Vibration Sensor - ESP32 MicroPython Example
# DO -> GPIO 25, VCC -> 3V3, GND -> GND

from machine import Pin
import time

sensor = Pin(25, Pin.IN)
pulse_count = 0

def on_vibration(pin):
    global pulse_count
    pulse_count += 1

# Trigger on both edges so idle-HIGH board revisions work too
sensor.irq(trigger=Pin.IRQ_RISING | Pin.IRQ_FALLING, handler=on_vibration)

print("Monitoring vibration...")

while True:
    pulse_count = 0
    time.sleep(1)

    if pulse_count == 0:
        print("Still")
    elif pulse_count < 20:
        print("Light vibration  ({} pulses)".format(pulse_count))
    else:
        print("STRONG vibration ({} pulses)".format(pulse_count))
Raspberry Pi (Python)
#!/usr/bin/env python3
# SW-420 Vibration Sensor - Raspberry Pi Example
# DO -> GPIO 17 (pin 11), VCC -> 3.3V (pin 1), GND -> GND (pin 6)

import RPi.GPIO as GPIO
import time

SENSOR_PIN = 17
pulse_count = 0

def on_vibration(channel):
    global pulse_count
    pulse_count += 1

GPIO.setmode(GPIO.BCM)
GPIO.setup(SENSOR_PIN, GPIO.IN)
# BOTH edges so idle-HIGH board revisions work too
GPIO.add_event_detect(SENSOR_PIN, GPIO.BOTH, callback=on_vibration)

print("Monitoring vibration (Ctrl+C to stop)...")

try:
    while True:
        pulse_count = 0
        time.sleep(1)

        if pulse_count == 0:
            print("Still")
        elif pulse_count < 20:
            print("Light vibration  ({} pulses)".format(pulse_count))
        else:
            print("STRONG vibration ({} pulses)".format(pulse_count))

except KeyboardInterrupt:
    print("Stopped by user")
finally:
    GPIO.cleanup()
Raspberry Pi Pico (MicroPython)
# SW-420 Vibration Sensor - Pico MicroPython Example
# DO -> GP15, VCC -> 3V3(OUT), GND -> GND

from machine import Pin
import time

sensor = Pin(15, Pin.IN)
pulse_count = 0

def on_vibration(pin):
    global pulse_count
    pulse_count += 1

sensor.irq(trigger=Pin.IRQ_RISING | Pin.IRQ_FALLING, handler=on_vibration)

print("Monitoring vibration...")

while True:
    pulse_count = 0
    time.sleep(1)

    if pulse_count == 0:
        print("Still")
    elif pulse_count < 20:
        print("Light vibration  ({} pulses)".format(pulse_count))
    else:
        print("STRONG vibration ({} pulses)".format(pulse_count))