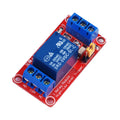
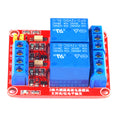
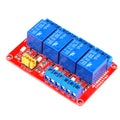
Overview
This USB-controlled relay is the simplest possible way to add software-driven AC/DC switching to a PC. It plugs straight into a USB-A port and presents itself as a standard CH340 serial device, so any computer (Windows, macOS, Linux, or even a Raspberry Pi) can flip the relay on or off by sending a single byte over a virtual COM port.
On the screw-terminal side you get NO (normally open), COM (common), and NC (normally closed) — a single-pole double-throw switch rated for 10A at 250VAC or 30VDC. Use it to power-cycle a remote computer, automate a USB hub, switch a 12V LED strip from a script, or any place where "PC says turn this thing on or off" is the requirement.
At a Glance
Specifications
| Parameter | Value |
| Power Source | USB 5V (USB 2.0 type A) |
| Power Consumption | ~70 mA (relay energized) |
| USB Bridge | CH340 (USB to serial, virtual COM) |
| Default Baud Rate | 9600 8N1 |
| Relay Type | SPDT (Single Pole Double Throw) |
| Contact Rating (AC) | 10A @ 250V |
| Contact Rating (DC) | 10A @ 30V |
| Switching Time | ~10 ms operate, ~5 ms release |
| Mechanical Life | ~10 million cycles |
| Electrical Life | ~100,000 cycles at full load |
| Operating Temperature | -25°C to +75°C |
| Output Terminals | NO (normally open), COM (common), NC (normally closed) |
Pinout Diagram

Wiring Guide
Low-Voltage Load (LED strip, fan, 12V device)
For a basic load that should be off until the PC says "on", wire your supply through the COM and NO terminals. The relay closes that circuit when energized.
| Terminal | Connect To |
|---|---|
| COM | One leg of the load supply (e.g., 12V+ from PSU) |
| NO | Load + terminal |
| NC | (unused) |
Load - terminal returns to the supply ground. The relay only switches one wire — make sure to wire the high side (positive) through it for safest operation.
Mains AC Load (110V or 220V)
Switch the LIVE / HOT wire through the relay; leave NEUTRAL pass-through. Always follow local electrical codes — if you're not comfortable with mains wiring, hire an electrician.
| Terminal | Connect To |
|---|---|
| COM | Mains LIVE (hot) wire from supply |
| NO | LIVE wire to the load |
| NC | (unused) |
Mains NEUTRAL connects directly from supply to the load — it does NOT go through the relay. EARTH (ground) also passes through directly.
PC Connection & Driver
Plug into any USB 2.0 port. The CH340 chip enumerates as a virtual COM port. Drivers are bundled with Windows 10/11 and current macOS/Linux distros — most users see the device appear automatically.
| OS | Where to Find Port |
|---|---|
| Windows | Device Manager > Ports > "USB-SERIAL CH340 (COMx)" |
| macOS | /dev/tty.wchusbserial1410 (or similar) |
| Linux | /dev/ttyUSB0 (typically) |
Code Examples
The board listens at 9600 baud. Send 0xA0 0x01 0x01 0xA2 to turn the relay ON, and 0xA0 0x01 0x00 0xA1 to turn it OFF. (Some firmware variants accept the simpler ASCII "on" / "off" — try both if one doesn't work.)
Python (Windows / macOS / Linux)
#!/usr/bin/env python3
# Install: pip install pyserial
# Find your port: pyserial-ports or check Device Manager

import serial
import time

PORT = 'COM3'        # Windows
# PORT = '/dev/tty.wchusbserial1410'  # macOS
# PORT = '/dev/ttyUSB0'                # Linux

ser = serial.Serial(PORT, 9600, timeout=1)
time.sleep(0.1)

ON  = bytes([0xA0, 0x01, 0x01, 0xA2])
OFF = bytes([0xA0, 0x01, 0x00, 0xA1])

print("Relay ON")
ser.write(ON)
time.sleep(2)

print("Relay OFF")
ser.write(OFF)

ser.close()
Linux Bash
#!/bin/bash
# Quick command-line relay control
# Usage: ./usb_relay.sh on   or   ./usb_relay.sh off

PORT="/dev/ttyUSB0"
stty -F "$PORT" 9600 raw -echo

if [ "$1" = "on" ]; then
  printf '\xA0\x01\x01\xA2' > "$PORT"
  echo "Relay ON"
elif [ "$1" = "off" ]; then
  printf '\xA0\x01\x00\xA1' > "$PORT"
  echo "Relay OFF"
else
  echo "Usage: $0 on|off"
fi
Node.js
// npm install serialport
const { SerialPort } = require('serialport');

const port = new SerialPort({
  path: '/dev/ttyUSB0',  // change to your port
  baudRate: 9600,
});

const ON  = Buffer.from([0xA0, 0x01, 0x01, 0xA2]);
const OFF = Buffer.from([0xA0, 0x01, 0x00, 0xA1]);

port.on('open', () => {
  port.write(ON);
  console.log('Relay ON');

  setTimeout(() => {
    port.write(OFF);
    console.log('Relay OFF');
    port.close();
  }, 2000);
});
Raspberry Pi (Python — same code)
#!/usr/bin/env python3
# Plug the relay into any USB port on the Pi
# It enumerates as /dev/ttyUSB0 (or similar)

import serial, time

ser = serial.Serial('/dev/ttyUSB0', 9600)
time.sleep(0.1)

# Pulse on for 5 seconds
ser.write(bytes([0xA0, 0x01, 0x01, 0xA2]))
time.sleep(5)
ser.write(bytes([0xA0, 0x01, 0x00, 0xA1]))
ser.close()
Frequently Asked Questions
"on" and "off". Confirm the COM port number is correct and that no other program (e.g., Arduino IDE Serial Monitor) is holding it open./dev/ttyUSB0, and use pyserial just like on a desktop. This is one of the easiest ways to add 10A switching to a Pi without GPIO wiring.