Super Starter Kit for Arduino Uno R3 with TutorialDefault Title · $34.99 · Only 3 left
Overview
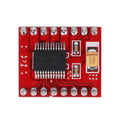
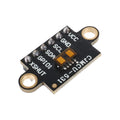
The Super Starter Kit is a complete on-ramp to embedded electronics, built around the Arduino Uno R3 platform — the board that taught the world to blink an LED. Everything needed for the first dozen experiments is in the box: the Uno R3-compatible board and USB cable, a solderless breadboard, jumper wires, and a spread of components and modules that cover inputs, outputs, and the wiring habits in between, with tutorial guidance to walk you through them in order.
The learning arc is deliberate. You start by making the board itself do something (Blink), then make electricity flow through your own circuit (an LED and resistor on the breadboard), then close the loop between input and output (a button, a knob, a sensor driving what you built). Those three steps — output, circuit, input — are the whole of physical computing in miniature; every project after is a bigger version of them.
Because the Uno is the most-documented microcontroller ever made, the kit also plugs you into a bottomless supply of follow-on material, including the tutorial-length walkthroughs on our own blog. This manual gets you through setup (including the one driver gotcha), your first circuits with exact wiring, four graduated code examples, and answers to the questions every beginner meets in week one.
At a Glance
Platform
Arduino Uno R3 compatible
Level
Absolute beginner friendly
Includes
Board, breadboard, components & modules
Software
Free Arduino IDE (Win / Mac / Linux)
Guidance
Included tutorial material
Ideal For
Students · makers · classrooms
Specifications
Parameter
Value
Controller board
Uno R3 compatible — ATmega328P, 16 MHz, USB
I/O
14 digital pins (6 PWM), 6 analog inputs
Logic level
5 V
USB-serial chip
CH340 (driver note in Setup tab)
Prototyping
Solderless breadboard + male-male jumper wires
Output components
LEDs (multiple colors), buzzer-type and display-type parts
Input components
Push buttons, potentiometer-style and sensor-type parts
Passives
Resistor assortment for LEDs and pull-downs
Power options
USB from the computer; barrel jack for 7–12 V adapters
Software
Arduino IDE 2.x (free), no license required
Contents note
Component mix may vary slightly between production batches
Wiring Guide
Install the IDE and Connect the Board
Step
What to do
Notes
1. Install the IDE
Download Arduino IDE 2.x from arduino.cc
Windows, macOS, and Linux are all supported
2. Install the driver
Install the CH340 USB-serial driver
Needed for the board to appear as a port
3. Plug in the board
Connect via the included USB cable
The board’s power LED lights up
4. Select the board
Tools → Board → “Arduino Uno”
Compatible boards use the standard Uno profile
5. Select the port
Tools → Port → the new COM/tty entry
Unplug/replug to see which entry it is
The one setup gotcha. Uno-compatible boards use the CH340 USB chip instead of the original’s ATmega16U2, so until the free CH340 driver is installed the board may not show a serial port at all. Install it once and the board behaves exactly like a standard Uno forever after.
Your First Breadboard Circuit: External LED
Connection
From → To
Notes
Signal
Uno D8 → 220 Ω resistor → LED anode (long leg)
Resistor limits LED current
Return
LED cathode (short leg) → breadboard rail → Uno GND
Completes the circuit
Breadboard tip
Rows of 5 holes are connected; the center trench splits them
Long side rails run the board’s length
LED polarity matters. The long leg (anode) goes toward the signal/positive side, the short leg to ground. Backwards, it simply stays dark — nothing is damaged. Always pair an LED with a resistor (220–330 Ω from the kit) or it will burn out.
Reading Inputs: Button and Knob
Connection
From → To
Notes
Button leg 1
Uno D2
Code uses INPUT_PULLUP — no resistor needed
Button leg 2 (diagonal)
GND
Pressed = pin reads LOW
Potentiometer outer legs
5V and GND
Either orientation works
Potentiometer middle leg
A0
Reads 0–1023 as you turn it
The pattern behind every sensor. Digital parts (buttons, PIR, tilt) read HIGH or LOW with digitalRead; analog parts (knobs, light sensors, soil probes) read 0–1023 with analogRead. Learn these two calls and most of the modules in the kit are already familiar.
Where to Go Next
Milestone
What you’ll practice
Kit skills used
Traffic light
Multiple outputs + timing
3 LEDs, resistors, loops
Night light
Analog threshold logic
Light-dependent input + LED
Distance alarm
Sensor + sound output
Ultrasonic-style module + buzzer
Serial dashboard
Talking to the PC
Serial Monitor / Plotter
Keep the momentum. Our blog’s Arduino tutorials (linked below) pick up exactly where the kit leaves off — GPS, motion sensors, servos, radios — each with wiring and complete sketches in the same style as this manual.
Code Examples
1. Blink — Prove Everything Works
blink.ino
// The "hello world" of hardware - uses the LED built into the board
void setup() {
  pinMode(LED_BUILTIN, OUTPUT);   // pin 13 on the Uno
}

void loop() {
  digitalWrite(LED_BUILTIN, HIGH);
  delay(500);
  digitalWrite(LED_BUILTIN, LOW);
  delay(500);
}
2. External LED with Fading (PWM)
led_fade.ino
// LED + 220 ohm resistor on pin 9 (a PWM pin, marked with ~)
const int LED = 9;

void setup() {
  pinMode(LED, OUTPUT);
}

void loop() {
  for (int b = 0; b <= 255; b += 5) {   // brighten
    analogWrite(LED, b);
    delay(20);
  }
  for (int b = 255; b >= 0; b -= 5) {   // dim
    analogWrite(LED, b);
    delay(20);
  }
}
3. Button Controls the LED
button_led.ino
const int BUTTON = 2;   // to GND, using the internal pull-up
const int LED = 8;

void setup() {
  pinMode(BUTTON, INPUT_PULLUP);  // reads HIGH until pressed
  pinMode(LED, OUTPUT);
}

void loop() {
  if (digitalRead(BUTTON) == LOW) {   // LOW = pressed
    digitalWrite(LED, HIGH);
  } else {
    digitalWrite(LED, LOW);
  }
}
4. Read the Knob on the Serial Plotter
analog_read.ino
// Potentiometer: outer legs to 5V and GND, middle leg to A0
// Open Tools > Serial Plotter at 9600 baud and turn the knob
void setup() {
  Serial.begin(9600);
}

void loop() {
  int raw = analogRead(A0);              // 0-1023
  float volts = raw * (5.0 / 1023.0);
  Serial.print("raw:");
  Serial.print(raw);
  Serial.print("\tvolts:");
  Serial.println(volts);
  delay(50);
}
Frequently Asked Questions
My board doesn’t show up under Tools → Port. What now?
Install the CH340 driver — that fixes it in nearly every case. If a port still never appears, try another USB cable (some are charge-only and carry no data) and another USB port. On Windows, Device Manager showing an unknown device confirms it is the driver; on macOS, allow the driver in Security settings after installing.
Upload fails with “avrdude: stk500_recv(): programmer is not responding”.
Work the checklist: correct board selected (Arduino Uno), correct port selected, nothing wired to pins 0 and 1 (they are the upload serial lines — disconnect anything on them during upload), then press the board’s reset button and try again. One of those four resolves virtually every sync error.
Is a compatible board really the same as an official Uno?
Functionally, yes: same ATmega328P, same pinout, same IDE, same sketches, same shields. The differences are the USB-serial chip (CH340, hence the driver step) and the price. Everything written for an Uno — every tutorial on the internet — runs on it unchanged.
How do I know which resistor is which?
Read the color bands (for 220 Ω: red-red-brown, plus a tolerance band) or simply measure with a multimeter if you have one. For LED work, anything in the 220–330 Ω range from the assortment is right; when a project needs a precise value, its tutorial will say so. Sorting the assortment into labeled bags on day one pays off forever.
Can I hurt the board by wiring something wrong?
Mostly no — the classic beginner mistakes (backwards LED, wrong pin, unconnected wire) are harmless. The wiring to actually avoid: connecting 5 V directly to GND (short circuit), feeding more than 5 V into any pin, and drawing motor-sized currents from a pin. Build with USB unplugged, double-check power rails, then plug in.
Do 3.3 V modules work with this 5 V board?
Many do, because common breakout boards include regulators and tolerant inputs — but pure 3.3 V parts can be damaged by 5 V signals. When you graduate to 3.3 V-only sensors, add a logic level converter (a small, cheap board we also stock) or move the project to a 3.3 V platform like ESP32 or Pico.
I finished the starter projects. What should I buy next?
Nothing, at first — recombine what you have into something of your own; that is where the learning compounds. When you do expand, the natural next steps are a sensor that interests you (distance, motion, temperature), a display, or a servo — each has a full manual and tutorials on this site written in the same format you are reading now.
Reference documents for the Super Starter Kit for Arduino Uno R3 with Tutorial. This manual covers wiring and code; the documents below carry the full electrical specifications.