
Connecting multiple Raspberry Pico W’s can be essential in projects involving distributed systems. In this tutorial, I demonstrate how to send messages between two Raspberry Pi Pico W devices using the Thonny IDE in MicroPython.
Step 1-) Allow multiple Thonny Instances
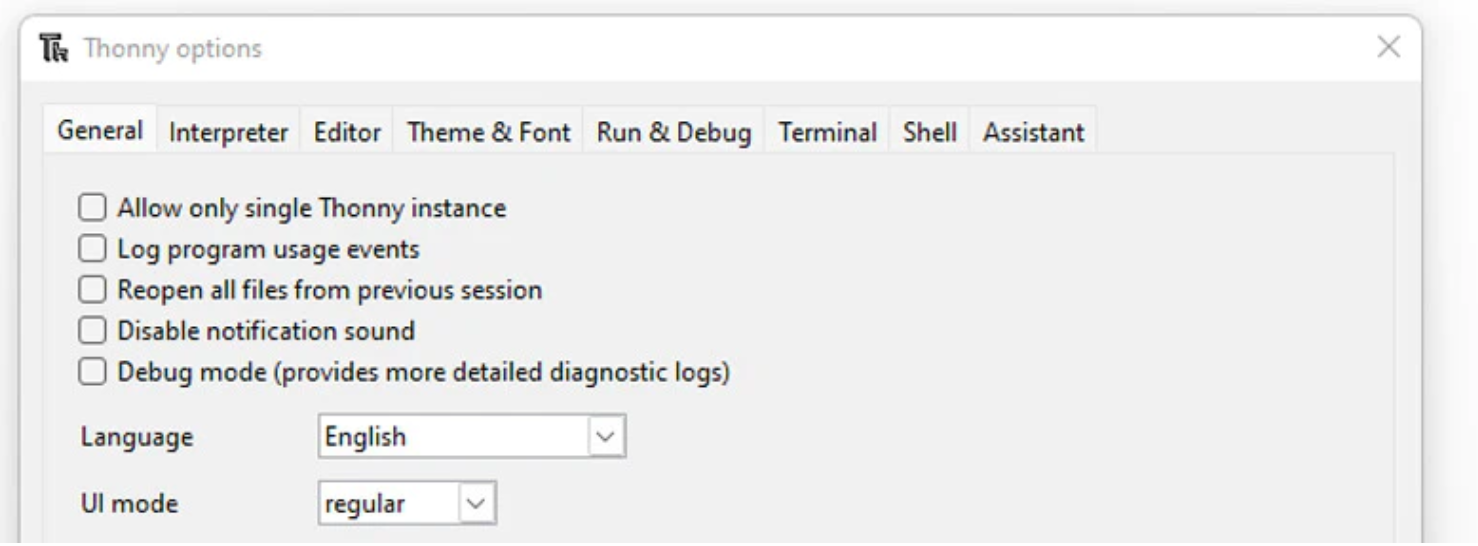
To do this, open up Thonny and head to Tools > Options > General and untick 'Allow only single Thonny instance'.
Restart Thonny to activate this behavior.
Step 2-) Open Another Thonny Instance
To open another instance on a Mac, go to the Terminal and run the following code:
/Applications/Thonny.app/Contents/MacOS/thonny
After running this you should see another Thonny instance pop up.
If you are using Windows or Linux, the process is a little different. You can open cmd and do something similar or you can double-tap the application to open another instance.
Afterward, you can select the corresponding device in the corresponding Thonny instances. If you have the devices connected to your computer you should be able to connect both in the separate screens.
Step 3-) Send messages between devices
In one instance run the following server code, you can select either Pico W to do this.
from machine import Pin, ADC
import network
import random
import socket
import time

import constants


# Just making our internet connection
wlan = network.WLAN(network.STA_IF)
wlan.active(True)
wlan.connect(constants.INTERNET_NAME, constants.INTERNET_PASSWORD)

# Wait for connect or fail
max_wait = 10
while max_wait > 0:
  if wlan.status() < 0 or wlan.status() >= 3:
    break
  max_wait -= 1
  print('waiting for connection...')
  time.sleep(1)
# Handle connection error
if wlan.status() != 3:
   raise RuntimeError('network connection failed')
else:
  print('connected')
  status = wlan.ifconfig()
  #print('ip = ' + status[0])

# Open socket
addr = socket.getaddrinfo('0.0.0.0', 80)[0][-1]

s = socket.socket()
s.bind(addr)
s.listen(1)

print('listening on', addr)

# Listen for connections
while True:
    try:
        cl, addr = s.accept()
        request = cl.recv(1024)
        print(request)
        # No need to unpack request in this example
        ran_num = str(random.randint(0, 100))
        cl.send(ran_num)
        print("Sent: " + ran_num)
        cl.close()

    except OSError as e:
        cl.close()
        print('connection closed')
In the other instance run the client code, and select the other Pico W to do this.
from machine import Pin, ADC
import network
import random
import socket
import time

import constants

# Just making our internet connection
wlan = network.WLAN(network.STA_IF)
wlan.active(True)
wlan.connect(constants.INTERNET_NAME, constants.INTERNET_PASSWORD)

# Wait for connect or fail
max_wait = 10
while max_wait > 0:
  if wlan.status() < 0 or wlan.status() >= 3:
    break
  max_wait -= 1
  print('waiting for connection...')
  time.sleep(1)
# Handle connection error
if wlan.status() != 3:
   raise RuntimeError('network connection failed')
else:
  print('connected')
  status = wlan.ifconfig()
  #print('ip = ' + status[0])

while True:
    ai = socket.getaddrinfo(<Change this>, 80) # Address of Web Server
    addr = ai[0][-1]

    # Create a socket and make a HTTP request
    s = socket.socket() # Open socket
    s.connect(addr)
    s.send(b"Anything") # Send request
    ss=str(s.recv(512)) # Store reply
    # Print what we received
    print(ss)
    # Set RGB LED here
    s.close()          # Close socket
    time.sleep(0.2)    # wait
The code is simply sending a message between the client and the server, be sure to change the Address of the Web Server. You can get this by uncommenting the code in the server,
#print('ip = ' + status[0])
If you set up everything correctly you should start seeing random numbers being sent to the client. This can be extended to your own applications!
Conclusion
Hope you learned how to easily send information locally between two or more devices. If you learned something be sure to subscribe to the channel and let me know if you have any questions.