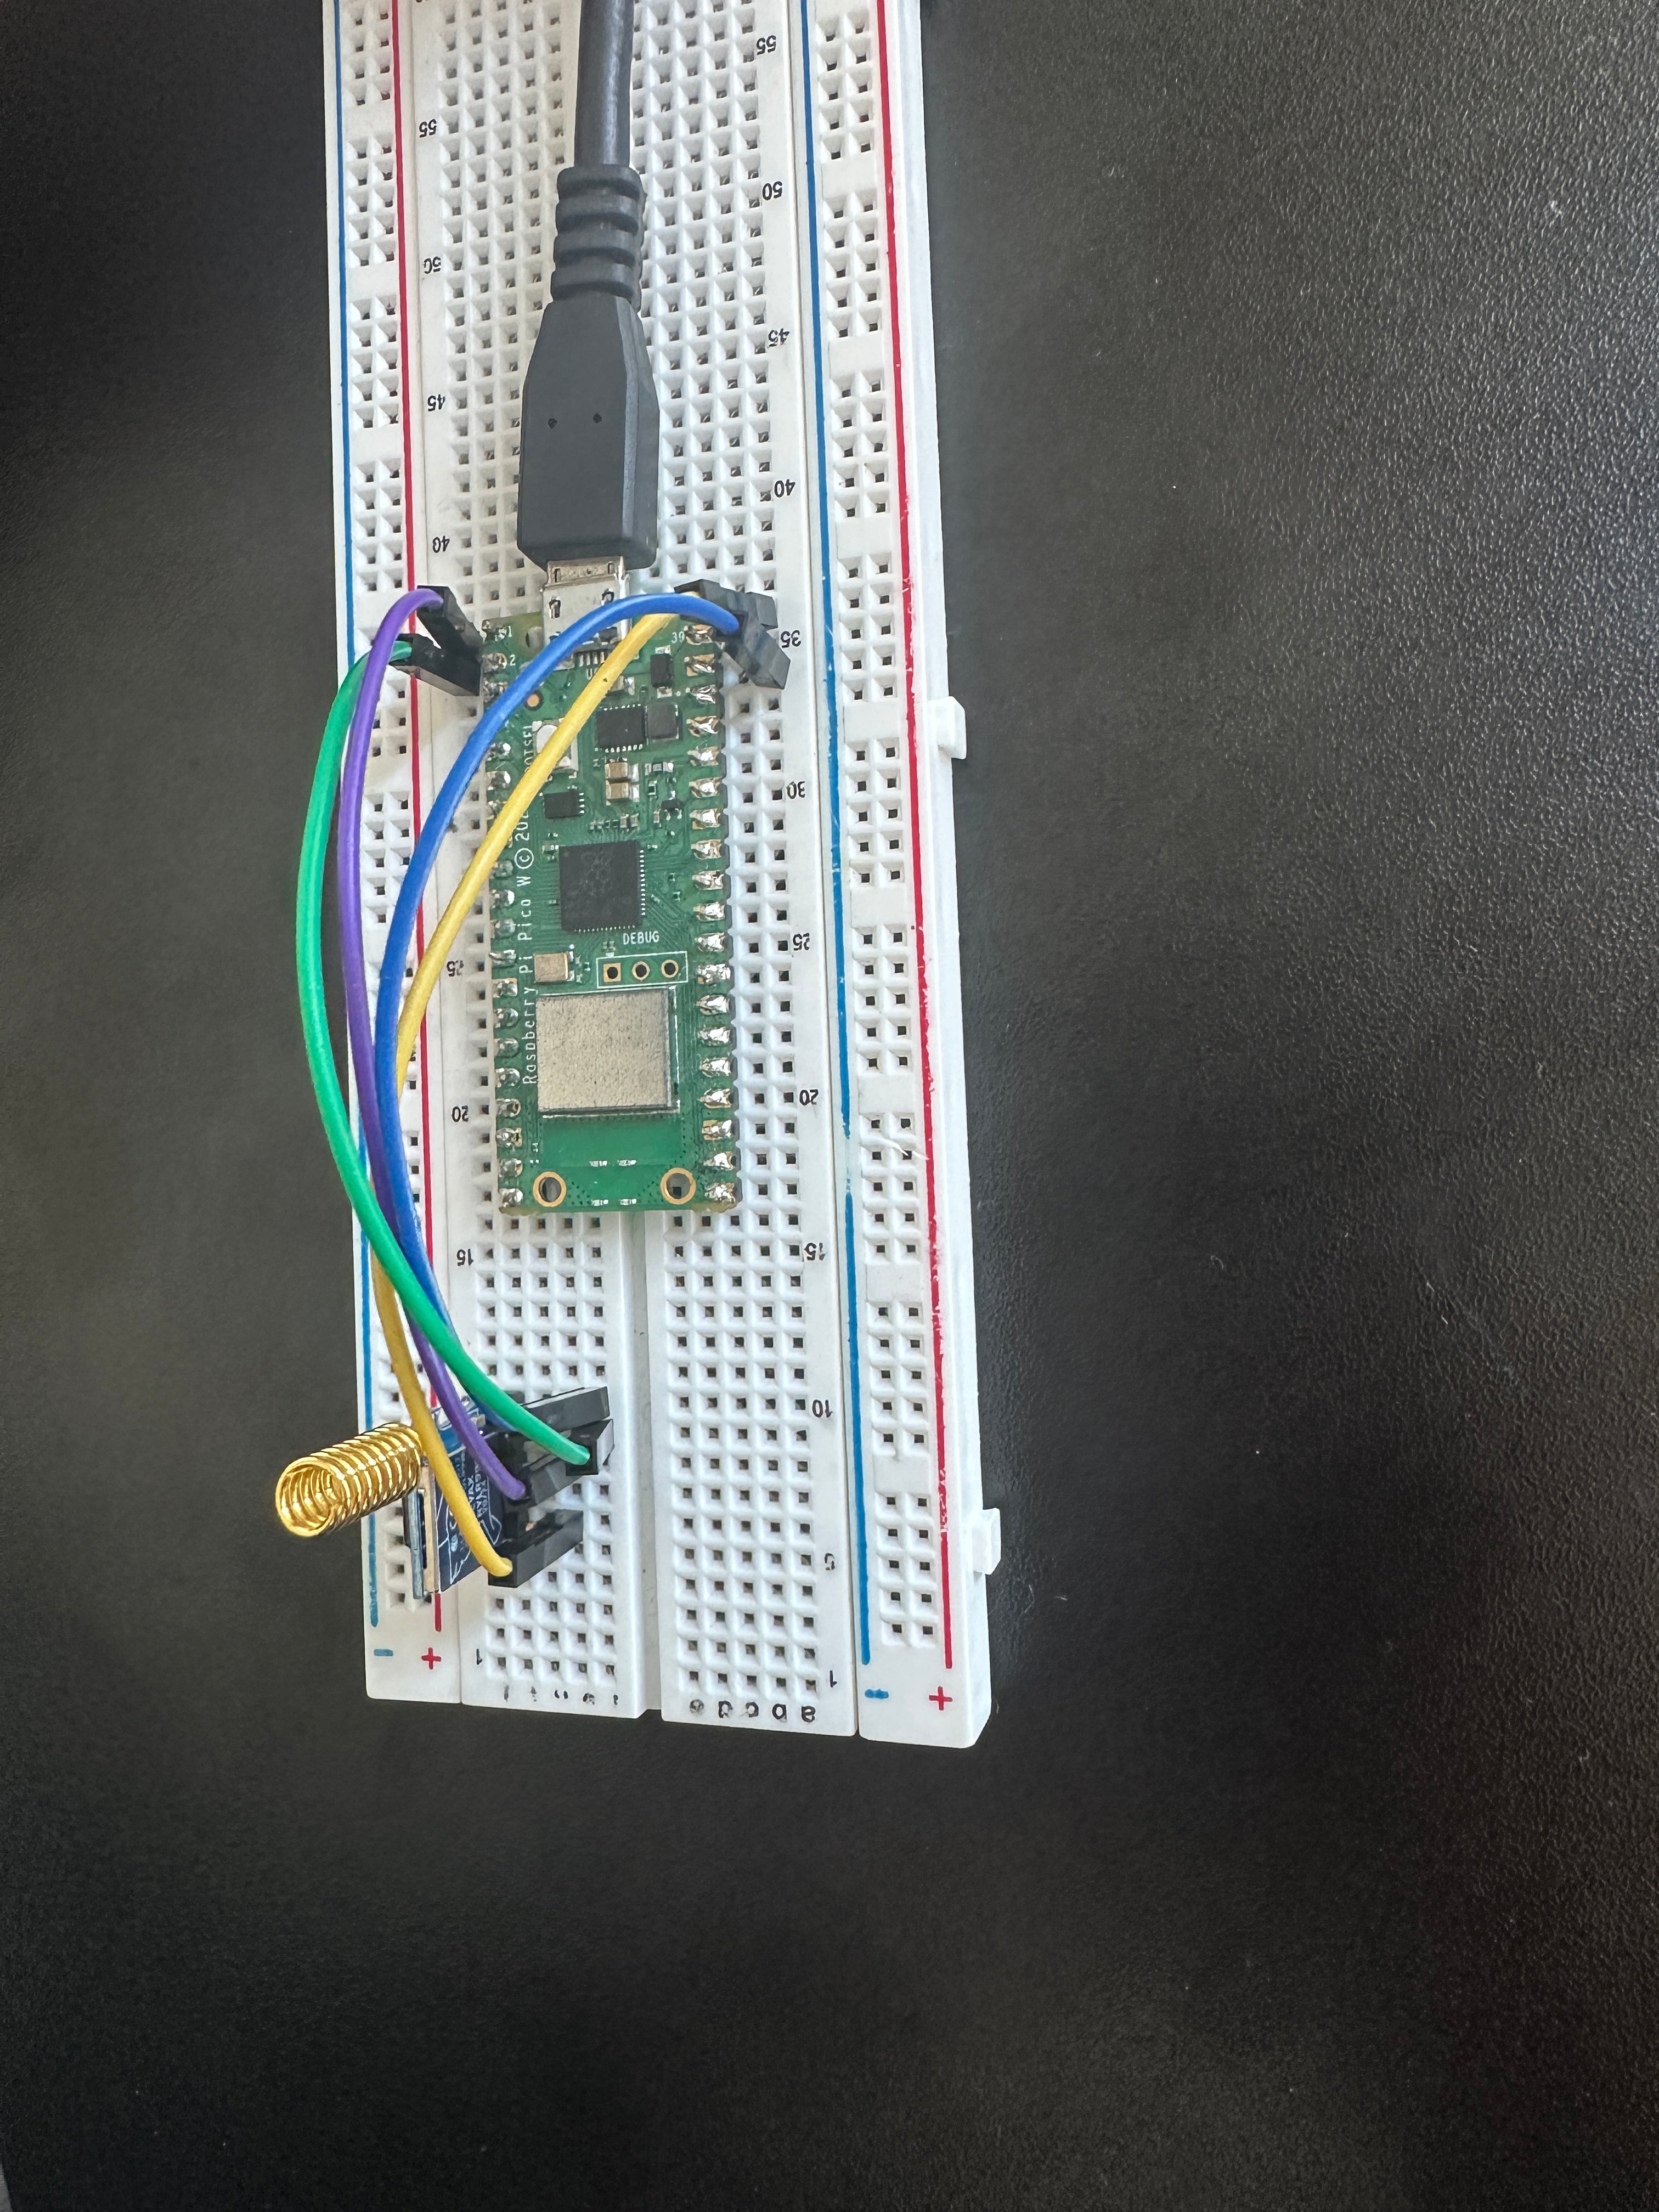
LoRa and Raspberry Pi Pico W: Building a Sender-Receiver Communication System
LoRa (short for Long Range) is a wireless communication technology designed for long-distance, low-power data transmission. It is widely used in IoT (Internet of Things) applications for connecting devices in smart agriculture, smart cities, and more.
Unlike traditional communication methods like Wi-Fi or Bluetooth, LoRa excels in its ability to transmit small amounts of data over extremely long distances—ranging from 1 km in urban areas to over 15 km in rural settings. This makes it ideal for applications like environmental monitoring, asset tracking, and disaster management.
In this tutorial, you’ll learn how to set up a simple LoRa sender-receiver communication system using two Raspberry Pi Pico W boards and LoRa modules. By the end, you’ll have a functional prototype that demonstrates the power and utility of LoRa in IoT applications.
What Makes LoRa Special?
- Long Range: LoRa can transmit data over distances of up to 15 km or more in ideal conditions.
- Low Power: Devices can operate for years on a single battery, making it perfect for remote or portable applications.
- Interference-Resilient: Its Chirp Spread Spectrum (CSS) modulation ensures robust communication even in noisy environments.
- Cost-Effective: Operates in unlicensed ISM bands, eliminating licensing fees.
- Versatile Applications: Used in agriculture, smart homes, healthcare, and more.

Parts Needed
Before we begin, gather the following components. You can find them easily online or at your favorite electronics store. Replace the links below with your store's product pages:
- Raspberry Pi Pico W (x2)
- LoRa Module (e.g., RYLR998) (x2)
- Breadboards (x2)
- Jumper Wires (assorted pack)
- Power Supply (USB cables or battery packs)

Setting Up Your LoRa Sender-Receiver System
We’ll use two Raspberry Pi Pico W boards: one as the sender and the other as the receiver. Follow the steps below to wire and program your devices.
Wiring
Connect the LoRa modules to the Pico W boards as follows:
- LoRa TXD → Pico GPIO1 (UART RX)
- LoRa RXD → Pico GPIO0 (UART TX)
- LoRa VCC → Pico 3.3V
- LoRa GND → Pico GND

Sender Code
Upload the following code to the first Pico W, which will act as the sender:
import machine
import utime

uart = machine.UART(0, baudrate=115200, tx=machine.Pin(0), rx=machine.Pin(1))

def send_command(command):
    if isinstance(command, str):
        command = command.encode('ascii')
    uart.write(command + b"\r\n")
    utime.sleep(0.5)
    while uart.any():
        response = uart.read()
        if response:
            print("Response:", response.decode('utf-8', 'ignore'))

def initialize_lora():
    send_command("AT")
    send_command("AT+ADDRESS=1")
    send_command("AT+NETWORKID=5")
    send_command("AT+BAND=915000000")

def send_message():
    message = "Hello Receiver"
    command = f"AT+SEND=2,{len(message)},{message}"
    send_command(command)

initialize_lora()
while True:
    send_message()
    utime.sleep(5)
Receiver Code
Upload the following code to the second Pico W, which will act as the receiver:
import machine
import utime

uart = machine.UART(0, baudrate=115200, tx=machine.Pin(0), rx=machine.Pin(1))

def send_command(command):
    if isinstance(command, str):
        command = command.encode('ascii')
    uart.write(command + b"\r\n")
    utime.sleep(0.5)
    while uart.any():
        response = uart.read()
        print("Response:", response.decode('utf-8', 'ignore'))

def initialize_lora():
    send_command("AT")
    send_command("AT+ADDRESS=2")
    send_command("AT+NETWORKID=5")
    send_command("AT+BAND=915000000")

def listen_for_messages():
    buffer = b""
    while True:
        if uart.any():
            data = uart.read()
            buffer += data
            if b"\r\n" in buffer:
                lines = buffer.split(b"\r\n")
                buffer = lines.pop()
                for line in lines:
                    line_str = line.decode('utf-8', 'ignore').strip()
                    if line_str.startswith("+RCV="):
                        parts = line_str.split(",")
                        address = parts[0].split('=')[1]
                        message = parts[2]
                        print(f"Received message from address {address}: {message}")

initialize_lora()
listen_for_messages()
Testing the System
- Power on both Pico W boards.
- The sender will transmit messages periodically to the receiver.
- The receiver will display the received messages in the console.
Conclusion
LoRa’s combination of long range, low power, and versatility makes it an essential technology for IoT applications. This tutorial demonstrated how to set up a simple sender-receiver system using Raspberry Pi Pico W and LoRa modules. Whether you’re monitoring crops in smart agriculture or tracking assets, LoRa offers a robust, cost-effective solution.
