
Video Tutorial (Optional)
Watch first if you want to follow along with the full Sharp pixel editing walkthrough in Node.js.
Project Overview
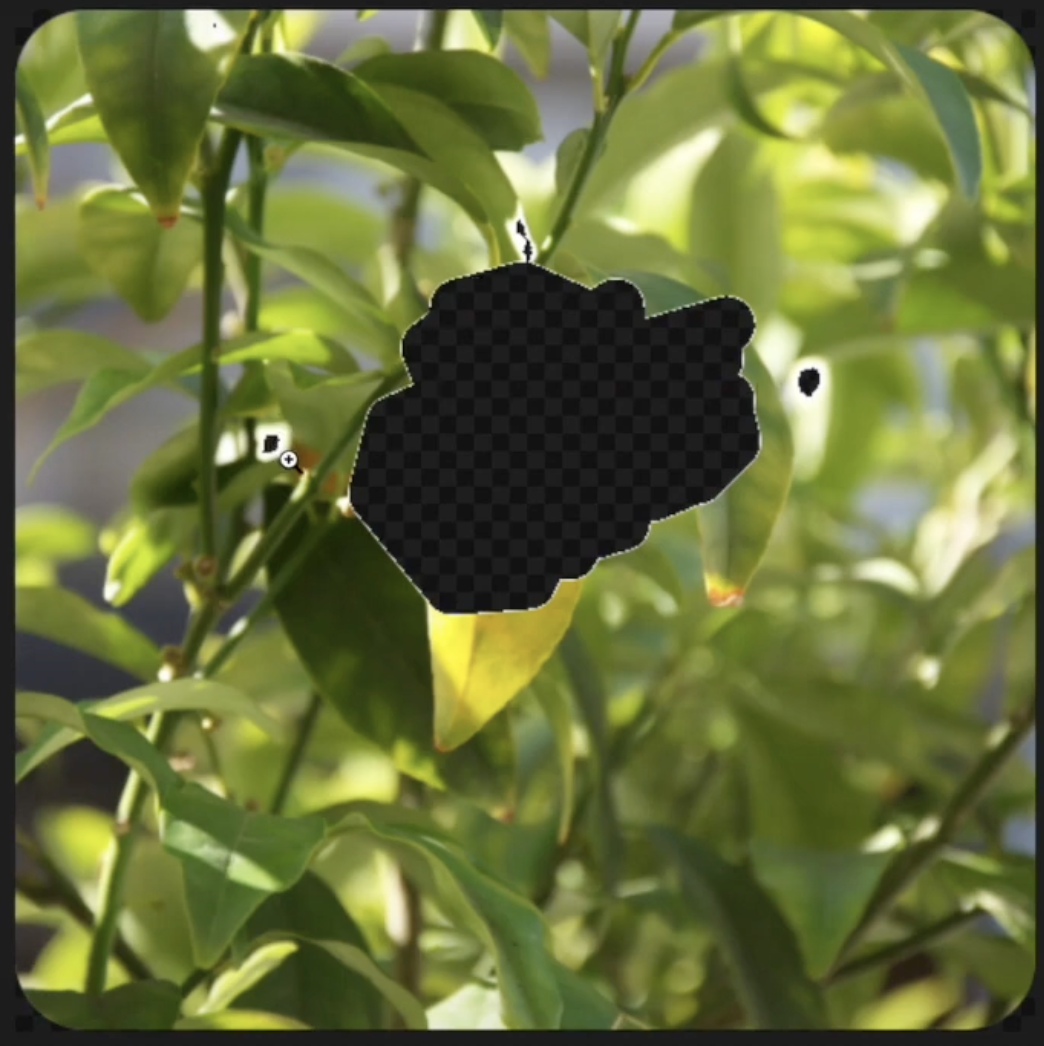
Pixel Editing in Node.js with Sharp: In this project, you use Node.js with the Sharp image processing library to access raw RGBA pixel data and change pixels based on an if-condition so you can make targeted pixels transparent (or recolor them) in a PNG output.
The example shown loops through every pixel and checks for white (255, 255, 255), then updates that pixel's RGBA values.
- Time: 10 to 20 minutes
- Skill level: Beginner
- What you will build: A Node.js script that reads an image with Sharp, edits pixels in raw RGBA, and saves a new PNG

Parts List
From ShillehTek
- None
External
- Node.js project (a working Node environment is a prerequisite)
- sharp (npm package) - used to read/write images and access raw pixel data
- Input image files (example filenames used below: original.png and mask_file.png)
Note: The script uses .ensureAlpha() so you have an RGBA buffer (4 channels). Some input images may not start with an alpha channel.
Step-by-Step Guide
Step 1 - Install Sharp
Goal: Add the Sharp library to your existing Node.js project.
What to do: In your Node project folder, install Sharp with npm.
Code:
npm install sharpExpected result: Your project has Sharp installed and you can import it from your script.
Step 2 - Create the pixel editing script
Goal: Load an image, access its raw RGBA pixel data, edit pixels based on a condition, and write a new PNG.
What to do: Create a JavaScript file (for example editPixels.js) and paste the code below. Make sure your input file path matches the image you want to edit.
Code:
const sharp = require("sharp")

imagePath = 'original.png'
maskImage = 'mask_file.png'
const width = 300;
const height = 200;

async function editPixels(imagePath) {
  const buffer = await sharp(imagePath)
  .ensureAlpha()
  .raw()
  .toBuffer({ resolveWithObject: true })
  .then( async ({ data, info }) => {
    const { width, height, channels } = info;
    for (let i = 0; i < data.length; i += channels) {
      if ([data[i]] == 255 && [data[i + 1]] == 255
         && [data[i + 2]] == 255) {
          data[i] = 100;
          data[i + 1] = 200;
          data[i + 2] = 30;
          data[i + 3] = 125;
        }
    }
   await sharp(data, { raw: { width, height, channels } })
        .toFormat('png')
        .toFile('new.png')
  })
}

editPixels(maskImage)
Expected result: You have a script that checks pixels for white (255, 255, 255) and updates RGBA values, then saves the edited image as new.png.
Step 3 - Understand what the code is doing
Goal: Know which Sharp calls matter so you can adapt the logic to your own conditions.
What to do: Review these key points from the script:
- Import Sharp with
require("sharp"). - Pass the image path into
sharp(imagePath)(in the example, the image is in the project root directory). -
.ensureAlpha()ensures the image has an alpha channel (RGBA). Alpha controls transparency and some images may not include it. -
.raw()and.toBuffer({ resolveWithObject: true })return both data (raw pixel bytes) and info (width, height, channels). - Loop through the buffer in increments of
channels. For RGBA, each pixel uses 4 values in the array (0 to 255 per channel). - Check if a pixel is white by testing RGB equals (255, 255, 255). If it matches, update RGBA values to whatever your application needs.
- Write out a new PNG using
sharp(data, { raw: { width, height, channels } }).toFile('new.png').
Expected result: You can confidently change the if-condition and RGBA assignments to match your own pixel manipulation needs.
Conclusion
You now have a working Node.js + Sharp workflow for pixel-level editing by reading raw RGBA buffers, applying an if-condition per pixel, and exporting a new PNG. This approach is useful any time you need precise per-pixel control beyond standard filters.
Subscribe: Youtube
Support: https://www.buymeacoffee.com/mmshilleh
Want parts and tools for your next build? Grab what you need from ShillehTek.com. If you want help customizing a software or IoT project, check out our consulting services.


.png?v=25000753014097803521767701813)

.png?v=68677308723310773341767701813)


