

Project Overview
ESP8266 D1 Mini + WS2812B LED strip: Build a Wi-Fi LED strip controller where the D1 Mini serves a phone-friendly web page so you can pick colors, set brightness, and run effects without apps, cloud services, or reflashing.
Addressable LED strips are fun to wire up, but frustrating to control if you have to re-upload a sketch every time you want a new color or animation. This project fixes that by hosting the entire control UI (HTML, color picker, slider, and buttons) directly on the ESP8266.
Along the way you will apply three rules that help keep WS2812B strips reliable: use a data resistor, add a power capacitor, and do not power long strips through a development board.
- Time: ~45 minutes
- Skill level: Beginner
- What you will build: A phone-controlled WS2812B strip with a color picker, brightness control, and five non-blocking effects, served from the D1 Mini on your Wi-Fi.

Parts List
From ShillehTek
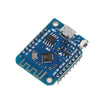
- ESP8266 D1 Mini - the Wi-Fi microcontroller hosting the web UI and driving the LEDs
- WS2812B LED Strip, 60 LED/m, 5 m roll - the addressable RGB strip being controlled
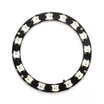
- WS2812 16-LED Ring - a handy low-power test target
- Resistor Kit - use a 330 ohm resistor in series with the data line
- Electrolytic Capacitor Kit - use a 220 uF capacitor across the strip power input
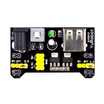
- MB102 Breadboard Power Supply - enough for up to about 30 LEDs at moderate brightness
- 400-Point Breadboard - for prototyping connections
- Dupont Jumper Wires - for wiring the D1 Mini to the strip and power rails
External
- A 5 V supply sized for your strip: 60 LEDs at full white draw about 3.6 A; a full 5 m roll can pull 18 A, so a 5 V 10 A supply with the brightness cap in the code is a sensible maximum
Note: Never feed a strip from the D1 Mini 5V pin. That pin is the USB cable, good for about 500 mA, and a dozen LEDs at full white already exceed it. Power the strip from its own supply, join the grounds, and the D1 Mini only ever drives the data line.
Step-by-Step Guide
Step 1 - Cut and Wire the Strip
Goal: One metre, powered properly.
What to do: Cut the roll at the copper pads after the 60th LED (the scissors line is marked). Note the arrows on the strip: data flows in one direction, and you connect to the DIN end.
Wire strip 5V and GND to your 5 V supply. The MB102 5 V rail is fine for the ring or up to about 30 LEDs at moderate brightness, but use a dedicated 5 V supply for longer lengths.
Place the 220 uF capacitor across 5V and GND at the strip input (positive to 5V). Wire D1 Mini D4 to strip DIN through a 330 ohm resistor. Tie D1 Mini GND to supply GND. Power the D1 Mini itself from USB.
Expected result: Strip powered, dark, waiting for data, with a shared ground between the strip supply and the D1 Mini.
Step 2 - Libraries and Board
Goal: Install and select the correct ESP8266 core and libraries.
What to do: Install the ESP8266 board package and select LOLIN(WEMOS) D1 R2 & mini. Use Boards Manager URL https://arduino.esp8266.com/stable/package_esp8266com_index.json.
In the Library Manager, install Adafruit NeoPixel. ESP8266WiFi and ESP8266WebServer come with the ESP8266 core. Set NUM_LEDS in the sketch to your actual count (16 for the ring, 60 for one metre).
Expected result: Your sketch compiles for the D1 Mini target.
Step 3 - Upload the Sketch
Goal: Flash the D1 Mini with a web-controlled LED strip sketch.
What to do: Paste the sketch below, set your Wi-Fi SSID and password, then upload. Open the Serial Monitor at 115200 baud to read the IP address printed by the board.
Code:
#include <ESP8266WiFi.h>
#include <ESP8266WebServer.h>
#include <Adafruit_NeoPixel.h>

const char* SSID = "YourNetwork";
const char* PASS = "YourPassword";
const int LED_PIN  = D4;         // GPIO2 -> 330 ohm -> strip DIN
const int NUM_LEDS = 60;         // one metre of 60/m strip; 16 for the ring

Adafruit_NeoPixel strip(NUM_LEDS, LED_PIN, NEO_GRB + NEO_KHZ800);
ESP8266WebServer server(80);

uint32_t color  = 0x2060FF;      // current colour, RRGGBB
uint8_t  bright = 100;           // 1-255, capped by the slider's max in the page
uint8_t  effect = 0;             // 0 solid, 1 rainbow, 2 breathe, 3 chase, 4 twinkle, 5 off
uint16_t frame  = 0;

const char PAGE[] PROGMEM = R"html(
<!DOCTYPE html>
<html>
<head>
  <meta charset="utf-8">
  <meta name="viewport" content="width=device-width,initial-scale=1">
  <title>LED Strip</title>
  <style>
    body{font-family:sans-serif;text-align:center;background:#111;color:#eee}
    input[type=color]{width:120px;height:120px;border:none;background:none}
    input[type=range]{width:80%}
    button{margin:6px;padding:12px 18px;font-size:16px;border-radius:8px;border:none;background:#333;color:#eee}
    .row{margin:10px 0}
  </style>
</head>
<body>
  <h2>LED Strip</h2>

  <div class="row">
    <input type="color" id="c" value="#2060ff">
  </div>

  <div class="row">
    <input type="range" id="b" min="1" max="255" value="100">
  </div>

  <div class="row">
    <button onclick="fx(0)">Solid</button>
    <button onclick="fx(1)">Rainbow</button>
    <button onclick="fx(2)">Breathe</button>
    <button onclick="fx(3)">Chase</button>
    <button onclick="fx(4)">Twinkle</button>
    <button onclick="fx(5)">Off</button>
  </div>

  <script>
    let e=0;
    const c=document.getElementById('c'),b=document.getElementById('b');
    function send(){fetch(`/set?c=${c.value.substring(1)}&b=${b.value}&e=${e}`);}
    function fx(n){e=n;send();}
    c.oninput=send;
    b.oninput=send;
  </script>
</body>
</html>
)html";

void handleSet() {
  if (server.hasArg("c")) color  = strtoul(server.arg("c").c_str(), nullptr, 16);
  if (server.hasArg("b")) bright = server.arg("b").toInt();
  if (server.hasArg("e")) effect = server.arg("e").toInt();
  server.send(200, "text/plain", "ok");
}

uint32_t scale(uint32_t c, uint8_t k) {          // dim a packed colour by k/255
  uint8_t r = (c >> 16) * k / 255, g = ((c >> 8) & 0xFF) * k / 255, b = (c & 0xFF) * k / 255;
  return strip.Color(r, g, b);
}

void render() {                                  // one animation frame, never blocks
  strip.setBrightness(bright);
  switch (effect) {
    case 0: strip.fill(color); break;
    case 1: for (int i = 0; i < NUM_LEDS; i++)
              strip.setPixelColor(i, strip.ColorHSV((i * 65536L / NUM_LEDS + frame * 256) & 0xFFFF)); break;
    case 2: { uint8_t k = 128 + 127 * sin(frame / 30.0); strip.fill(scale(color, k)); } break;
    case 3: strip.clear(); for (int i = 0; i < NUM_LEDS; i += 6) strip.setPixelColor((i + frame) % NUM_LEDS, color); break;
    case 4: for (int i = 0; i < NUM_LEDS; i++) strip.setPixelColor(i, scale(strip.getPixelColor(i), 220));   // fade everything
            if (random(3) == 0) strip.setPixelColor(random(NUM_LEDS), color); break;                          // light a random one
    default: strip.clear();
  }
  strip.show();
  frame++;
}

void setup() {
  strip.begin(); strip.show();                   // all off
  Serial.begin(115200);
  WiFi.begin(SSID, PASS);
  while (WiFi.status() != WL_CONNECTED) delay(250);
  Serial.print("Open http://"); Serial.println(WiFi.localIP());
  server.on("/", []() { server.send_P(200, "text/html", PAGE); });
  server.on("/set", handleSet);
  server.begin();
}

void loop() {
  server.handleClient();
  static unsigned long last = 0;
  if (millis() - last >= 30) { last = millis(); render(); }   // ~33 frames per second
}
Expected result: The strip lights a soft blue at brightness 100. The Serial Monitor prints an address like Open http://192.168.x.x.
Step 4 - Control It From Your Phone
Goal: Use the on-board web page as the controller.

What to do: On a phone connected to the same Wi-Fi network, open the IP address printed in the Serial Monitor. Tap the color control to open your phone's native color picker. Drag the brightness slider. Tap Solid, Rainbow, Breathe, Chase, Twinkle, or Off.
The page sends /set?c=... on every input event, and the animations run inside render() on a 30 ms timer, so the web server stays responsive while effects animate.
Expected result: Instant color changes, smooth animations, and no lag on the page.
Step 5 - Scale Up Safely
Goal: Run longer strips without overheating or voltage drop issues.
What to do: Set NUM_LEDS to 300 for the full five metres and swap to a 5 V 10 A supply. Inject power at both ends of the roll (5V and GND to the far end too) or the last LEDs may turn orange when the first ones are white due to voltage drop along the copper.
Cap brightness by lowering the slider max value to 128. Keep the 330 ohm data resistor and the capacitor to help protect the first LED input and reduce power inrush effects.
Expected result: A five-metre strip that stays even from end to end, with a supply that stays cool.
Step 6 - Make It Yours
Goal: Extend the project beyond the default UI and effects.
What to do: Save the last color and effect to EEPROM so it restores after a power cut. Add an mDNS name so the address is strip.local. Add a speed slider by making the 30 ms timer a variable. Add MQTT so Home Assistant can control it, or add an Alexa-compatible endpoint with the Espalexa library.
You can also enclose the controller with a barrel jack for power and package it as a gift with a strip.
Expected result: Lighting behavior that feels like a product, built from an LED strip and a low-cost Wi-Fi board.
Conclusion
By serving the user interface directly from the ESP8266 D1 Mini, you get a WS2812B LED strip controller that works from any phone browser with no app, no cloud account, and no repeated reflashing. With the data resistor, the input capacitor, and a properly sized 5 V supply, the strip stays stable and you can scale up to longer runs safely.
Want the exact parts used in this build? Grab them from ShillehTek.com. If you want help customizing this project or building something for your product, check out our IoT consulting services.
Credits: Photos and images are credited to Arnov Sharma on Hackster.io (LGPL license). The original guide by Arnov Sharma served as the reference for this ShillehTek version.






.png?v=25000753014097803521791038641)

.png?v=68677308723310773341791038641)


