


Project Overview
ESP32-C3 DevKit: In this guide you will set up an ESP32-C3 DevKit in the Arduino IDE, then run blink, a WiFi scan, and a basic BLE notify demo to confirm WiFi + BLE 5 are working.
The ESP32-C3 is Espressif’s cheapest WiFi + BLE chip: a 32-bit RISC-V CPU running at 160 MHz with 4 MB Flash, 400 KB SRAM, BLE 5 (long-range PHY), and 2.4 GHz WiFi. Full DevKit boards are under $4. At that price it is a strong default for tiny IoT sensor nodes, smart-home gadgets, and BLE peripherals where the ESP32-S3’s extra horsepower is overkill.
This walkthrough gets a brand-new ESP32-C3 board talking to Arduino IDE, runs the canonical "blink + WiFi scan" sketch, and highlights project types where the C3 beats the price-per-feature competition.
- Time: 20 to 40 minutes
- Skill level: Beginner
- What you will build: A working ESP32-C3 Arduino setup that prints to Serial, blinks an LED, scans WiFi networks, and advertises a BLE characteristic you can read from a phone.
Parts List
From ShillehTek
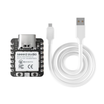
- XIAO ESP32-C3 Pre-Soldered - compact ESP32-C3 option that works well for small IoT nodes.
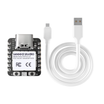
- XIAO ESP32-C6 Pre-Soldered - same family, adds Thread + Zigbee.
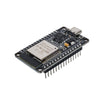
- ESP-WROOM-32 - the bigger sibling for reference.
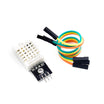
- DHT22 Sensor - optional simple test peripheral for future sensor-node projects.
External
- ESP32-C3 DevKit board (any variant).
- USB-C cable.
- Arduino IDE 2.x with Espressif boards version 3.0 or newer installed.
Note: LED and pin numbers vary by ESP32-C3 board. The examples below use GPIO 8 for the built-in LED, which is common on many C3 boards, but you may need to adjust for your specific DevKit.
Step-by-Step Guide
Step 1 - Understand why the ESP32-C3 is a good default
Goal: Know what you gain (and what you give up) compared to older ESP32 and ESP-01 style builds.
What to do: Use the ESP32-C3 when you want low cost, WiFi + BLE 5, and a small footprint for sensor and actuator projects.

- Cheaper: $3 to $4 vs about $8 for a WROOM-32 board.
- RISC-V single core at 160 MHz: fast enough for most sensor and actuator projects.
- BLE 5.0: longer range than the original ESP32’s BLE 4.2.
- Smaller footprint: XIAO ESP32-C3 is about thumbnail size.
- Native USB: no CP2102, fewer reset and serial quirks.
Expected result: You can decide quickly if the C3 fits your project. The trade-off vs the S3 is less Flash (4 MB), no PSRAM, and single core, which is fine for sensor nodes but not great for camera or ML projects.
Step 2 - Install the ESP32 board package in Arduino IDE
Goal: Add Espressif’s Arduino core so the IDE can compile and upload to the ESP32-C3.
What to do:
- Arduino IDE: File → Preferences. Add this to Additional Board URLs:
https://espressif.github.io/arduino-esp32/package_esp32_index.json. - Tools → Board → Boards Manager. Search esp32, then install Espressif Systems version 3.0 or newer.
- Tools → Board → ESP32 Arduino → select ESP32C3 Dev Module (or XIAO_ESP32C3 if you bought the XIAO variant).
- Tools → USB CDC On Boot → Enabled (so
Serial.printgoes to USB).
Expected result: Your ESP32-C3 board shows up as a selectable board target, and Serial output works over USB.
Step 3 - Upload a blink + Serial test sketch
Goal: Confirm uploads work and your Serial monitor prints messages.
What to do: Create a new sketch, paste the code below, select the correct port, then upload.
Code:
const int LED = 8;   // built-in LED on most C3 boards

void setup() {
  Serial.begin(115200);
  pinMode(LED, OUTPUT);
}
void loop() {
  Serial.println("hello from ESP32-C3");
  digitalWrite(LED, HIGH); delay(500);
  digitalWrite(LED, LOW);  delay(500);
}
Expected result: The built-in LED blinks and the Serial Monitor shows repeated lines that say hello from ESP32-C3.
Step 4 - Run a WiFi scan
Goal: Confirm the ESP32-C3 WiFi stack is working by listing nearby networks.
What to do: Upload the sketch below and open Serial Monitor at 115200 baud.
Code:
#include <WiFi.h>
void setup() {
  Serial.begin(115200);
  WiFi.mode(WIFI_STA);
  WiFi.disconnect();
  delay(100);
  int n = WiFi.scanNetworks();
  Serial.printf("%d networks:\n", n);
  for (int i = 0; i < n; i++) {
    Serial.printf("  %s (%d dBm)\n",
                  WiFi.SSID(i).c_str(), WiFi.RSSI(i));
  }
}
void loop() {}
Expected result: You see the number of networks found and a list of SSIDs with signal strength (RSSI).
Step 5 - Create a simple BLE notify characteristic
Goal: Confirm BLE works by advertising a service and sending a changing value your phone can subscribe to.
What to do: Upload the sketch below. On your phone, open nRF Connect, connect to ESP32-C3 Sensor, then subscribe to the characteristic to watch the count update.
Code:
#include <BLEDevice.h>
#include <BLEServer.h>
#include <BLEUtils.h>
#include <BLE2902.h>

#define SVC_UUID  "12345678-1234-1234-1234-1234567890ab"
#define CHAR_UUID "12345678-1234-1234-1234-1234567890ac"

BLECharacteristic* pChar;

void setup() {
  Serial.begin(115200);
  BLEDevice::init("ESP32-C3 Sensor");
  BLEServer*  pServer  = BLEDevice::createServer();
  BLEService* pService = pServer->createService(SVC_UUID);
  pChar = pService->createCharacteristic(
      CHAR_UUID,
      BLECharacteristic::PROPERTY_NOTIFY);
  pChar->addDescriptor(new BLE2902());
  pService->start();
  pServer->getAdvertising()->start();
  Serial.println("Advertising");
}

void loop() {
  static int count = 0;
  String s = "count=" + String(count++);
  pChar->setValue(s.c_str());
  pChar->notify();
  delay(2000);
}
Expected result: Your phone app connects and receives a periodically updating count=... value over BLE notifications.
Step 6 - Understand power and battery use
Goal: Set realistic expectations for current draw and long-life battery builds.
What to do: Plan power around your duty cycle. The C3 idles at about 25 mA awake and about 5 µA in deep sleep. With a sensor read every 10 minutes plus occasional BLE advertising, average current can drop below 50 µA.
Expected result: You can estimate battery life. A single 18650 (3000 mAh) can be multiple years in theory, but in practice cell self-discharge often becomes the limiting factor.
Step 7 - Map the ESP32-C3 to real project types
Goal: Identify where the C3 fits best so you can reuse this setup pattern in future builds.

What to do: Use the C3 for small, cheap wireless nodes like these:
- BLE iBeacon for room presence detection.
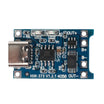
- Tiny WiFi temperature node: C3 + DHT22 + TP4056 + LiPo + 3D-printed enclosure.
- Smart-home button: battery-powered, BLE-paired to Home Assistant, can last years.
- BLE GATT bridge: read an IKEA Tradfri or Govee sensor, republish to MQTT.
- Replace ESP-01 in legacy projects where you want more capability in a small module footprint.
Expected result: You have a shortlist of practical projects that benefit from the ESP32-C3’s cost, BLE 5, and WiFi support.
Conclusion
The ESP32-C3 DevKit is a strong choice when you want WiFi + BLE 5 + USB and you do not need camera-class compute. With Arduino IDE set up, you can quickly validate your board using blink, a WiFi scan, and a BLE notify demo from a phone app.
Want the exact parts used in this build? Grab them from ShillehTek.com. If you want help customizing this project or building something for your product, check out our IoT consulting services.


.png?v=25000753014097803521791168436)

.png?v=68677308723310773341791168436)


