

Project Overview
Phone Thermometer with Digispark ATtiny85 and a 10K NTC thermistor: Build a pocket-sized USB thermometer that streams live temperature readings to your Android phone over OTG using the Digispark ATtiny85 and the DigiCDC virtual serial interface.
The Digispark is a coin-sized ATtiny85 board that plugs straight into USB, including your phone's USB port through an OTG adapter. With the DigiCDC library it shows up as a virtual serial device, so an Android serial terminal app can talk to it directly. Add a 10K thermistor and you can read temperature with no battery, no WiFi, and only three sensor connections.
- Time: 30 to 45 minutes
- Skill level: Beginner
- What you will build: A USB-stick thermometer that reads out on your phone via OTG.
Parts List
From ShillehTek
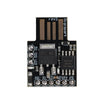
- ATtiny85 USB Development Board (Digispark) - the microcontroller board that enumerates as USB serial via DigiCDC
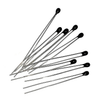
- 10K NTC Thermistor (MF52-103) - the temperature-sensing element
- Metal Film Resistor Kit - use one 10K resistor to make the voltage divider
External
- USB OTG adapter for your phone
- "Serial USB Terminal" app (free on Google Play)
Note: On the Digispark, physical pin P2 is analog input A1. That is why the wiring refers to P2 while the code reads A1.
Step-by-Step Guide
Step 1 - Install the Phone App
Goal: Give your phone a serial console.
What to do: Install "Serial USB Terminal" from the Google Play Store. It can connect to CDC serial devices like the Digispark over the OTG port.
Expected result: The app is installed and ready to connect to USB serial devices.
Step 2 - Build the Thermistor Divider
Goal: Create a simple voltage divider the Digispark can read.
What to do: Wire the thermistor and 10K resistor exactly like this:
Thermistor leg 1 -> Digispark P2
Thermistor leg 2 -> GND
10K resistor     -> between P2 and 5V
Expected result: A voltage divider whose midpoint voltage changes with temperature.
Step 3 - Upload the Sketch
Goal: Stream temperature over USB serial using DigiCDC.
What to do: In the Arduino IDE, make sure you have the Digispark board support installed (Digistump boards package). Upload the sketch below. It waits for any incoming character, then reads the divider, runs the B-coefficient (simplified Steinhart-Hart) conversion, and prints the temperature once per second only when the integer value changes.
Code:
#include <DigiCDC.h>

#define SERIESRESISTOR 10000
#define THERMISTORPIN A1        // physical pin P2
#define THERMISTORNOMINAL 10000 // 10K at 25 C
#define TEMPERATURENOMINAL 25
#define NUMSAMPLES 5
#define BCOEFFICIENT 3950

void setup() {
  SerialUSB.begin();
}

void loop()
{
  if (SerialUSB.available())
  {
    uint8_t i;
    float average;
    average = analogRead(THERMISTORPIN);

    average = 1023 / average - 1;
    average = SERIESRESISTOR / average;

    float steinhart;
    float presteinhart;
    steinhart = average / THERMISTORNOMINAL;     // R/Ro
    steinhart = log(steinhart);                  // ln(R/Ro)
    steinhart /= BCOEFFICIENT;                   // 1/B * ln(R/Ro)
    steinhart += 1.0 / (TEMPERATURENOMINAL + 273.15); // + 1/To
    steinhart = 1.0 / steinhart;                 // invert -> Kelvin
    steinhart -= 273.15;                         // to Celsius

    if (int(presteinhart) != int(steinhart))
    {
      SerialUSB.print("Temperature ");
      SerialUSB.print(steinhart);
      SerialUSB.println(" *C");
      presteinhart = steinhart;
    }
    SerialUSB.delay(1000);
  }
}
Expected result: The sketch uploads successfully (follow the Digispark plug-in-when-prompted upload flow).
Step 4 - Plug Into Your Phone and Read
Goal: View live temperature updates on your phone.
What to do: Connect the Digispark to your phone through the OTG adapter. Open Serial USB Terminal, tap the connect icon, and send any character. That first byte starts the readings, and temperatures then stream in real time.

Expected result: You see repeated lines like "Temperature XX.XX *C" updating in the terminal.
Conclusion
You used a Digispark ATtiny85 and a 10K thermistor divider to build a phone-powered USB thermometer. DigiCDC makes the board appear as a virtual serial port, and the sketch converts the analog reading into degrees Celsius for live display on Android.
Want the exact parts used in this build? Grab them from ShillehTek.com. If you want help customizing this project or building something similar for your product, check out our IoT consulting services.



.png?v=25000753014097803521789973449)

.png?v=68677308723310773341789973449)


